Hack The Box - Blocky - Writeup
Introduction
The hack the box machine “Blocky” is an easy machine which is included in TJnull’s OSWE Preparation List. Exploiting this machine requires knowledge of how to decompile JAR files as well as basic enumeration skills. More specifically, one must know the basics of nmap and how to perform directory brute forcing.
By enumerating the target, it is possible to discover a web application which hosts JAR files on a specific web page. These JAR files can be downloaded and decompiled using JD-GUI. Thereafter, it is possible to find a password in one of these files, which can be used to connect to the target over SSH as an unprivileged user. Then, a root shell can be obtained by using the sudo command since the compromised user can execute arbitrary commands with sudo.
Exploitation
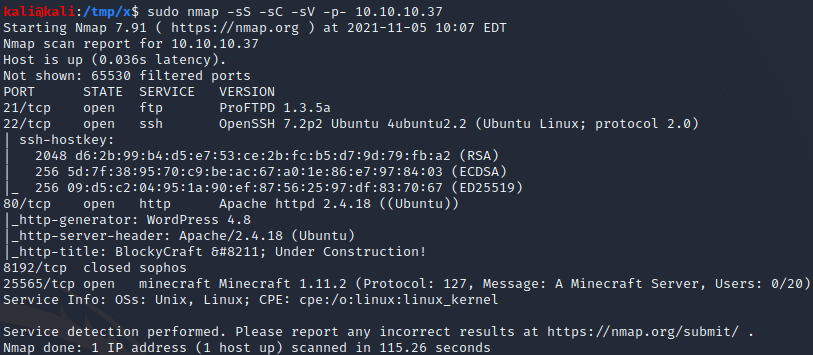
We start by performing an nmap scan by executing nmap -sS -sC -sV -p- 10.10.10.37. The -sS, -sC and -sV flags instruct nmap to perform a SYN scan to identify open ports followed by a script and version scan on the ports which were identified as open. The -p- flag instructs nmap to scan all the ports on the target. From the scan results, shown below, we can see that port 21, 22, 80 and 25565 are open. These ports correspond to FTP, SSH, HTTP and a Minecraft server respectively.
We can check the FTP server for anonymous access by trying to login with the username “anonymous” and the password “anonymous”. However, this doesn’t work. Another potential attack vector is to use exploits related to ProFTPD version 1.3.5a. It is possible to find a couple of potentially relevant exploits for this particular version using searchsploit, as can be seen below. However, we will continue to enumerate the target on other ports before trying to execute any exploits. Prioritizing enumeration over running exploits is often a good idea since blindly executing exploits can render a target host unexploitable.

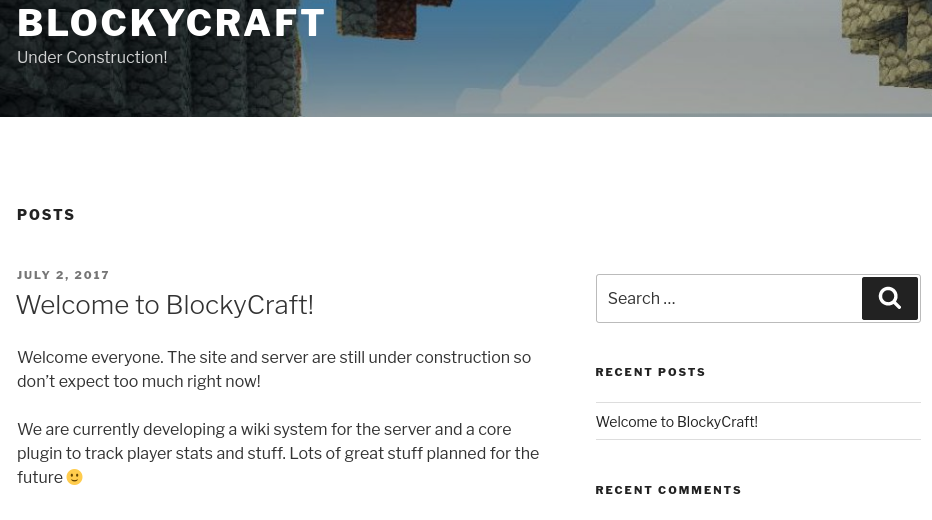
Next, we open a browser and navigate to http://10.10.10.37/. Upon navigating to this URL, we reach the index page below. This page only contains one post which mentiones that the site is still under construction, that a wiki system is being developed and that a plugin is used to track Minecraft players’ stats.
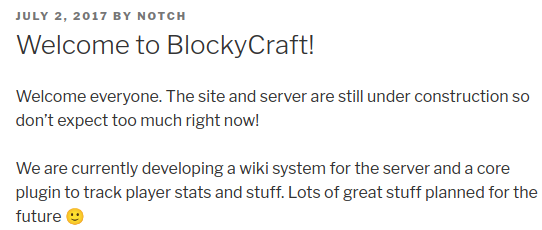
By clicking on the title of the post, we reach another page, displayed above. Here, we can see that a user named “Notch” submitted this post. We note this name down for later use. As there are no other posts from other users or any interesting pages which we can reach by clicking around, we proceed by performing a directory bruteforce as shown below. Since the selected wordlist contains comments (lines starting with the character #), we use the -ic flag to instruct ffuf to ignore wordlist comments.
1
2
3
4
5
6
7
8
9
10
kali@kali:/tmp/x$ @@ffuf -u http://10.10.10.37/FUZZ -w /usr/share/dirbuster/wordlists/directory-list-2.3-small.txt -ic@@
[...]
                    [Status: 200, Size: 52253, Words: 3306, Lines: 314]
wiki                [Status: 301, Size: 309, Words: 20, Lines: 10]
wp-content          [Status: 301, Size: 315, Words: 20, Lines: 10]
plugins             [Status: 301, Size: 312, Words: 20, Lines: 10]
wp-includes         [Status: 301, Size: 316, Words: 20, Lines: 10]
javascript          [Status: 301, Size: 315, Words: 20, Lines: 10]
wp-admin            [Status: 301, Size: 313, Words: 20, Lines: 10]
phpmyadmin          [Status: 301, Size: 315, Words: 20, Lines: 10]
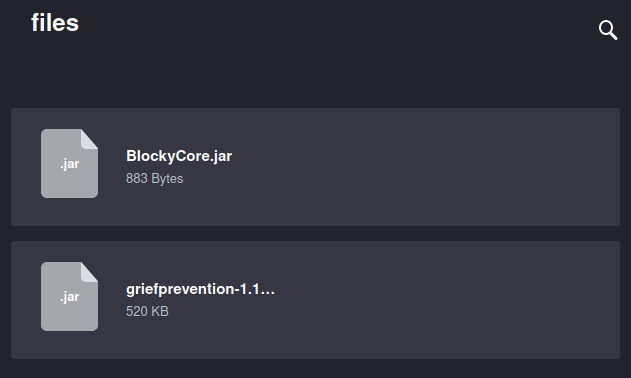
From the results, we know that this is a Wordpress site since we can see the entries wp-content, wp-includes and wp-admin. The phpmyadmin entry leads to a login page for accessing the phpmyadmin tool which is used to administrate MySQL and MaridaDB databases. The wiki and plugins entries are interesting since they aren’t standard Wordpress directories. Navigating to wiki does not result in anything interesting except for a page that says “Under Construction”. The plugins entry does, however, correspond to an interesting page which is shown below. This page contains two JAR files which we can download. We proceed by downloading both of these files.
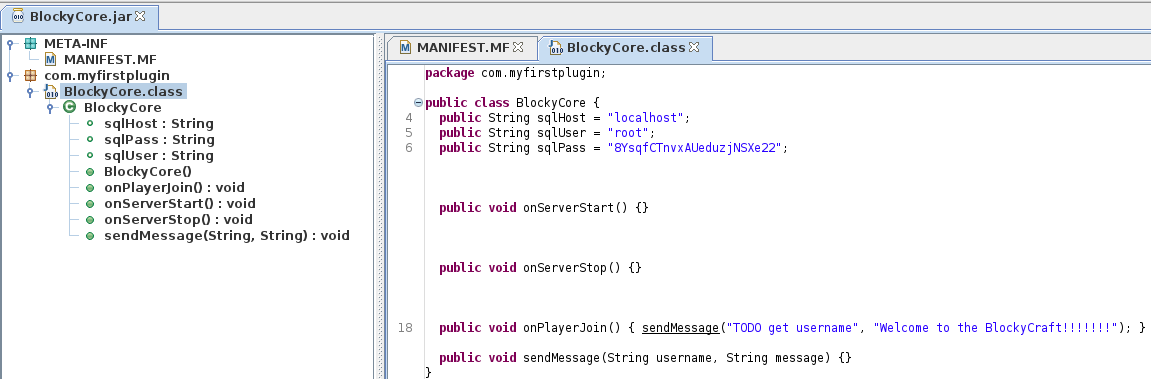
JAR files contain .class files which can be inspected using JD-GUI. More specifically, this tool can decompile the bytecode of the .class files and thus reconstruct the original Java source code. This tool can be installed in Kali Linux by executing sudo apt install jd-gui. Once installed, we can execute jd-gui to start JD-GUI. Once JD-GUI has started, we open the file named “BlockyCore.jar” by pressing File followed by Open File... and selecting the file. Once the file has been opened, we can see that it contains a package named “com.myfirstplugin” as can be seen below. This package contains one class file named “BlockyCore.class” which contains a class named “BlockyCore” which, in turn, contains database credentials. More specifically, it contains the username “root” and the password “8YsqfCTnvxAUeduzjNSXe22”, as can be seen at line 5 and 6 in the figure below.
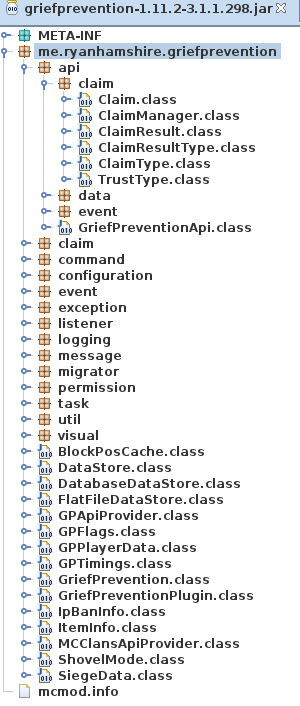
The other JAR file can be decompiled by opening it in JD-GUI as well. However, upon decompiling this file, it is possible to discover that it contains a large amount of code that might take a long time to review, as can be observed in the image above. As such, it might be a good idea to try other attack vectors before spending time reviewing this JAR file’s code.
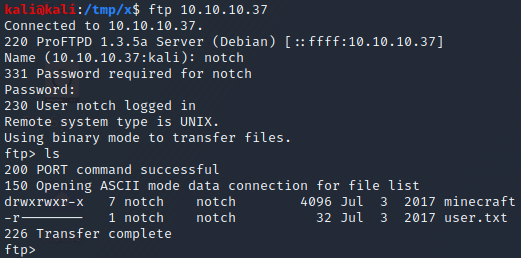
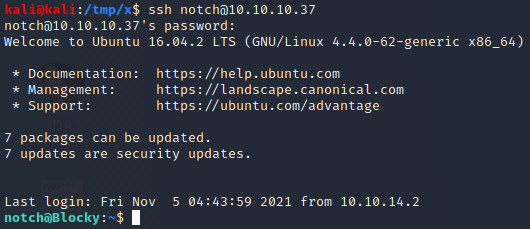
At this point, one thing we could try is to log in to FTP and SSH with the usernames and the password we have found. Upon doing so, we discover that it is indeed possible to login to both FTP and SSH with the username “notch” and the password “8YsqfCTnvxAUeduzjNSXe22”, as can be seen above. Note that this password was the password used in the Java code to access a database as the database user named “root”.
Privilege Escalation
The next step is to perfrom a privilege escalation from the notch user to the root user. One of the first things to check when performing a privilege escalation, is if the unprivileged user can execute any commands as the root user using the sudo command. Commands which the unprivileged user can execute as root can be found by executing sudo -l (note that l is a lower case L). Executing this command in our context results in the output below.

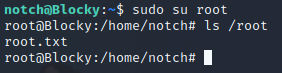
From the output, we can see that the notch user can run any command as root using the sudo command. As such, a root shell can be obtained by simply using the su command. More specifically, the root shell can be acquired by executing sudo su root as performed in the image above.